
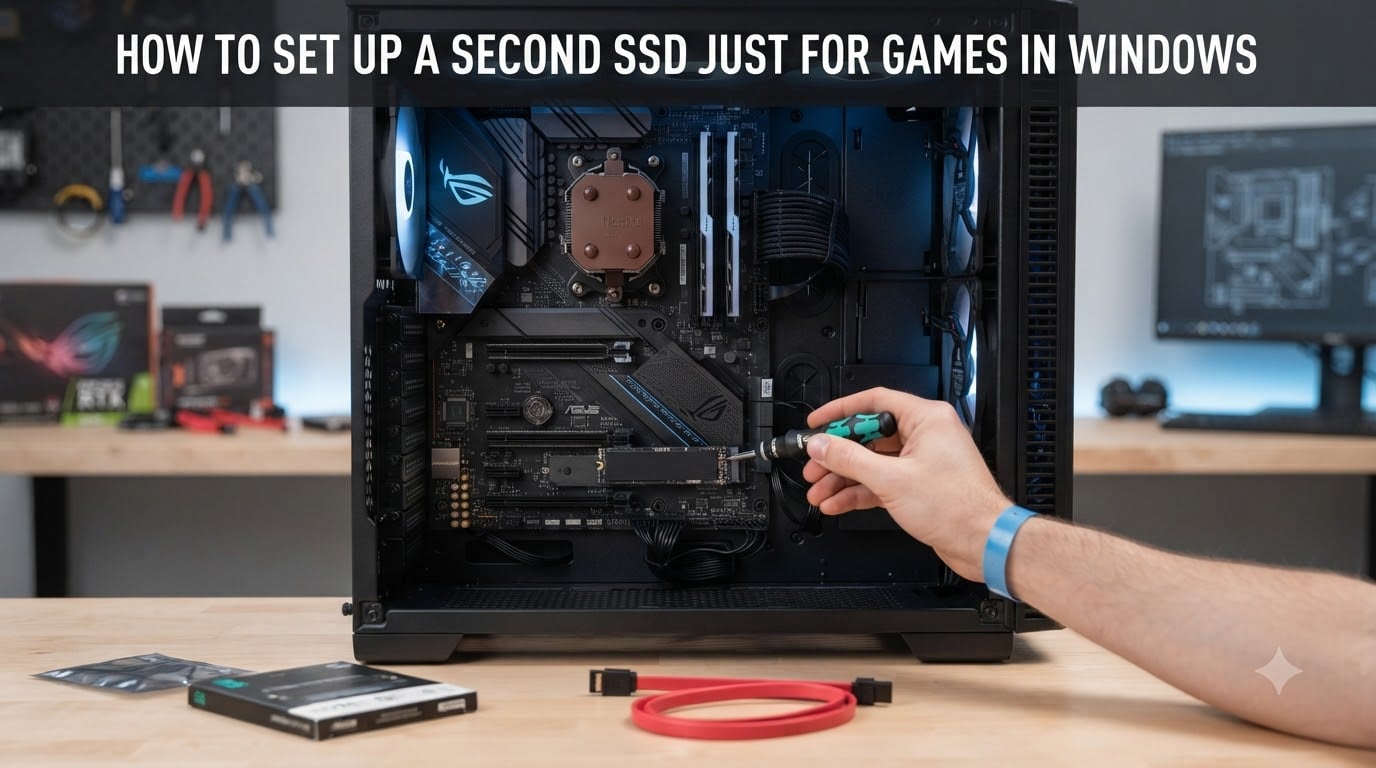
Setting up a second SSD just for games in Windows is one of the smartest upgrades any PC gamer can make. Modern titles like Call of Duty: Black Ops 6 regularly push past 140 GB, and once you add a few of them, your boot drive fills up fast. In this guide, I will walk you through every step of installing, configuring, and using a dedicated game SSD on Windows 10 or Windows 11.
Yes, you can absolutely add a second SSD to your gaming PC, and it is one of the most common upgrades our team recommends. By the end of this article you will know how to physically install an NVMe or SATA SSD, set it up in Disk Management, configure your favorite game launchers, and troubleshoot any hiccups along the way.
Table of Contents
Why Set Up a Second SSD Just for Games in Windows?
Separating your games from your operating system drive has three concrete benefits that our team has seen pay off hundreds of times. First, your boot drive stays lean and fast, so Windows keeps booting quickly even after you install dozens of games.
Second, putting games on a second SSD protects your data if Windows ever gets corrupted. On community forums like r/buildapc and r/pcmasterrace, gamers consistently report that keeping their Steam library on a separate drive made reinstalling Windows almost painless. Your saves, settings, and game files all stay intact.
Third, SSDs have a finite lifespan measured in write cycles. A boot drive is hammered every day by Windows updates, swap files, and background services. Offloading game writes to a separate drive spreads the wear and extends the longevity of your primary SSD.
Game sizes keep ballooning, and that matters here. Call of Duty clocks in at around 141 GB. Starfield needs about 139 GB. ARK: Survival Ascended exceeds 150 GB. Once you have three or four of these, your 500 GB or 1 TB boot drive is gone. A dedicated game SSD solves that entirely.
Most apps default to installing on your C: drive. If you do not configure a second drive, your system partition will fill up with no warning, and that is exactly the kind of situation this guide is designed to prevent.
Choosing the Right SSD for Game Storage
NVMe vs SATA vs M.2: Which SSD Type Do You Need?
M.2 is just a physical connector shape. SATA and NVMe are the protocols that run through it (or through a SATA cable for 2.5 inch drives). Here is how they compare for gaming.
SATA SSD (2.5 inch): Slower, around 550 MB/s. Cheap and reliable. Fine for game storage if you already have one. Uses a SATA data cable and a SATA power cable.
NVMe M.2 SSD: Much faster, anywhere from 3,500 MB/s (PCIe Gen 3) to 12,000 MB/s (PCIe Gen 5). Plugs directly into an M.2 slot on your motherboard. The standard choice for new builds in 2026.
SATA M.2 SSD: Looks like an NVMe stick but uses the SATA protocol. About 550 MB/s. Useful when you are out of SATA ports but have a free M.2 slot.
For pure game storage, the practical difference between a fast NVMe and a SATA SSD is smaller than you might think. Most games are still optimized for SATA-era loading speeds, and texture streaming rarely maxes out a SATA drive. That said, an NVMe drive in your M.2 slot is the cleanest install and frees up SATA ports.
What Size SSD Do You Need for Games?
I recommend at least 1 TB for a dedicated game drive if you play a handful of modern titles. If you maintain a larger library like I do, 2 TB gives you breathing room without constant uninstalling. Hardcore players with libraries of 20 plus titles should consider 4 TB.
Keep in mind that usable capacity is slightly less than advertised after formatting. A 2 TB drive will show roughly 1.81 TB in Windows. Build your game library plan around the formatted number, not the box.
How to Set Up a Second SSD Just for Games in Windows: Physical Installation
This section covers the physical part of how to set up a second SSD for games in Windows. Before you begin, shut down your PC completely, unplug the power cable, and press the power button once to discharge any residual energy. Ground yourself by touching a bare metal part of the case.
Installing an NVMe M.2 SSD
An NVMe M.2 SSD looks like a small gum stick and slots directly into the M.2 port on your motherboard. This is the cleanest install for most modern gaming PCs.
Locate an empty M.2 slot on your motherboard. Most boards have two or more. Consult your motherboard manual if needed. The primary slot is usually between the CPU and the top PCIe x16 slot.
Remove the screw at the end of the M.2 slot. Some boards ship the screw pre-installed; others tuck it in the accessories bag.
Gently insert the SSD at a slight angle (about 30 degrees) into the M.2 connector. The gold contacts should slide in fully. Do not force it.
Press the SSD down flat against the standoff. It will spring up slightly.
Reinstall the screw to secure the drive. Tighten firmly but do not overtighten.
If your SSD came with a heatsink, attach it now. NVMe drives can throttle under sustained writes without one. Your motherboard may also include a built-in M.2 heatsink that you can swap in.
Warning: NVMe drives run hot under load. Without a heatsink, sustained file transfers or heavy texture streaming can trigger thermal throttling and reduce performance. If your motherboard has a built-in M.2 shield, use it.
Installing a SATA SSD
A 2.5 inch SATA SSD is the right choice if your motherboard has no free M.2 slots or you are reusing parts from an older build. The install is slightly more involved because of the cabling.
Mount the SSD in a free 2.5 inch drive bay. Most mid and full tower cases have dedicated SSD mounts behind the motherboard tray or under the PSU shroud. Use the four screws that came with your case or the SSD.
Connect a SATA data cable from the SSD to a SATA port on your motherboard. Use the lowest numbered port first (SATA 1, SATA 2, etc.).
Connect a SATA power cable from your PSU to the SSD’s power connector. This L shaped plug only fits one way.
Tidy up the cables. Loose cables can hit fans or block airflow. Use Velcro straps or the routing cutouts in your case.
That is the entire physical installation. Close up your case, plug the power cable back in, and boot into Windows.
BIOS/UEFI Configuration for Your New SSD
Modern motherboards detect NVMe and SATA SSDs automatically, but it is still worth confirming. This part of how to set up a second SSD for games in Windows often gets skipped, and it is where most “SSD not showing up” issues begin.
Enter your BIOS or UEFI. Press
DelorF2as soon as you see the manufacturer logo. Some boards also acceptF10orF12.Verify the new SSD is detected. Look under a menu like Storage Configuration, Main, or Boot. Your new drive should appear with its model name and capacity.
Confirm the SATA mode is set to AHCI (not IDE, which is legacy). AHCI enables features like NCQ and TRIM that keep your SSD fast over time.
If you installed an NVMe drive, make sure the M.2 slot is set to PCIe rather than disabled. Some boards auto-detect, others need a manual switch.
Save and exit. Press
F10or select Save & Exit. Your PC will reboot.
If your drive does not appear in the BIOS, power off and reseat the drive. A loose M.2 stick is the most common cause.
How to Initialize and Format Your New SSD in Windows
Windows does not automatically mount a brand new SSD. You need to initialize it, create a partition, and format it before it shows up in File Explorer. Here is how to set up 2nd SSD on PC in Windows 10 and Windows 11.
Open Disk Management. Press
Win + Xand choose Disk Management from the menu. On Windows 11, this opens the redesigned version with cleaner visuals.Find your new drive. It will appear as a black bar labeled “Unallocated” or “Not Initialized.”
Initialize the disk. Right click the drive label and choose Initialize Disk. Select GPT for any drive on a modern system. MBR is only for legacy compatibility with older 32 bit Windows installs.
Right click the unallocated space and choose New Simple Volume.
Use the full capacity unless you specifically want multiple partitions.
Assign a drive letter. Most people pick a high letter like E:, F:, G:, or H: to avoid conflicts. Pick something memorable, like G: for “Games.”
Format as NTFS. Use the default allocation unit size. NTFS is the right choice for Windows. exFAT only matters for cross platform drives you also use on macOS or consoles.
Add a volume label like “Games” so you can identify the drive at a glance.
Click Finish. Your new SSD will now appear in File Explorer under This PC.
Windows 10 vs Windows 11 Differences
The flow is nearly identical, but Windows 11 ships with a refreshed Disk Management UI. The menus are in the same places, but the icons and confirmation dialogs look cleaner. If you do not see Disk Management in the Win + X menu on older Windows 10 builds, search for “Disk Management” from the Start menu instead.
Choosing the Right Drive Letter
Drive letters are just labels, but picking a consistent one helps. Many gamers use G: or M: for games so Steam, Epic, and other launchers all point to the same target. Avoid letters reserved by external devices you plug in often, like memory card readers, because Windows may swap assignments and confuse your launchers.
How to Install and Move Games to Your Second SSD
Now that the drive is online, the next step in how to set up a second SSD for games in Windows is making your game launchers use it. Below are the exact steps for every major launcher our team uses.
Setting Up Steam Library on Your Second SSD
Steam supports multiple library folders, which means you can install games on any drive without breaking anything.
Open Steam and click Steam > Settings.
Select Storage from the left sidebar.
Click the + button or “Add Drive” and pick your new game SSD. Steam will create its own folder structure automatically.
For new installs, choose your new drive from the dropdown during installation.
To move an existing game, right click it in your library, choose Properties > Installed Files > Move Install Folder, then pick the new drive.
Steam moves files in place, so you do not have to re-download 100 GB titles. This is one of the biggest perks of using a second SSD.
Configuring Epic Games, EA App, and Other Launchers
Each launcher has its own quirks. Here is the quick version for the most popular ones.
Epic Games Launcher: Click your profile icon > Settings. Under Install Location, set the default to your new game SSD. Existing installs can be moved by clicking the three dots next to a game and choosing Move.
EA App: Go to Settings > Download. Change the Install location field to a folder on your new drive, for example
D:EA Games. You may need to manually copy old installs.Xbox App (Microsoft Store / Game Pass): Open Settings > General > Default install location. Choose your new SSD. Game Pass titles respect this setting.
GOG Galaxy: Go to Settings > Installation. Pick your new drive. GOG also supports moving installed games via the game’s menu.
Battle.net: Go to Settings > Game Install Locations. Add your new drive and pick it for each title.
Ubisoft Connect: Click the three lines > Settings > Game locations. Add a new location pointing at your new drive.
Tip: For the cleanest setup, create a top level folder on your game SSD like D:SteamLibrary, D:EpicGames, and so on. Each launcher manages its own subdirectory inside.
Optimizing Your Gaming SSD for Best Performance
Once the drive is set up, a few quick tweaks keep it running at peak speed. Most of these are default on Windows 10 and 11, but it is worth double checking.
Confirm TRIM is enabled. Open Command Prompt as Administrator and run
fsutil behavior query DisableDeleteNotify. If the result is 0, TRIM is on and your SSD is being maintained.Keep your SSD firmware updated. Manufacturers like Samsung, WD, and Crucial release firmware that fixes bugs and improves stability. Check their software (Samsung Magician, Crucial Storage Executive, etc.) every few months.
Do not defragment an SSD. Defrag is a mechanical drive trick. On SSDs it just wastes write cycles. Windows knows this and runs TRIM instead, but if you use a third party tool, disable defrag for your SSD.
Leave 10 to 20 percent of the drive free. SSDs slow down when they get near full because of how NAND blocks are written. Keeping headroom extends performance.
Enable the high performance power plan in Windows. Balanced or Power Saver can throttle NVMe drives on some laptops.
Troubleshooting Common SSD Setup Issues
Even with a careful install, things can go sideways. These are the issues our team has run into most often, and the fix for each.
New SSD not showing in Disk Management: Reseat the drive, double check the SATA data cable or M.2 screw, and confirm the drive appears in BIOS.
Drive shows wrong capacity: Old motherboards sometimes cap boot drives at 2 TB. Your game drive should not have this issue unless the BIOS itself is outdated.
Slow transfer speeds: Make sure you are using a SATA III cable (not SATA II), confirm the drive is in a PCIe Gen 3 or 4 slot rather than a Gen 2 slot, and check that your PSU is supplying steady power.
M.2 slot conflicts: On some boards, using the second M.2 slot disables two SATA ports. Check your motherboard manual for the layout if a previously working drive disappears after installing the M.2.
Steam cannot find games on new drive: Use Steam > Settings > Storage > Add Drive to register the folder. Steam does not auto detect library folders.
Windows asks to format the drive every reboot: The drive may have a loose SATA cable, failing power connector, or be marked as a “removable” drive in BIOS. Toggle the setting in BIOS if available.
If problems persist, run your SSD manufacturer’s diagnostic tool. Most have built in S.M.A.R.T. checks that flag failing drives within warranty.
Frequently Asked Questions
Can I just add a second SSD to my gaming PC?
Yes, you can add a second SSD to almost any gaming PC as long as you have a free SATA port, a free M.2 slot, or a spare 2.5 inch drive bay. Most modern motherboards include multiple storage connectors specifically for this kind of upgrade.
Should I have separate SSDs for Windows and games?
Having separate SSDs for Windows and games is recommended. It keeps your boot drive fast, makes Windows reinstalls painless, protects game data from OS crashes, and spreads out write wear across two drives.
How do I set up a 2nd SSD on my PC?
Physically install the SSD in an empty M.2 slot or 2.5 inch bay, boot into BIOS to confirm detection, then open Disk Management via Win+X to initialize the disk as GPT, create a partition, and format it as NTFS with a drive letter.
Is it okay to put 2 SSDs in a PC?
Yes, putting 2 SSDs in a PC is completely normal and supported. Most modern motherboards have at least two M.2 slots plus four to six SATA ports, so dual or even triple SSD setups are very common.
Do games run better on an SSD vs HDD?
Games load significantly faster on an SSD compared to an HDD. Texture pop in is reduced, open world streaming is smoother, and level transitions are nearly instant. Frame rates themselves are usually similar, but the overall experience is much better.
How do I move existing Steam games to my second SSD?
In Steam, right click the game in your library, choose Properties, then Installed Files, then Move Install Folder. Pick your new SSD and Steam will relocate the files in place without redownloading.
Do I need to format my new SSD before using it?
Yes, a brand new SSD must be initialized in Disk Management and formatted with NTFS before Windows will let you store files on it. This only takes a minute and happens once per drive.
Conclusion
Learning how to set up a second SSD just for games in Windows is a weekend project that pays off for years. The physical install takes about ten minutes, the Disk Management setup takes another five, and the game launcher configuration rounds it out in under half an hour. Total investment, around an hour.
Once it is done, your boot drive stays clean, your Windows reinstalls become drama free, and you never have to choose between keeping Call of Duty or installing the next big release. That is the kind of quality of life upgrade our team recommends to every PC gamer.
Pick up an NVMe M.2 drive if your motherboard has a free slot, or grab a 2.5 inch SATA SSD if you are working with an older build. Either way, you will wonder how you ever gamed without one.