
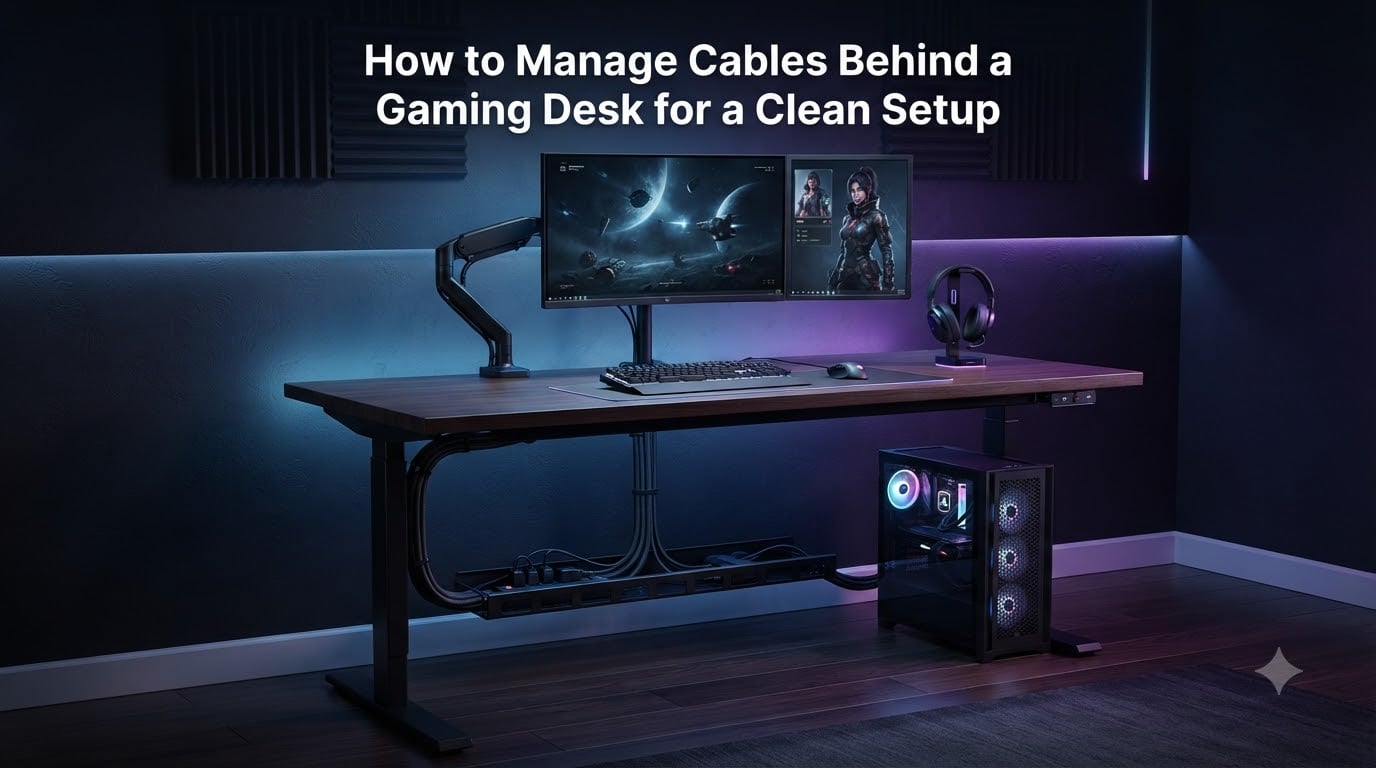
You built the perfect gaming rig, picked the right monitor, and dialed in your chair height. Then you look behind your desk and see a spaghetti junction of power cables, display cords, and USB wires tangled together. That mess is not just ugly. It collects dust, blocks airflow, and makes every upgrade or troubleshooting session a nightmare.
Learning how to manage cables behind a gaming desk for a clean setup is the difference between a battlestation you are proud to show off and one you keep pushed against the wall. Our team has tested and refined these techniques across dozens of desk configurations, from budget apartment setups to dual-monitor streaming stations.
In this guide, you will learn a complete step-by-step process for cable management on a gaming desk, the tools that actually work, gaming-specific routing tips, and how to keep everything tidy months from now. No fluff, just actionable methods you can apply today.
Table of Contents
Why Cable Management Matters for Your Gaming Desk?
A clean gaming desk setup is about more than looks. When cables are organized, your entire workspace functions better. You find the right cord faster, your devices run cooler, and your desk feels like a dedicated gaming environment instead of a temporary workstation.
Here is what proper cable management behind your desk actually delivers:
Better aesthetics. A tangle-free desk photographs well and looks professional. If you stream, your viewers notice the difference immediately. Clean cable routing makes even a modest setup look premium.
Reduced tripping hazards. Loose cables dangling from your desk to the floor are an accident waiting to happen. One wrong kick and you can yank a monitor off the desk or rip a port out of your PC. Routing and securing cables eliminates that risk entirely.
Improved airflow and device longevity. When power cables and adapter bricks are bunched together with no airflow, they heat up. Heat degrades electronics faster. Spacing cables out and keeping power bricks in ventilated cable trays helps your gear last longer.
Easier troubleshooting and upgrades. When a monitor goes dark or a peripheral disconnects, labeled and organized cables let you trace the problem in seconds. No more unplugging things at random hoping to find the right cord.
Plan Your Cable Layout Before You Start
The biggest mistake people make is grabbing zip ties and starting to bundle before they have a plan. Spend ten minutes mapping your layout and you will save an hour of rework later.
Take a full inventory. List every cable behind your desk: power cords for your PC, monitor, speakers, and chargers. Then add data cables like HDMI, DisplayPort, USB, and ethernet. Knowing exactly what you are dealing with prevents surprises mid-project.
Separate power from data. This is a step most guides skip but electricians insist on. Running high-voltage power cables right next to data cables can cause interference, particularly with unshielded audio and display connections. Plan to route power cables down one desk leg and data cables down the other.
Identify your problem zones. Look for where cables cross each other, where they droop, and where they are visible from your seating position. These are the areas that need the most attention with clips, trays, and sleeves.
Measure your cable runs. Know the distance from your devices to your power strip and from your desk to your wall outlets. Cables that are too short force awkward routing, and cables that are too long create excess that needs coiling and hiding.
Essential Cable Management Tools and Supplies
You do not need to buy a massive kit to get started, but having the right tools makes the job dramatically easier. Here is what our team recommends for a gaming desk cable management project.
Velcro cable straps. These are reusable, adjustable, and will not damage cable insulation the way overtightened zip ties can. Buy a roll of self-gripping velcro tape and cut strips to any length you need.
Adhesive cable clips. Small plastic clips with sticky backs attach to the underside of your desk or along the back panel. They hold individual cables in place and keep them from drooping. Get a pack of 20 to 30 for a typical gaming desk.
Cable sleeves. A neoprene or mesh sleeve bundles multiple cables into a single clean tube. This is what gives that “one cable” look behind a desk. Sleeves come in black, white, and braided designs to match your setup.
Under-desk cable tray. A metal or plastic mesh tray that screws to the underside of your desk. It holds your power strip, adapters, and excess cable length off the floor and out of sight. Forum users on r/desksetup consistently call this the single best upgrade you can make.
Cable raceway. A plastic or metal channel that mounts to the wall or desk surface to hide cables running horizontally. Raceways are great for the visible back edge of your desk where individual cables would be seen.
Binder clips. Yes, the cheap office supply kind. Attach large binder clips to the back edge of your desk and thread cables through the metal arms. This prevents cables from sliding off the desk when you unplug a device. It is a popular forum hack that costs almost nothing.
Cable labels. Small adhesive labels or colored wraps that identify each cable. Label both ends of every cord so you know what goes where without tracing it. This is a content gap we noticed across competitor guides, and it saves enormous time during upgrades.
Surge protector with enough outlets. A quality surge protector mounted under your desk or on a desk leg centralizes power. Look for one with spaced outlets to accommodate bulky adapter bricks.
How to Manage Cables Behind a Gaming Desk: Step by Step
Now for the actual process. Follow these seven steps in order for a clean, professional result that will hold up over time.
Step 1: Power down and disconnect everything. Shut off your PC, unplug all peripherals, and remove every cable from behind your desk. This gives you a blank slate and lets you clean accumulated dust. Trying to organize cables while they are still connected leads to a messy, compromised result.
Step 2: Sort and label each cable. Group your cables into power and data categories. Label both ends of every cable using masking tape and a marker or proper cable labels. You should be able to identify any cable at a glance without tracing it.
Step 3: Position your surge protector. Mount your power strip to the underside of your desk using screws, adhesive strips, or a dedicated bracket. It should be close enough to reach all your devices but tucked away from view. This becomes the central hub for all your power needs.
Step 4: Route cables along desk legs. Run power cables down one desk leg and data cables down the other to minimize interference. Use adhesive clips every 8 to 12 inches to keep cables flush against the leg. This creates two clean vertical lines instead of a curtain of dangling wires.
Step 5: Secure cables with clips and straps. Along the underside of the desk surface, use adhesive clips to route cables to their destinations. Bundle parallel runs of cable together with velcro straps every 6 to 8 inches. Keep bundles snug but not crushed.
Step 6: Enclose bundles in a cable sleeve. For the main visible cable run from your desk to the floor, slip a cable sleeve over the grouped wires. This transforms five or six cables into one clean black tube. Trim the sleeve to length so it sits flush.
Step 7: Do a final visual check. Sit in your gaming chair and look at the desk from every angle. Check for drooping cables, visible wire colors, and any cable crossing another unnecessarily. Adjust clips and re-bundle as needed until the setup looks clean from every position.
How to Hide Cables Behind and Under Your Desk
Hiding cables is different from organizing them. You want cables to not only be tidy but invisible from your normal viewing positions. Here are the most effective hiding techniques for a gaming desk.
Use an under-desk cable tray. Mount a mesh tray to the underside of your desk surface, positioned toward the back. All excess cable length, power bricks, and the surge protector go in the tray. From the front and sides, nothing is visible. This is the technique that delivers the most dramatic before-and-after difference.
Install a cable raceway on the wall. If your desk sits against a wall, a raceway mounted at desk height hides the vertical cable run from your desk to your floor outlet. Paint the raceway to match your wall color and it nearly disappears.
Match sleeve color to your desk. A black cable sleeve on a white desk stands out. Choose a sleeve color that matches or complements your desk surface and wall. Black sleeves work on dark desks, while white or gray sleeves blend into lighter setups.
Use desk grommet holes. If your desk has grommet holes (those circular cutouts in the desktop surface), route cables through them. This keeps monitor and peripheral cables from running over the back edge where they are visible. If your desk lacks grommets, you can drill your own with a hole saw.
Route cables through a monitor arm. A monitor arm with built-in cable channels lets you run power and display cables inside the arm itself. The cables go from your monitor straight through the arm and down to the desk, completely hidden inside the metal structure. This is one of the cleanest solutions for dual monitor setups.
Gaming Setup Specific Cable Considerations
Gaming desks have unique cable challenges that a standard home office does not face. Here is how to handle the specific gear in a gaming setup.
Dual monitor cable routing. Two monitors mean two power cables and two display cables running to roughly the same area. Use a monitor arm for both screens and route all four cables through a single arm mount. Bundle them in a sleeve running down the arm to the desk surface.
RGB cable management. RGB fans, LED strips, and RGB controllers add a tangle of thin cables behind your desk. Use a dedicated RGB controller hub to centralize these connections, then route the hub’s single output cable with your main bundle. Short RGB extension cables prevent long runs across your setup.
Headset and controller cables. Accessories you plug and unplug frequently need a different approach. Use the binder clip trick on your desk edge so cables stay in place when disconnected. A desk-mounted headset hook keeps the headset cable off the surface entirely.
Ethernet versus Wi-Fi decision. A wired ethernet connection gives lower latency for competitive gaming but adds another cable. If you use ethernet, route it along the same desk leg as your other data cables and through the same sleeve. If your router is close enough, a flat ethernet cable is easier to hide than a round one.
Cable Management for Standing Desks
Standing desks add a challenge most guides underaddress: your desk moves up and down, and your cables need to move with it without pulling, tangling, or getting pinched.
Leave extra slack for height changes. Measure the full height range of your standing desk and add at least that much extra cable length to every run. Cables that fit perfectly at sitting height will pull taut and potentially disconnect when you stand.
Use a cable chain or spiral wrap. A cable chain is a flexible track that holds your cables in a managed bundle while allowing movement. It mounts to the underside of the desk and the desk leg, expanding and contracting as the desk moves. Spiral wrap serves a similar purpose for lighter setups.
Mount the power strip to the desk, not the wall. If your surge protector is fixed to the wall, your cables will pull every time the desk moves. Mount it to the underside of the desk itself so it travels with your setup. Only a single power cable runs from the desk to the wall outlet.
Common Cable Management Mistakes to Avoid
Even with the right tools, certain mistakes undermine your cable management project. Here are the pitfalls our team sees most often.
Over-tightening zip ties. Pulling a zip tie as tight as possible can crush cable insulation and damage the wires inside. If you use zip ties, leave them snug enough to hold but loose enough that the cable slides slightly. Better yet, use velcro straps instead.
Mixing power and data cables. Running your monitor’s power cable right next to its DisplayPort cable can introduce signal interference, causing flickering or static. Keep power runs and data runs separated by at least a few inches whenever possible.
Skipping the labeling step. It feels tedious in the moment, but unlabeled cables will cost you time every single time you need to change or troubleshoot something. Label both ends of every cable before you route it.
Ignoring future changes. If you cinch every bundle permanently, adding a new device later means cutting ties and redoing sections. Build your bundles with velcro straps and leave a little room in your cable tray for one or two future additions.
Overloading power strips. Daisy-chaining power strips or plugging high-draw devices like space heaters into the same strip as your gaming PC creates a fire hazard. Use a surge protector rated for your total wattage and never chain multiple strips together. This is a safety issue that too many guides ignore.
Keeping Your Cable Setup Clean Long-Term
Cable management is not a one-time project. Over months of use, cables shift, dust accumulates, and new devices get added. A quick maintenance routine keeps everything looking sharp.
Do a monthly visual check. Once a month, take 60 seconds to look behind your desk. Check for cables that have slipped out of clips, bundles that have loosened, and any new cables that were added without routing. Fix small issues before they become big messes.
Clear dust from cable trays. Under-desk trays collect dust over time, especially around power bricks that generate static. Use compressed air or a vacuum with a brush attachment every few months to keep dust from building up around heat-generating components.
Use velcro for everything you might change. Reserve zip ties for permanent runs you will never touch. Use velcro straps for anything you might need to adjust, add to, or remove. This makes maintenance and upgrades painless instead of a full teardown.
Label new cables immediately. When you add a new device, label its cables before routing them behind the desk. Unlabeled new additions are how clean setups slowly degrade back into chaos.
FAQs
How to hide cables behind a gaming desk?
Mount an under-desk cable tray to hold your power strip and excess cable length, route cables down desk legs with adhesive clips, and enclose the main bundle in a cable sleeve. For wall-facing areas, install a cable raceway painted to match your wall color. Monitor arms with built-in cable channels hide display and power cables completely.
How to clean up cords behind a desk?
Start by powering down and disconnecting every cable. Sort them into power and data groups, label both ends of each cable, then route power cables down one desk leg and data cables down the other. Secure everything with adhesive clips and velcro straps, bundle visible runs in a cable sleeve, and place the power strip in an under-desk tray.
How to organize cables behind a PC?
Label every cable at both ends before routing anything. Separate power cables from data cables to prevent signal interference. Route cables along desk legs using adhesive clips every 8 to 12 inches, bundle parallel runs with velcro straps, and use a cable sleeve for any visible section. Keep the surge protector mounted under the desk rather than on the floor.
How can I organize cables under my desk?
Install an under-desk cable tray to hold your surge protector and excess cable length. Use adhesive cable clips along the underside of the desk surface to route individual cables to their destinations. Bundle parallel cable runs with velcro straps and enclose the main visible run in a cable sleeve. Add binder clips to the desk edge to prevent cables from slipping off when unplugged.
Conclusion
Managing cables behind a gaming desk comes down to planning, the right tools, and a repeatable process. Take inventory, separate power from data, route along desk legs, bundle with velcro and sleeves, and hide everything in an under-desk tray. Label every cable so future you does not have to guess.
The techniques in this guide work whether you have a basic single-monitor setup or a full streaming station with dual screens and RGB everything. Start with the under-desk tray and cable labels, since those two additions deliver the biggest visible improvement for the least effort. Your battlestation will look better, run cooler, and be far easier to maintain and upgrade.