
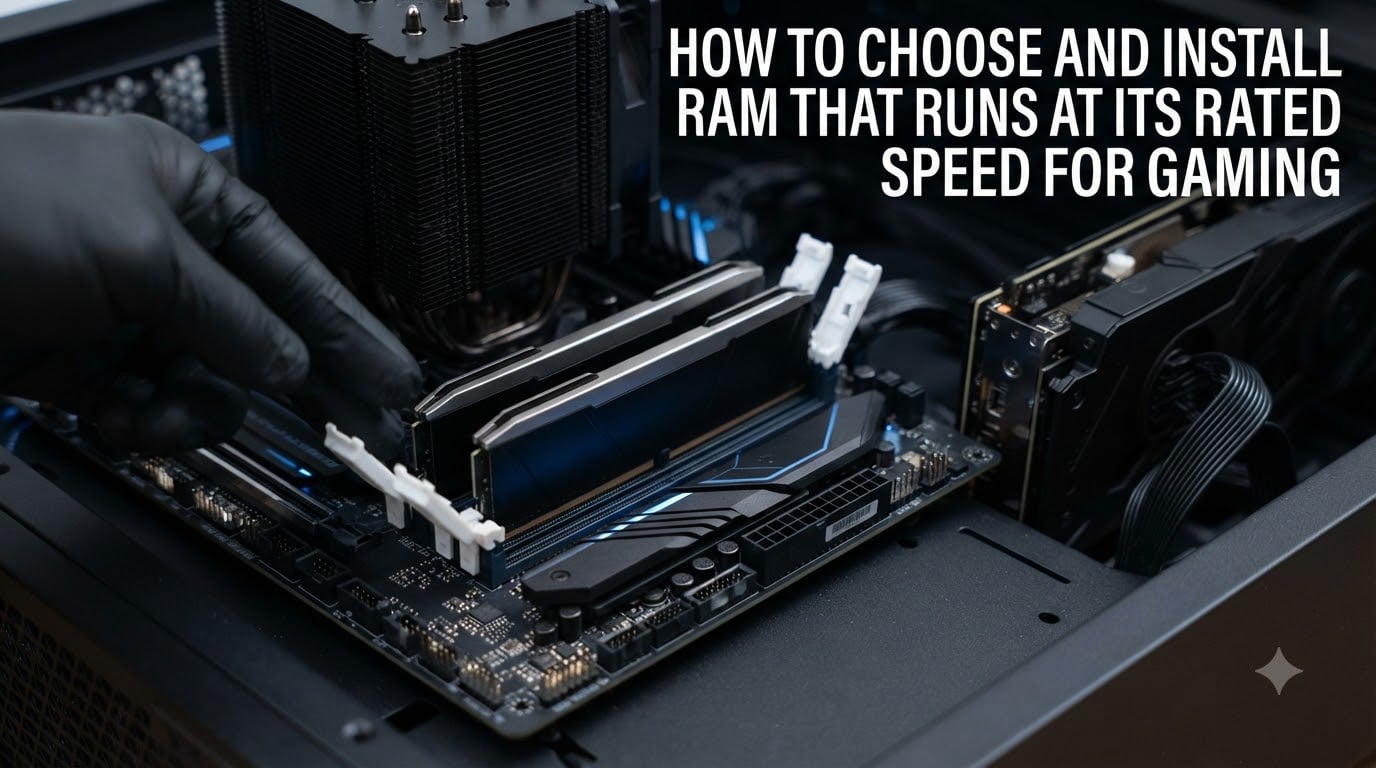
You just spent good money on a 6000 MT/s DDR5 kit, fired up your favorite game, and your frame rates look identical to your old 3200 MHz setup. Here is why: your RAM is almost certainly running at its base speed, not the speed you paid for. Out of the box, memory defaults to a conservative standard frequency until you manually enable the rated speed in BIOS.
Our team has built, tested, and troubleshot dozens of gaming PCs, and the single most common mistake we see is builders who never enable their RAM’s rated speed profile. It is like buying a sports car and never taking it out of first gear. This guide walks you through how to choose and install RAM gaming builders can trust, and more importantly, how to make sure it actually runs at the speed on the box.
We will cover everything from DDR4 vs DDR5 decisions to the exact BIOS steps for enabling XMP, DOCP, and EXPO profiles. You will learn how to read memory timings, understand dual-channel configuration, and troubleshoot when your system refuses to POST after a RAM upgrade. By the end, you will know exactly how to get every megahertz of performance you paid for.
Whether you are building your first gaming rig or upgrading an older system, this information applies directly to your build. Let us break it down step by step so you can stop leaving free performance on the table.
Table of Contents
What Is RAM and How Does It Work for Gaming?
RAM (Random Access Memory) is your system’s short-term workspace. When you launch a game, the CPU pulls data from your SSD or hard drive and loads it into RAM because reading from RAM is dramatically faster than reading from storage. The more efficiently data moves in and out of RAM, the smoother your gameplay feels.
Think of it like a workbench. Storage is the warehouse where everything is stored, and RAM is the bench where the CPU does its actual work. A bigger bench means more tools (game data) can be within arm’s reach at once. A faster bench means the CPU can grab and put back tools more quickly.
For gaming specifically, RAM affects three things: frame rates, frame consistency (less stuttering), and load times. The impact varies by game and CPU. Tests from Gamers Nexus and Tom’s Hardware consistently show that going from slow RAM to fast RAM can improve average frame rates by 5-15% in CPU-bound titles like Cyberpunk 2077, CS2, and Microsoft Flight Simulator. The gains are largest when you pair faster RAM with a powerful GPU that would otherwise be waiting on the CPU.
RAM speed matters most when your CPU is the bottleneck, which happens at 1080p with high-end GPUs, or at any resolution in simulation-heavy games. At 4K with a mid-range GPU, your video card is usually the limit, and RAM speed barely moves the needle.
DDR4 vs DDR5: Which One Do You Need?
The choice between DDR4 and DDR5 is not really a choice at all for new builders in 2026. It comes down to what your CPU and motherboard support. You cannot mix them, and the slots are physically different so you cannot accidentally install the wrong type.
DDR4: The Mature Standard
DDR4 launched in 2014 and became the gaming standard for years. Speeds range from 2133 MT/s up to about 4000 MT/s for overclocked kits, with 3200 MT/s and 3600 MT/s being the sweet spots for gaming. DDR4 is still fully viable for AM4 platforms (Ryzen 3000/5000 series) and Intel LGA 1200 and some LGA 1700 boards.
If you are on an AM4 platform, 3600 MT/s with CL16-18 timings is widely considered the optimal speed. This is because of how AMD’s Infinity Fabric interconnect synchronizes with RAM speed, which we cover in detail later.
DDR5: The Current Generation
DDR5 arrived with Intel 12th Gen and AMD AM5 platforms. Base speeds start at 4800 MT/s, and gaming kits now commonly run 6000 MT/s to 7200 MT/s. DDR5 also introduced on-die ECC (error correction) and doubled the burst length compared to DDR4, meaning it can handle larger data chunks per operation.
For AMD AM5 builds (Ryzen 7000/9000 series), 6000 MT/s with CL30 is the community-verified sweet spot. The Infinity Fabric on AM5 desynchronizes above 6400 MT/s, so faster kits can actually perform slightly worse or require manual tuning to maintain stability.
For Intel LGA 1700 and LGA 1851 builds, DDR5 kits in the 6000-7200 MT/s range scale well, with 6400-6800 MT/s being a practical target for most users. Intel’s memory controller handles high speeds more gracefully than AMD’s current generation.
If you are building from scratch in 2026, go DDR5 unless budget constraints force you to AM4. If you already own a DDR4 platform, there is no reason to upgrade just for DDR5. The real-world gaming difference between well-tuned DDR4 3600 and DDR5 6000 is measurable but not night-and-day for most titles.
Understanding RAM Speed: MHz, MT/s, and Why It Matters for Gaming
RAM speed is measured in megatransfers per second (MT/s), though many manufacturers and retailers still use MHz interchangeably. The difference: MHz measures clock cycles, while MT/s measures data transfers. DDR (Double Data Rate) memory performs two transfers per clock cycle, so a 3000 MHz clock rate produces 6000 MT/s. Modern marketing increasingly uses MT/s because it reflects actual data throughput.
What matters for gaming is bandwidth, which is how much data the RAM can feed the CPU per second. Higher MT/s means more bandwidth. A 6000 MT/s kit has roughly 50% more theoretical bandwidth than a 4000 MT/s kit of the same capacity.
But raw speed is only half the equation. The other half is latency, which is how quickly the RAM responds to a request. We cover that next, because speed without low latency does not tell the full story.
Here is where most guides stop being helpful. They tell you to buy fast RAM but never explain the critical distinction between advertised speed and actual speed. A 6000 MT/s kit runs at 4800 MT/s out of the box on DDR5, or 2133 MT/s on DDR4. That is the JEDEC standard speed, a conservative default designed for maximum compatibility. You have to manually enable the rated speed through an XMP, DOCP, or EXPO profile in BIOS.
This single step is the difference between getting what you paid for and leaving 20-40% of your memory performance unused. We see this confusion constantly on r/buildapc and Tom’s Hardware forums. Users buy a fast kit, plug it in, and never realize it is running at base speed.
Understanding CAS Latency and Memory Timings
CAS Latency (CL) measures how many clock cycles it takes for RAM to respond to a data request from the CPU. A CL16 kit takes 16 clock cycles to deliver data after being asked. Lower is better, but you have to consider it alongside speed to understand real-world latency.
The formula for actual latency in nanoseconds is: (CL / (MT/s / 2)) x 1000. For example, a 3600 MT/s CL16 kit has a true latency of about 8.9 nanoseconds. A 6000 MT/s CL30 kit also has a true latency of about 10 nanoseconds. This is why DDR5 with higher CL numbers can still be faster overall, the higher MT/s more than compensates.
Memory timings appear as a series of four numbers like 16-18-18-38 or 30-38-38-96. These represent CAS Latency (tCL), RAS-to-CAS Delay (tRCD), RAS Precharge (tRP), and Active-to-Precharge Delay (tRAS). For gaming, the first number (CL) matters most. The others affect stability and fine-grained performance but are less impactful for typical gaming workloads.
When comparing kits, look at the ratio of CL to MT/s. A 6000 MT/s CL30 kit is better than a 6400 MT/s CL36 kit because the first word latency is lower. As a rule of thumb, divide MT/s by CL and look for a higher number. 6000/30 = 200, while 6400/36 = 178. The lower result means worse effective latency.
How Much RAM Do You Really Need for Gaming? (16GB vs 32GB)
16GB is the minimum for modern gaming in 2026. Most current AAA titles recommend 16GB, and some like Star Citizen and Microsoft Flight Simulator already push past that with background applications running. If you only game and do nothing else simultaneously, 16GB of fast RAM is enough for smooth performance.
32GB is our recommended target for most gamers. It gives you headroom for Chrome tabs, Discord, OBS streaming, background downloads, and the increasingly memory-hungry games coming out. We have seen modern titles consume 12-14GB on their own, leaving almost nothing for the operating system on a 16GB system.
8GB is no longer viable for gaming in 2026. Games will load, but you will experience stuttering and frame drops as the system constantly pages data between RAM and your storage drive. Do not build or upgrade with 8GB unless the system is for light office work only.
64GB makes sense if you stream while gaming, do content creation (video editing, 3D rendering), or run multiple virtual machines. For pure gaming, 64GB provides no measurable benefit over 32GB with current titles. Save the money and put it toward a faster kit or a better GPU.
Beyond capacity, always buy RAM in matched pairs (2x8GB, 2x16GB, 2x32GB) to take advantage of dual-channel mode. A single stick of 16GB runs in single-channel mode and cuts your memory bandwidth in half compared to 2x8GB. We have measured 15-20% gaming performance losses from running single-channel in CPU-bound scenarios.
How to Choose and Install RAM for Gaming: Compatibility Checklist
Before buying RAM, you need to verify three compatibility factors. Get any of these wrong and you will be returning the kit or dealing with instability.
Check Your Motherboard Compatibility
First, confirm your DDR generation. DDR4 and DDR5 are physically different and use different slots. Your motherboard supports one or the other, never both. Check the motherboard spec sheet or look at the notch position on the RAM slot.
Second, check the QVL (Qualified Vendor List) on your motherboard manufacturer’s website. This is a list of RAM kits the manufacturer has tested and verified to work. A kit not on the QVL will usually still work, but QVL-listed kits have been validated for stability at their rated speeds.
Third, check maximum supported speed. Your CPU and motherboard impose limits on how fast RAM can run. An entry-level B650 motherboard might only support DDR5-5200 natively, even if you install a 6400 MT/s kit. The kit will work but may not reach its full speed without manual tuning.
Dual-Channel Configuration Explained
Dual-channel mode doubles your memory bandwidth by letting the CPU access two RAM sticks simultaneously instead of one at a time. This is not optional for gaming. It is the difference between a two-lane road and a four-lane highway for data.
To enable dual-channel, install two identical sticks in the correct slots. On most motherboards with four slots labeled A1, A2, B1, B2, you install sticks in slots A2 and B2 (the second and fourth slots from the CPU). The motherboard manual will show the exact configuration. Get this wrong and you will run in single-channel mode, losing significant performance.
If you install four sticks (2x8GB plus 2x8GB), they still run in dual-channel mode, not quad-channel. The benefit of four sticks is capacity, not bandwidth. However, four sticks put more strain on the memory controller and may limit your maximum stable speed compared to two sticks.
Single-Rank vs Dual-Rank DIMMs
Single-rank and dual-rank refer to how memory chips are organized on the DIMM. A dual-rank stick has two independent 64-bit channels the memory controller can access, while a single-rank stick has one. Dual-rank can provide a small performance boost (3-5% in some games) because the controller can interleave requests across ranks.
You cannot tell single-rank from dual-rank by looking at the stick. Check the manufacturer’s spec sheet or use a tool like CPU-Z to read the rank information. Most 16GB DDR4 sticks are single-rank, while most 32GB DDR4 sticks are dual-rank. For DDR5, 16GB sticks are typically single-rank and 24GB sticks can be either.
For gaming, do not overthink this. The performance difference is marginal for most users. The one scenario where it matters: running four dual-rank sticks at high speeds is very demanding on the memory controller and often requires lowering your speed. If you plan to fill all four slots, prefer single-rank kits.
Step-by-Step RAM Installation Guide
Installing RAM is one of the simplest PC building tasks, but doing it correctly prevents boot failures and stability issues. Follow these steps in order.
Step 1: Power down completely. Shut down your PC and switch off the power supply using the toggle on the back. Unplug the power cable. This is not paranoia, it prevents any residual current from causing issues during installation.
Step 2: Ground yourself. Touch an unpainted metal surface on your PC case to discharge static electricity. If you have an anti-static wrist strap, use it. Static discharge can damage memory modules.
Step 3: Locate the correct slots. If installing two sticks, use slots A2 and B2 (second and fourth from the CPU socket). Check your motherboard manual to confirm, because some boards use a different layout. Using the wrong slots means single-channel mode and reduced performance.
Step 4: Open the retention clips. Push down on the plastic clips at the top and bottom of each RAM slot until they click open. Some boards only have clips on one side.
Step 5: Align the notch. Look at the gold contacts on the bottom of the RAM stick. There is a notch offset from center. Match this notch to the raised ridge in the RAM slot. DDR4 and DDR5 have different notch positions, so the wrong type will not fit.
Step 6: Press down firmly. Place the stick straight down into the slot and press with firm, even pressure on both ends. You will hear a satisfying click as the retention clips snap closed. If one side clicks but not the other, press the unclick side until both clips engage.
Step 7: Verify both clips are closed. Both retention clips should be fully upright and locked. A partially seated stick will cause boot failures or intermittent crashes.
Step 8: Connect power and boot. Reconnect the power cable, switch on the power supply, and start the PC. The first boot after installing new RAM may take longer than usual as the motherboard trains memory. This is normal.
Step 9: Enter BIOS immediately. Press DEL or F2 during POST to enter BIOS. Do not boot into Windows yet. You need to enable your RAM’s rated speed profile before normal use.
Enabling XMP/DOCP/EXPO: How to Run RAM at Its Rated Speed
This is the most important section in this entire guide. Without enabling your memory profile, your RAM runs at JEDEC standard speed regardless of what speed is printed on the box. Here is exactly how to fix that.
XMP (Extreme Memory Profile) is Intel’s technology for storing rated speed profiles on the RAM stick itself. DOCP (Direct Overclock Profile) is ASUS’s AMD equivalent, and EXPO (Extended Profiles for Overclocking) is AMD’s official standard for AM5. All three do the same thing: they tell the motherboard what speed, voltage, and timings the RAM is designed to run at.
Here is how to enable it:
Step 1: Boot into BIOS by pressing DEL or F2 during startup.
Step 2: Enter Advanced Mode (usually by pressing F7 on ASUS, or clicking Advanced Mode on Gigabyte/MSI/ASRock).
Step 3: Navigate to the overclocking or memory settings section. On ASUS, look under Ai Tweaker or Extreme Tweaker. On MSI, go to OC. On Gigabyte, look under Tweaker. On ASRock, check OC Tweaker.
Step 4: Find the XMP/DOCP/EXPO setting. It may be called Ai Overclock Tuner (ASUS), XMP (Gigabyte/MSI), or EXPO (AMD AM5 boards).
Step 5: Change the setting from Disabled (or Auto) to Profile 1. Some kits have multiple profiles. Use Profile 1, which is the primary rated speed.
Step 6: Verify the speed and voltage changed. You should see the DRAM frequency update to the rated speed (e.g., 6000 MT/s) and the DRAM voltage change to the rated voltage (usually 1.35V for DDR4, 1.35V or 1.4V for DDR5).
Step 7: Save and exit (usually F10). The system will restart and perform memory training. This can take 30-90 seconds on DDR5, or up to several minutes on some AM5 boards. Be patient.
Step 8: If the system boots successfully, enter BIOS again and confirm the speed is still set correctly. Then boot into Windows and verify using Task Manager (Performance tab, Memory) or CPU-Z (SPD tab).
If the system fails to boot (blank screen, repeated restarts), do not panic. This is common when pushing high speeds. Clear CMOS by removing the round CR2032 battery on the motherboard for 30 seconds, or use the Clear CMOS button/jumper if your board has one. Then re-enter BIOS and try a lower speed or increase DRAM voltage slightly.
AMD Infinity Fabric: What AMD Users Need to Know
AMD Ryzen processors use a technology called Infinity Fabric to connect the CPU cores to the memory controller. Infinity Fabric runs at a frequency tied to your RAM speed, and maintaining a 1:1 ratio between Infinity Fabric (FCLK) and memory controller clock (UCLK) is important for optimal performance.
For AM4 (Ryzen 3000/5000), the sweet spot is 3600 MT/s. At this speed, the Infinity Fabric runs at 1800 MHz, maintaining a perfect 1:1 ratio. Above 3800 MT/s, the Infinity Fabric drops to a 2:1 ratio, which actually hurts performance. Buying 4000+ MT/s RAM for AM4 is often counterproductive unless you plan to manually tune the fabric speed.
For AM5 (Ryzen 7000/9000), the 1:1 ratio holds up to about 6400 MT/s with the memory controller at 2000 MHz. Going above 6400 MT/s forces the controller into a 2:2:1 mode that reduces performance. This is why the community has settled on 6000 MT/s CL30 as the sweet spot for AM5, it stays comfortably within the 1:1 zone with room for stability.
If you are on AMD and your RAM will not reach its rated speed, this Infinity Fabric limit may be the reason. Check whether your target speed stays within the 1:1 ratio for your platform.
How to Check If Your RAM Is Running at Full Speed
After enabling XMP/DOCP/EXPO, verify it actually worked. Here are the three best methods:
Task Manager: Press Ctrl+Shift+Esc, go to the Performance tab, and click Memory. Look at the Speed field. It should show your rated speed (e.g., 3600 MHz or 6000 MHz). If it shows 2133, 2400, 4800, or another low number, your profile is not active.
CPU-Z: Download the free CPU-Z utility. Go to the SPD tab to see what the RAM reports as its rated XMP profile. Then check the Memory tab to see what speed the RAM is actually running at. If SPD says 6000 but Memory says 4800, XMP is not enabled.
BIOS: Restart and enter BIOS. The main status screen should display current DRAM frequency. Confirm it matches your kit’s rated speed.
Run all three checks if possible. Task Manager is the quickest, CPU-Z gives the most detail, and BIOS is the ground truth. If all three agree and match your rated speed, you are good to go.
Troubleshooting: Why Your RAM Is Not Running at Rated Speed
So you enabled XMP, but the system will not boot, or it boots but shows the wrong speed. This is the most frustrating scenario for PC builders, and it has several common causes.
Problem: System will not POST after enabling XMP. The most likely cause is that your memory controller cannot handle the rated speed at the default voltage. Try increasing DRAM voltage by 0.02V (for example, from 1.35V to 1.37V). Also check VCCIO and System Agent voltage on Intel, or SoC voltage on AMD, as these affect memory stability.
Problem: System boots but RAM runs at base speed despite XMP being enabled. Some motherboards revert to JEDEC speed after a failed memory training cycle. Enter BIOS, confirm XMP is still enabled, and check whether the board applied a fallback. You may need to manually set the frequency, timings, and voltage instead of relying on the XMP profile.
Problem: Random crashes or blue screens after enabling XMP. The system passed initial training but is unstable under load. Increase DRAM voltage slightly, or loosen the primary timings by one step (for example, change CL30 to CL32). Test stability with a memory stress test like TestMem5, MemTest86, or Windows Memory Diagnostic.
Problem: Four sticks will not reach rated speed. Running four DIMMs stresses the memory controller significantly more than two. Most CPUs cannot maintain the same speed with four sticks as with two. This is especially true for dual-rank kits. Solution: either reduce the speed, increase voltage, or stick with two higher-capacity sticks instead of four.
Problem: BIOS does not show an XMP option. This usually means the motherboard does not recognize the profile on the RAM stick, or the BIOS is outdated. Update your motherboard BIOS to the latest version, which often improves memory compatibility. If the option still does not appear, the kit may not have a valid XMP profile, though this is extremely rare for any reputable brand.
Problem: AMD system unstable at rated speed. On AM4, try manually setting the Infinity Fabric (FCLK) to 1800 MHz for 3600 MT/s RAM. On AM5, try setting UCLK to match MEMCLK (1:1 ratio) and reduce the speed to 6000 MT/s if running higher. AMD systems are more sensitive to subtimings, so consider using a community-tested timing preset like those from the r/overclocking community.
How to Choose and Install RAM Gaming: Common Mistakes to Avoid
We have seen every mistake in the book across forum threads and support requests. Here are the ones that cause the most frustration.
Mistake 1: Never enabling XMP/DOCP/EXPO. This is the number one issue. Your RAM runs at base speed until you manually enable the profile. If you do nothing else after reading this guide, go enable XMP right now.
Mistake 2: Installing RAM in the wrong slots. Two sticks go in slots A2 and B2 (second and fourth from the CPU), not A1 and A2. Wrong slots mean single-channel mode and a significant performance penalty.
Mistake 3: Mixing different RAM kits. Even if two kits are the same brand and speed, they may use different memory chips internally. This can cause instability or prevent XMP from working. Always buy a matched pair kit rather than two separate single sticks.
Mistake 4: Ignoring CPU and motherboard speed limits. A 7200 MT/s kit will not reach that speed on a budget motherboard with a weak memory controller. Check what your hardware supports before buying.
Mistake 5: Forcing high speeds with four sticks. Four DIMMs almost never reach the same speed as two. If you need 64GB, buy 2x32GB, not 4x16GB, unless you are prepared to accept lower speeds or manual tuning.
Mistake 6: Not testing stability after enabling XMP. A successful boot does not mean the RAM is stable under load. Run a memory stress test for at least 30 minutes to confirm stability before relying on the system for gaming.
FAQs
What should my RAM be running at while gaming?
Your RAM should run at the rated speed printed on the box or in the product specifications. For DDR4 gaming builds, 3200 MT/s to 3600 MT/s is ideal. For DDR5, 6000 MT/s is the current sweet spot. If Task Manager shows a lower speed like 2133 MHz or 4800 MT/s, you need to enable your XMP, DOCP, or EXPO profile in BIOS.
Can I mix 2400MHz and 3200MHz RAM?
Technically yes, but it is not recommended. When you mix different speed RAM, all sticks default to the speed of the slowest module. A 3200 MHz stick paired with a 2400 MHz stick will both run at 2400 MHz. Mixing different brands and speeds can also cause instability, crashes, and boot failures. Always buy a matched pair kit.
How to set RAM to run at full speed?
Boot into BIOS by pressing DEL or F2 during startup. Navigate to the memory or overclocking section. Find the XMP (Intel), DOCP (ASUS AMD), or EXPO (AMD) setting and change it to Profile 1. Verify the DRAM frequency updates to your rated speed, then save and exit (F10). The system will restart and run memory training before booting at full speed.
Which RAM speed is best for gaming?
For DDR4 on AM4 or older Intel platforms, 3600 MT/s with CL16-18 timings is the best balance of speed and latency. For DDR5 on AM5, 6000 MT/s with CL30 is the community-verified sweet spot that stays within the Infinity Fabric 1:1 ratio. For Intel DDR5 builds, 6000 to 6800 MT/s performs well.
Can installing a new RAM cause problems?
Yes, common problems include boot failures from improperly seated sticks, single-channel operation from wrong slot placement, and instability from mixing incompatible kits. New RAM also defaults to base JEDEC speed, so you must enable XMP or EXPO in BIOS to reach the rated speed. Always verify the RAM is fully seated in the correct slots before booting.
Why is my PC not turning on after putting new RAM?
The most common cause is improperly seated RAM. Remove and reinstall the sticks, pressing firmly until both retention clips click. If that fails, try one stick at a time to identify a faulty module. Also verify the RAM is installed in the correct slots (A2 and B2 for two sticks). If the system still does not POST, clear CMOS by removing the motherboard battery for 30 seconds and try again.
How common are RAM failures?
RAM failures are relatively uncommon but do happen. Industry data suggests roughly 1-3% of memory modules fail within the first year. Symptoms include random crashes, blue screens, corrupted files, and boot failures. Run MemTest86 or Windows Memory Diagnostic to check for faulty modules. Most reputable brands offer lifetime warranties on RAM.
Is there a wrong way to install RAM?
Yes. Installing sticks in the wrong slots (using A1 and A2 instead of A2 and B2) forces single-channel mode and cuts bandwidth in half. Forcing a stick in backward or without aligning the notch can damage the module and the slot. Not pressing firmly enough for both clips to engage causes intermittent boot failures. Always follow the motherboard manual for slot configuration.
Wrapping Up: Get Your RAM Running at Full Speed
Learning how to choose and install RAM gaming PCs can benefit from is only half the battle. The other half is making sure it actually runs at the speed you paid for. The biggest takeaway from this guide is simple: enable your XMP, DOCP, or EXPO profile in BIOS. Without it, your expensive 6000 MT/s kit runs at 4800 MT/s, and you are leaving free performance on the table.
Start by checking what speed your RAM is currently running at using Task Manager. If it shows a base speed instead of your rated speed, enter BIOS and enable the memory profile. Verify with CPU-Z, run a stability test, and enjoy the extra frame rates you just unlocked.
If you hit roadblocks like boot failures or instability, work through the troubleshooting steps we covered. Increase DRAM voltage slightly, check your slot configuration, and make sure your target speed stays within your platform’s limits. For AMD users, pay attention to the Infinity Fabric ratio, because exceeding the 1:1 sweet spot can actually reduce performance.
With the right RAM choice, proper installation in the correct slots, and an enabled memory profile, your gaming PC will deliver the memory performance it was designed for. Now go check your BIOS and make sure you are getting every megahertz you paid for.