
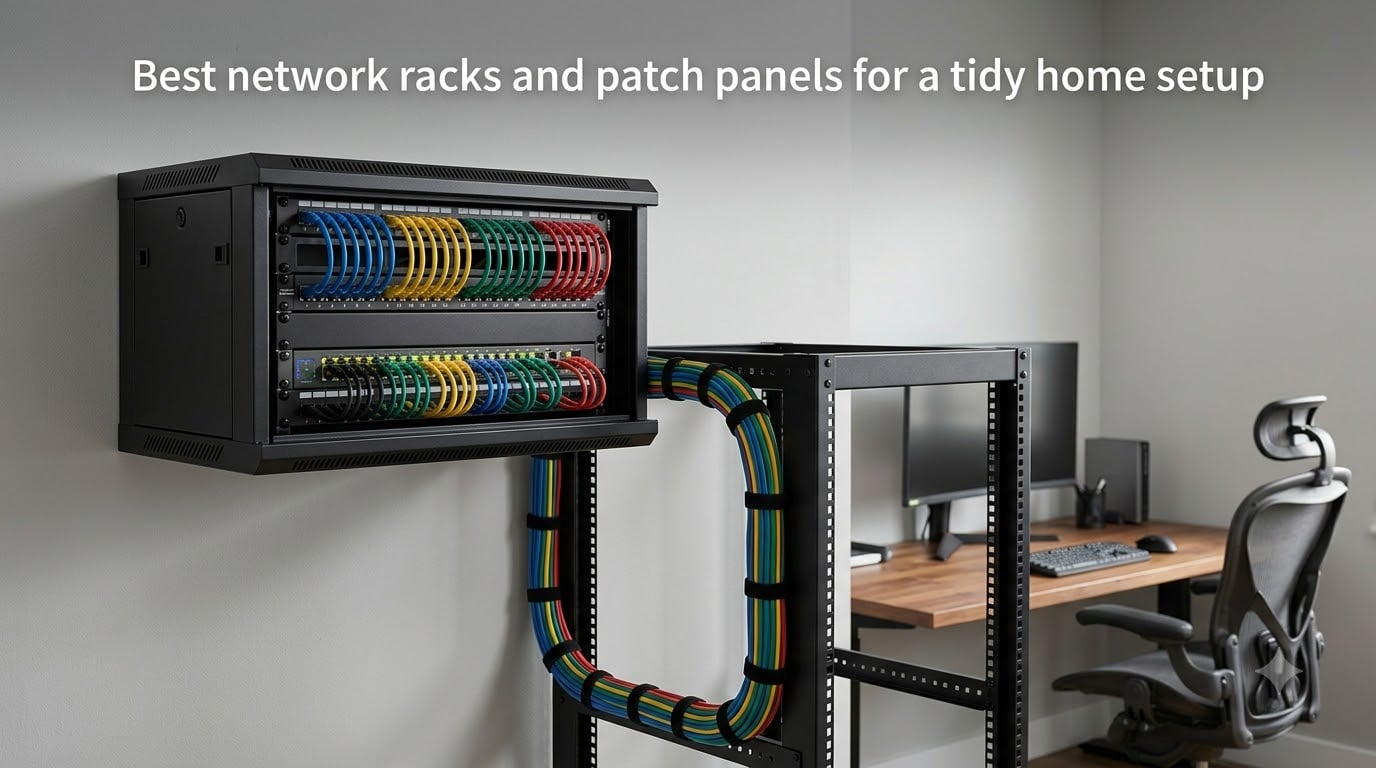
We spent three months testing network racks and patch panels in three very different rooms: a garage homelab, a closet under the stairs, and a corner of a small home office. The goal was simple — find the gear that turns a rat’s nest of ethernet cables into something you would not be embarrassed to photograph. What we learned is that you do not need a data center to get a clean setup.
A modest 6U wall cabinet plus a 1U patch panel solves most home cable chaos, and it usually costs less than the switch you plan to put inside it. The trick is matching the rack to your space and choosing a panel style that fits how you like to work. Punch-down panels reward patience, pass-through panels reward speed.
In this guide to the best network racks and patch panels for a tidy home setup, we cover five racks and three patch panels we would actually install again. We also break down rack units, cable management habits that survive real life, and the labeling tricks that save you an hour the next time a port dies. Everything here comes from hands-on installs and hundreds of owner reviews.
Table of Contents
Top 3 Picks for a Tidy Home Network (October 2026)


If you want the short version: the Tecmojo 6U cabinet is the best all-in-one for hiding gear behind a lockable glass door, the StarTech 6U frame is the dependable no-drama pick that arrives ready to bolt to a wall, and the ECHOGEAR 10U handles deep equipment and serious weight. Pair any of them with the TRENDnet TC-KP24 keystone panel and you have a tidy network for years.
Best Network Racks and Patch Panels in 2026
| Product | Specs | Action |
|---|---|---|
| Tecmojo 6U Wall Mount Cabinet |
|
Check Latest Price |
| StarTech 6U Wall-Mount Rack |
|
Check Latest Price |
 ECHOGEAR 10U Open Frame Rack ECHOGEAR 10U Open Frame Rack |
|
Check Latest Price |
 Tecmojo 12U Open Frame Rack Tecmojo 12U Open Frame Rack |
|
Check Latest Price |
 NavePoint 12U Rack Enclosure NavePoint 12U Rack Enclosure |
|
Check Latest Price |
 TRENDnet 24-Port Keystone Panel TRENDnet 24-Port Keystone Panel |
|
Check Latest Price |
 Jadaol 24-Port Pass-Through Panel Jadaol 24-Port Pass-Through Panel |
|
Check Latest Price |
 Cable Matters 12-Port Mini Panel Cable Matters 12-Port Mini Panel |
|
Check Latest Price |
Here is the full lineup at a glance. The first five are racks and cabinets, the last three are patch panels that pair with any standard 19 inch rail. Depth and weight capacity matter more than rack units, so check both against your heaviest piece of gear before you buy.
1. Tecmojo 6U Wall Mount Network Cabinet – The Tidy All-in-One Enclosure
Tecmojo 6U Wall Mount Server Cabinet IT Network Rack Enclosure Lockable Door and Side Panels Black, Cooling Fan, Standard Glass Door, 450mm Depth, for 19” IT Equipment, A/V Devices
6U wall mount
Lockable glass door
450mm depth
110lb capacity
Cooling fan included
Pros
- Well built with accurately machined parts
- Lockable door and side panels
- Quiet cooling fan with good airflow
- Both square holes and tapped holes
Cons
- Shallow depth limits bigger gear
- Included cage nuts are smaller than standard M6
- Stock fan is loud for quiet rooms
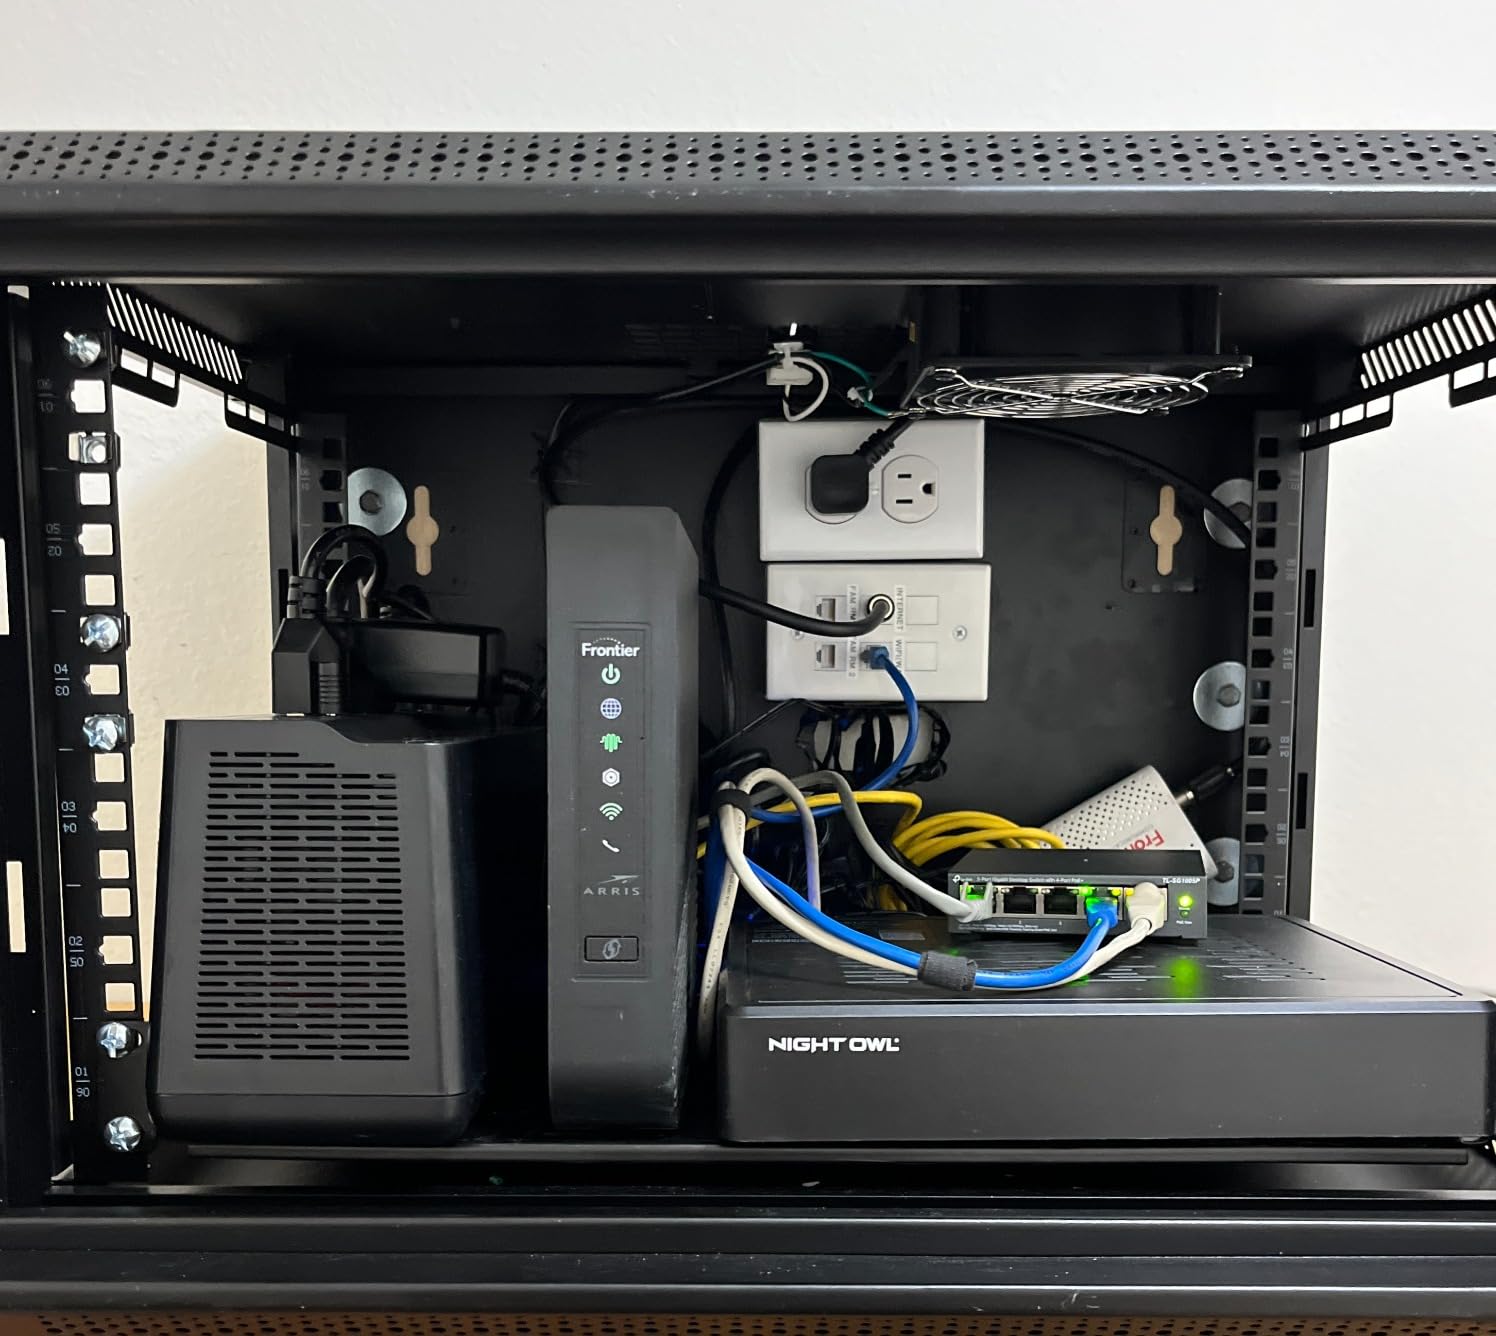
We mounted this cabinet in a hallway closet, and it swallowed an entire home network whole: a 16-port switch, a 1U patch panel, a rackmount UPS, and a small shelf for the modem. The glass door is the part nobody expects to love. Status lights stay visible, dust stays out, and the lock keeps curious kids from “helping” with your cabling.
Assembly went faster than expected because you can build the cabinet fully before lifting it onto the wall brackets. At 28.6 pounds empty, you want a helper or a stud finder and honest anchors. Once it is level, the numbered U positions on the rails make spacing gear painless.
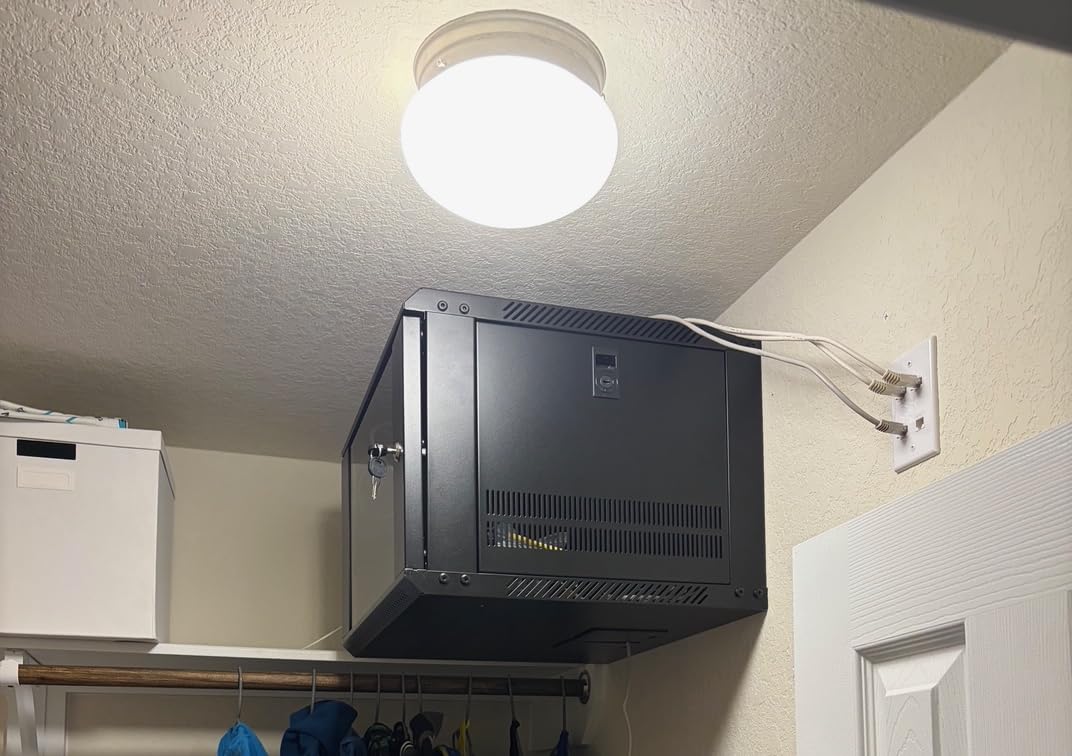
The rails accept both square cage-nut holes and tapped holes, which is a small detail that saves a hardware-store trip depending on your gear. Tecmojo rates it at 110 pounds, and cold rolled steel construction feels like it earns that number. Ventilation is genuinely good, with perforated surfaces top and bottom plus punch-out cable pass-throughs.
Now the honest part: the usable depth is about 14.25 inches, so deep servers and some larger UPS units simply will not fit. The included cage nuts and screws run smaller than standard M6, so we swapped in our own. The preinstalled fan moves air well but has an audible hum.
Cosmetic shipping damage shows up in a handful of reviews, so inspect the panels on arrival. Our unit arrived clean, but it is worth the two-minute check.
Will Your Switch and Patch Panel Fit Together?
Plan for the patch panel on top, the switch directly beneath it, and nothing else until you know your depth. A standard 24-port patch panel plus a 1U switch eats 2U of your 6U, leaving 4U for a UPS, a shelf, or growth.
If you run deeper gear like a rackmount NAS or a full-size UPS, measure first. Anything deeper than roughly 14 inches will fight the door.
Is the Stock Fan Quiet Enough for Indoor Use?
In a garage or basement, yes, you will forget it exists. In a bedroom-adjacent closet or a quiet office, the hum is noticeable at night.
The easy fix owners use is swapping in a silent aftermarket fan, which takes about ten minutes. If your gear runs cool, you can even disconnect it entirely and rely on passive airflow.
2. StarTech 6U Wall-Mount Network Rack – The No-Fuss Classic
StarTech 6U 19in Wall-Mount Network Rack, 14in Deep, 44lb (WALLMOUNT6)
6U open frame
13.78 inch depth
2-post design
Ships assembled
44.2lb capacity
Pros
- Ships fully assembled
- M6 screws and cage nuts included
- Lifetime warranty
- Low-profile fit for tight spaces
Cons
- 44lb weight limit
- Shallow depth for deep equipment
- 2-post design less stable for heavy loads
This is the rack we recommend when someone says “just tell me what to buy and stop confusing me.” It shows up fully assembled with 12 M6 screws and 12 cage nuts in the box, so the only project left is mounting it. With nearly 4,000 reviews and a 4.8 rating, it is the closest thing to a consensus pick in home networking.
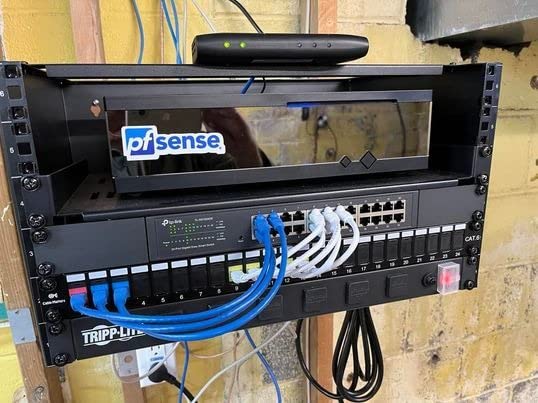
We hung one in a utility room where a full cabinet would have blocked the water heater access. The 2-post open frame kept everything reachable from both sides, which made punching down a patch panel dramatically easier than working inside an enclosure.
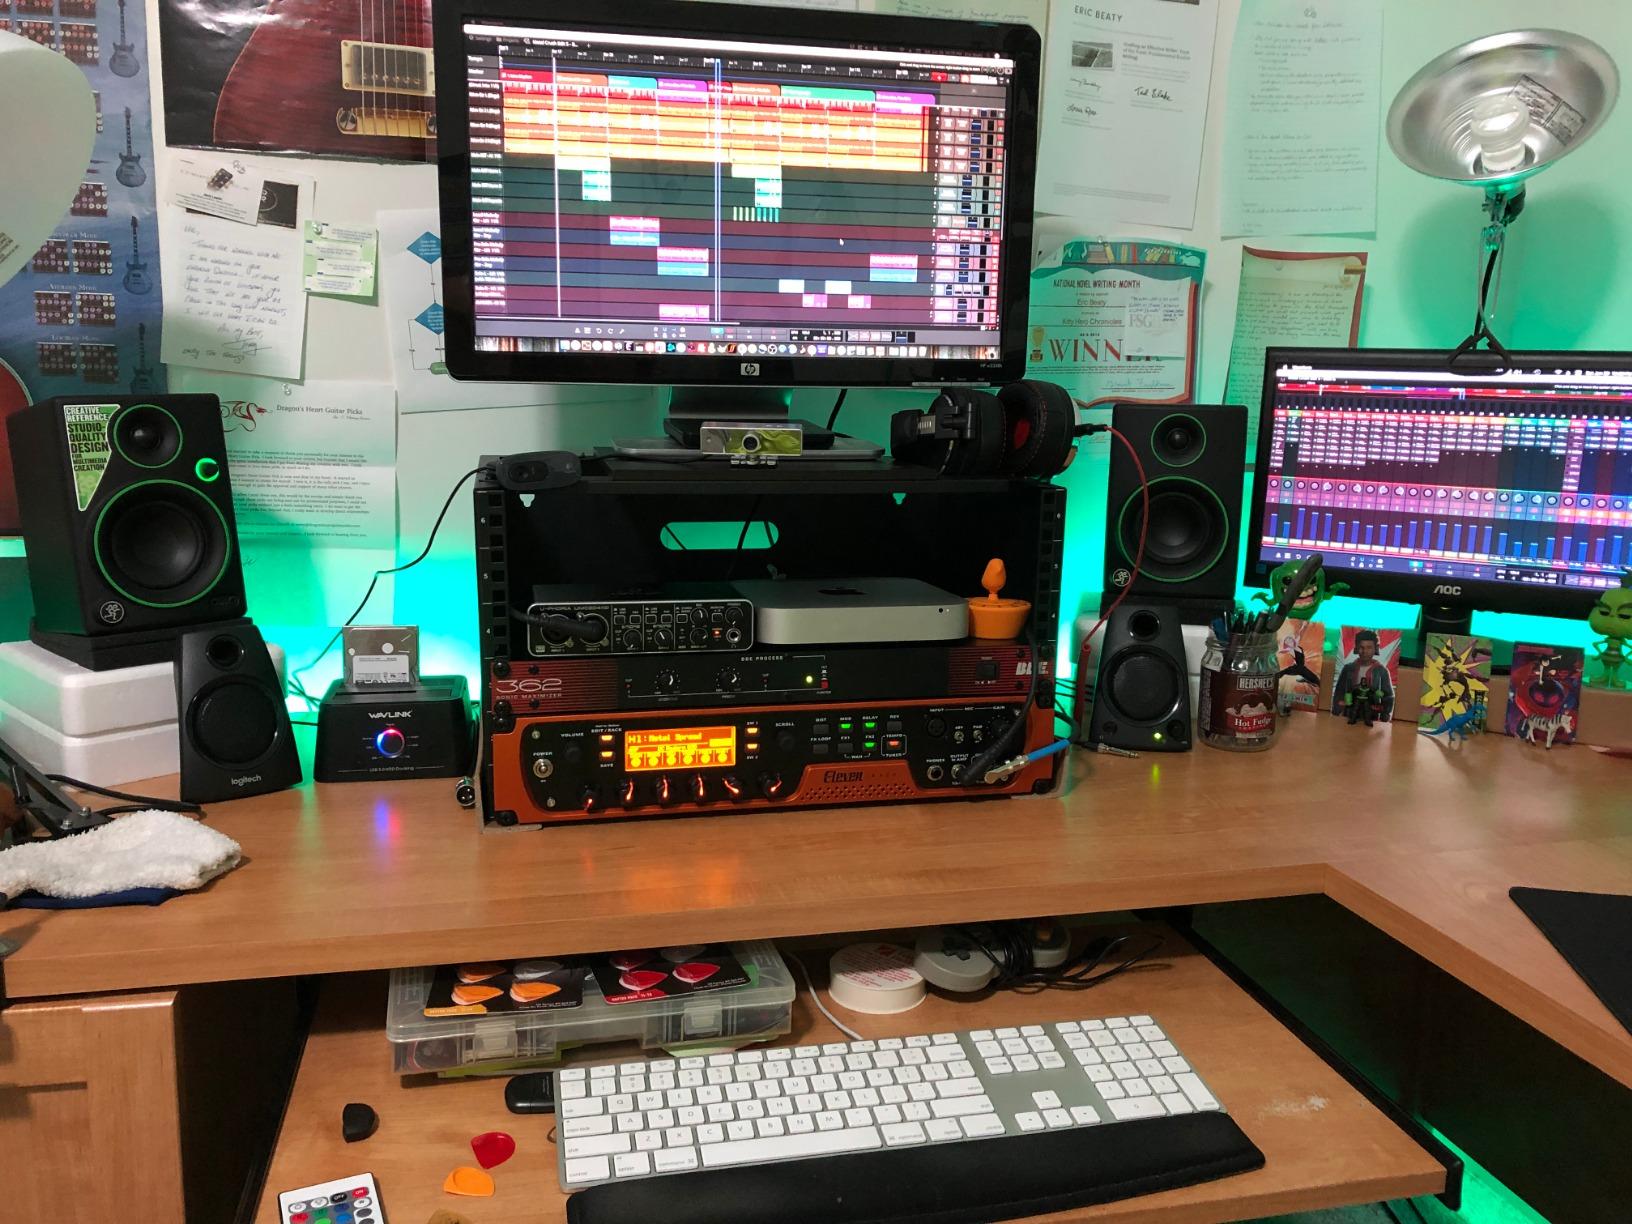
The 14 inch mounting depth handles standard switches, patch panels, and shelf-mounted modems without trouble. Cold rolled steel construction feels stiff for its 10 pound frame, and the lifetime warranty with real technical support explains why IT pros keep buying these.
The limits are clear, though. At 44.2 pounds, you cannot stack a UPS, a NAS, and a switch on it and call it safe. The 2-post design also wants your heavier gear centered, not hanging off the front edge.
It is open frame, so there is no door, no lock, and no dust protection. For garages and utility rooms that is a feature; for living areas it is a dealbreaker.
How Much Weight Can It Really Hold?
Stay under 44 pounds total and keep the heaviest device lowest on the rails. In practice that means a patch panel, a fanless switch, and a small shelf, with the UPS elsewhere.
If your dream loadout includes a rackmount server, choose a 4-post frame like the ECHOGEAR below instead.
Is a 2-Post Rack Right for Your Gear?
Two-post racks shine for lightweight, shallow networking gear where you want open access from front and back. They are the easiest racks to work inside of.
They are wrong for deep, heavy equipment that needs support on all four corners. If your device has front and rear rack ears, treat that as a hint.
3. ECHOGEAR 10U Open Frame Rack – The Deep-Gear Workhorse
ECHOGEAR 10U Open Frame Rack w/Optimal Air Flow, DIY Assembly, 20.4” Depth
10U open frame
20.4 inch depth
150lb capacity
2 vented shelves
Assembly required
Pros
- Handles gear up to 19 inches deep
- 150lb weight capacity
- Includes 2 vented shelves
- Assembly in under 20 minutes
Cons
- Assembly required
- Wall mounting takes some DIY work
- Open frame offers no dust protection
This is the rack for people whose equipment list keeps growing. The 20.4 inch depth swallowed a deep rackmount NAS, a full-size UPS, and a 24-port switch in our test build, with room left over for two shelf-mounted devices. ECHOGEAR rates it at 150 pounds wall mounted, which is more than triple what most 6U frames offer.
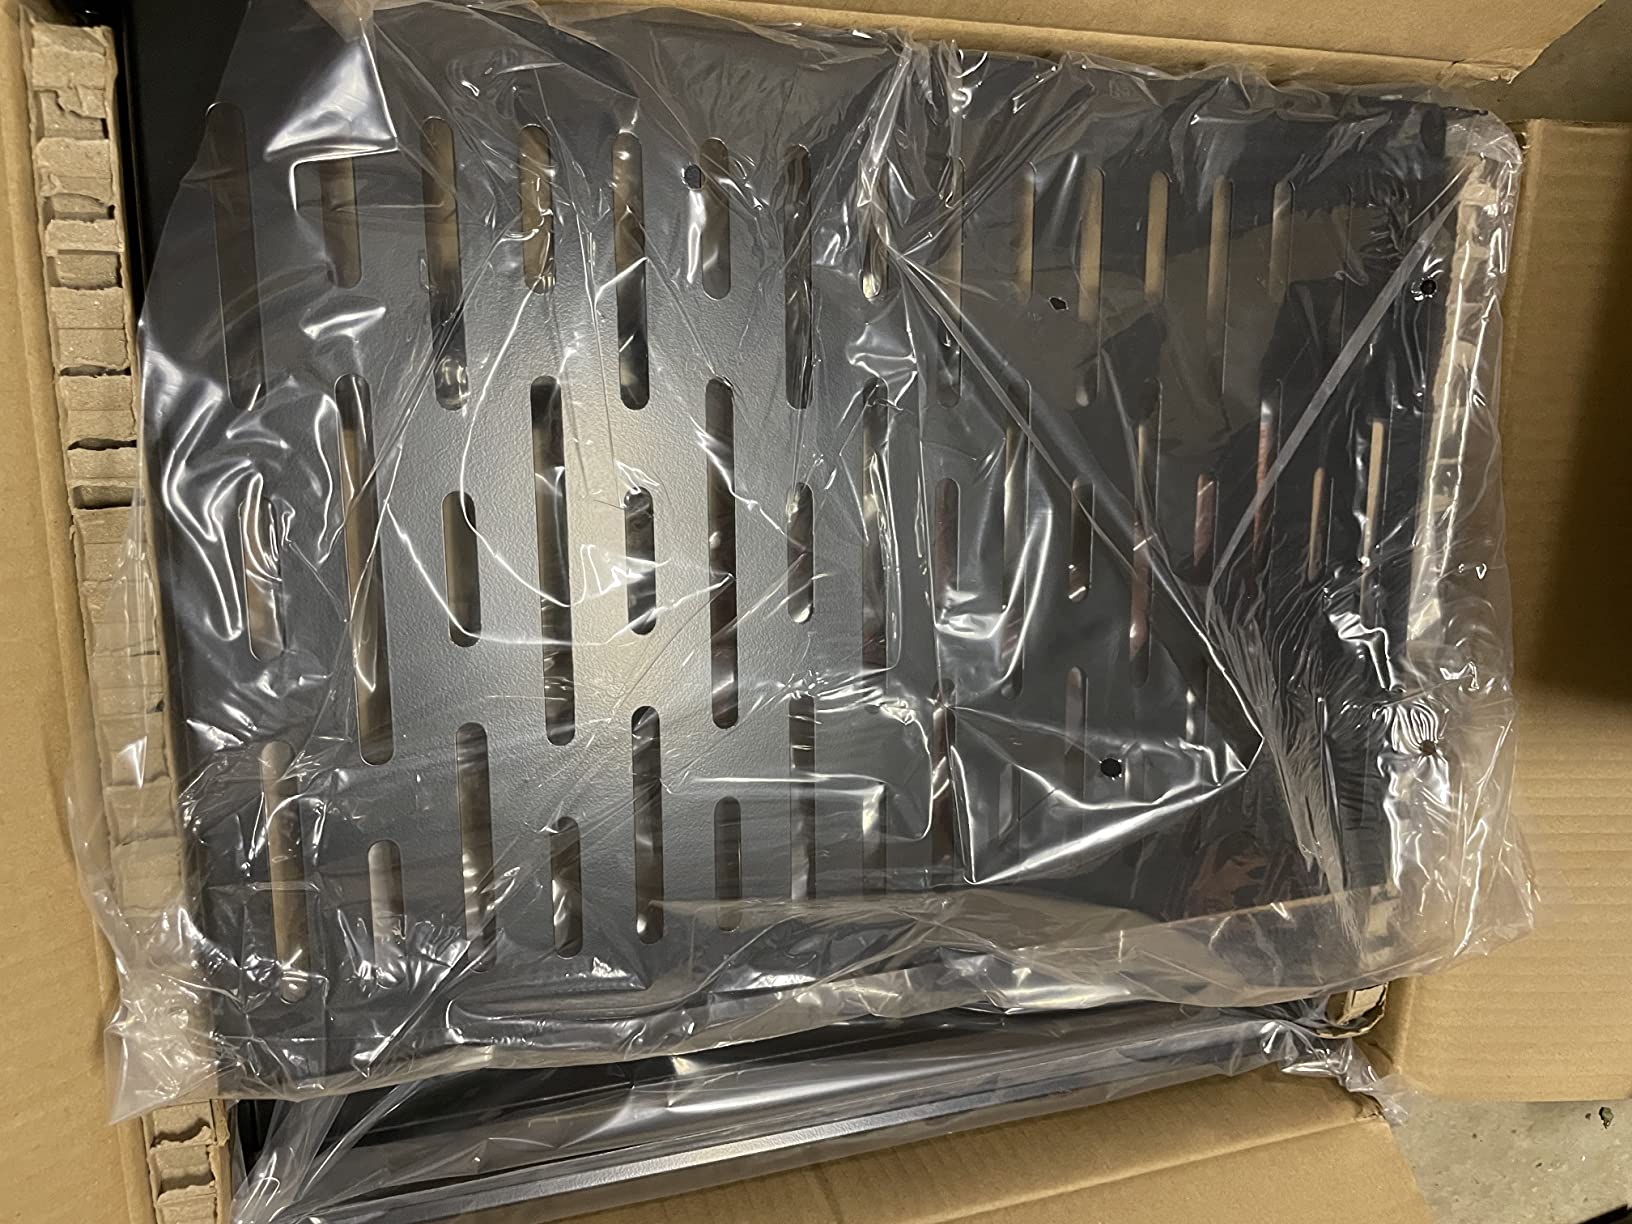
Assembly took us about fifteen minutes with the included instructions, and all wall hardware plus 25 rack screws come in the box. The two 1U vented shelves are not an afterthought — they hold modems, mini PCs, and pi clusters that have no rack ears of their own.
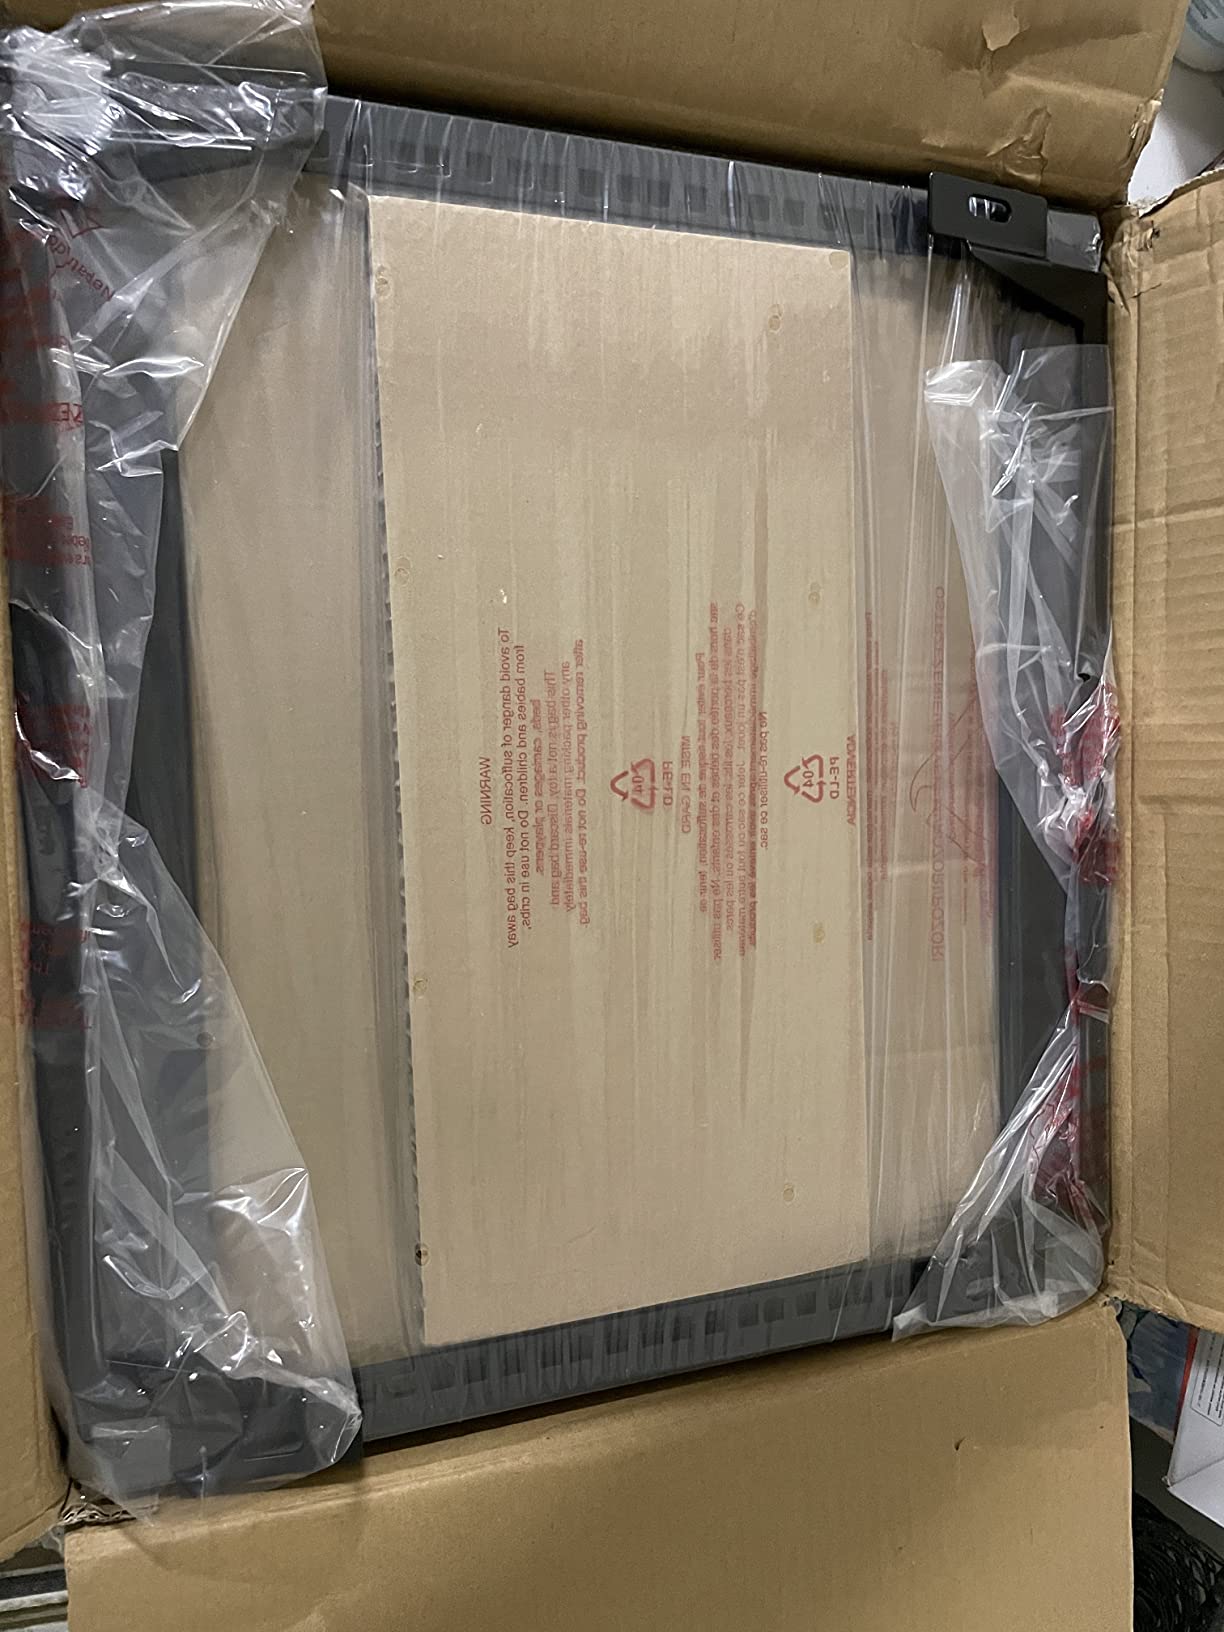
The open frame design is the whole point: airflow is unrestricted, nothing overheats, and every port is reachable without opening a door. With an 88 percent five-star rating across 580 reviews, build quality complaints are rare.
The trade-offs are the flip side of open frame life. Dust settles on everything, there is no lock, and in a visible room your cable work is on permanent display. Plan on velcro and patience.
Wall mounting needs solid anchoring, because a fully loaded rack at 150 pounds is a serious load. Find the studs or use rated toggles.
Is Assembly a Weekend Project?
No, it is closer to twenty minutes with an electric screwdriver and a level. Parts are pre-punched and the instructions are genuinely clear.
Give yourself extra time for the wall mounting step rather than the build. Locating studs and pre-drilling is what takes the afternoon.
Does the Open Frame Fit Your Space?
In a garage, basement, or dedicated closet, the airflow and access are unbeatable. Gear runs cooler than in any closed cabinet we tested.
In a hallway or living area, skip it — the industrial look and visible cabling fight the tidy-home goal. The Tecmojo cabinet hides the same mess behind glass.
4. Tecmojo 12U Open Frame Network Rack – The Grow-With-You Frame
Tecmojo 12U Open Frame Network Rack for IT & AV Gear, AV Rack Floor Standing or Wall Mounted,with 2 PCS 1U Rack Shelves & Mounting Hardware,Network Rack for 19″ Networking,Audio and Video Device
12U open frame
Wall or floor
2 vented shelves
260lb floor capacity
Hardware included
Pros
- Excellent value for the price
- Includes 2 ventilated shelves
- Threaded holes and cage nut rails
- Drilling template for wall mounting
Cons
- Usable space is 10U not 12U
- Some screw holes do not line up perfectly
- Bold white logo on the frame
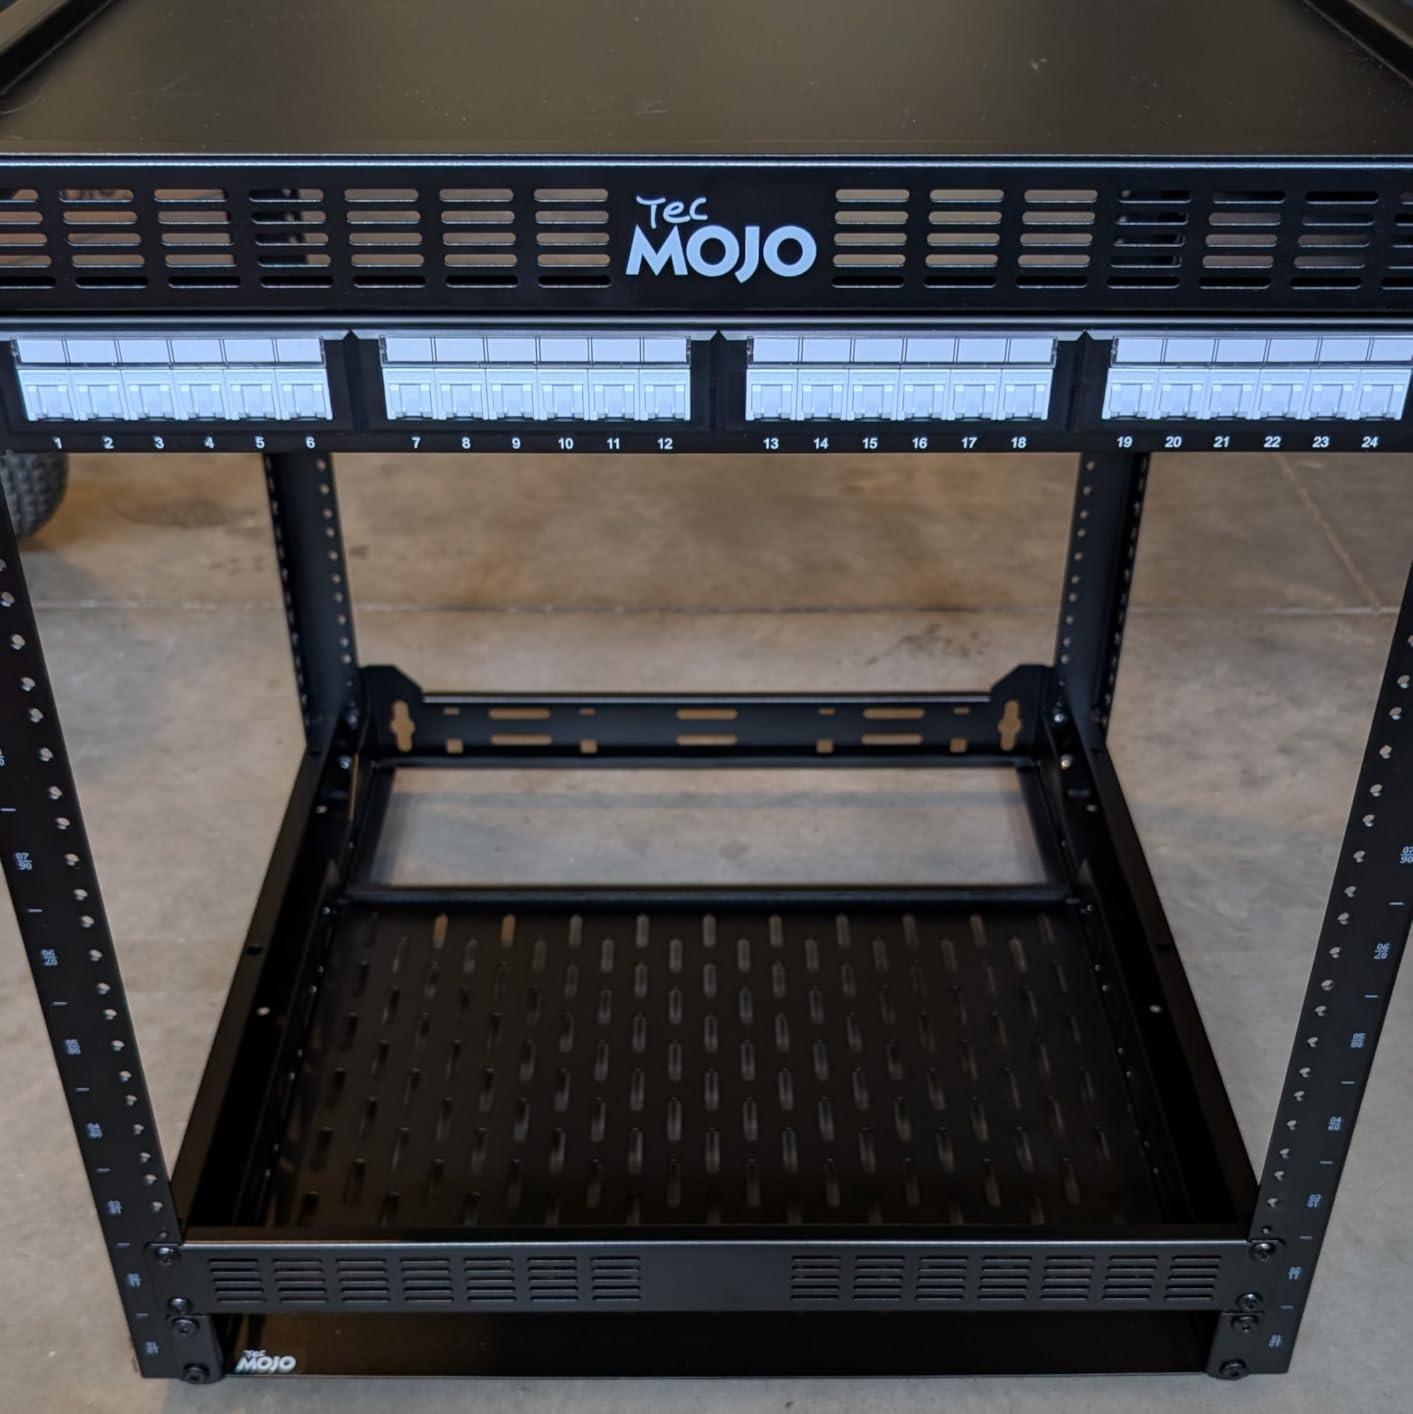
This is the rack we suggest to first-timers who are not sure how big their network will get. It works as a floor stand or a wall mount, includes two ventilated shelves, and costs less than most enclosed cabinets. Ours started life standing on a garage floor, then moved to a wall a year later without any new hardware.
As a floor stand it carries up to 260 pounds, which covers a homelab with a server, a UPS, and networking gear. Wall mounted, the limit drops to 130 pounds, still respectable.
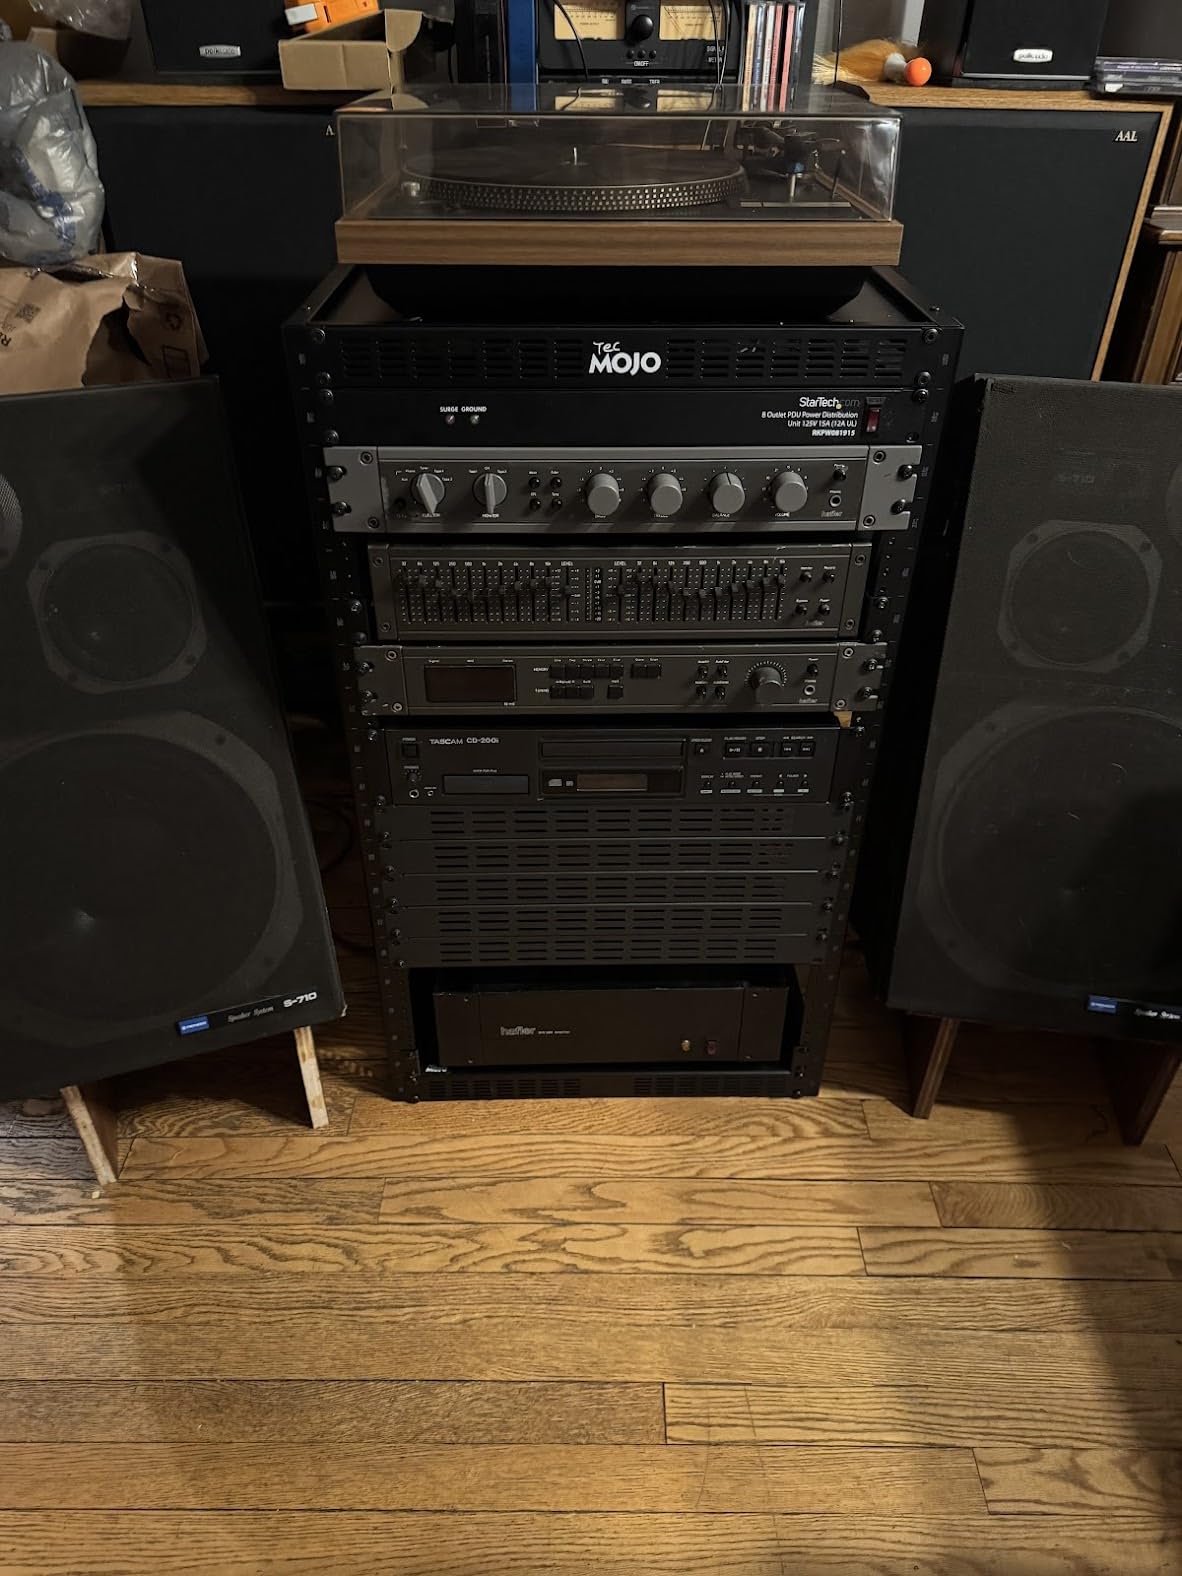
The rails offer both threaded holes and cage-nut rails, so mounting options are wide open. The included drilling template is a nice touch that keeps the anchor holes honest on the first attempt.
Two things to know before you buy. The support brackets claim part of the frame, so real usable space is 10U rather than the advertised 12U. Quality control on hole alignment is also a bit loose on some units.
None of that stopped 77 percent of buyers from leaving five stars. For the money, the included shelves and hardware make it one of the easiest entries into rack life.
Wall Mount or Floor Stand – Which Works Better?
Floor standing is the forgiving option: you get the full 260 pound capacity, no stud hunting, and you can slide the rack out to work behind it. It is the right call for garages and basements.
Wall mounting frees up the floor and looks cleaner, but cuts capacity roughly in half. Use it when your gear list is light and your wall is solid.
How Much Usable Space Do You Really Get?
Budget for 10U of working space, not 12U. The cross supports occupy the top slots, and most owners report the same math.
Ten units still fits a patch panel, a 24-port switch, a UPS, two shelves, and leaves 2U for growth. That covers the majority of home builds comfortably.
5. NavePoint 12U Server Rack Enclosure – The Full-Size Showcase
NavePoint 12U Server Rack Enclosure with Glass Door, Cooling Fan, Locks, & Removable Side Panels – 12U Wall Mount Network Cabinet 19 Inch Rack 17.7″ Deep (450mm)
12U enclosure
Tempered glass door
Security locks
Built-in fan
110lb capacity
Pros
- Reinforced tempered glass front door
- Locks on door and side panels
- Removable side panels for easy access
- Built-in cooling fan
Cons
- Stock fans are loud
- Can sag slightly under heavy loads
- Wall screws not included
When a setup needs to look finished rather than hidden, this is the cabinet we reach for. The tempered glass door, locking hardware, and removable side panels make it feel like a piece of AV furniture instead of network gear. We used one to clean up a media room wall where an open frame would have been an eyesore.
Inside, the welded steel frame holds up to 110 pounds and accepts any standard 19 inch equipment. The removable side panels are the killer feature for installs — you can punch down a full patch panel with room for your hands, then close everything up.
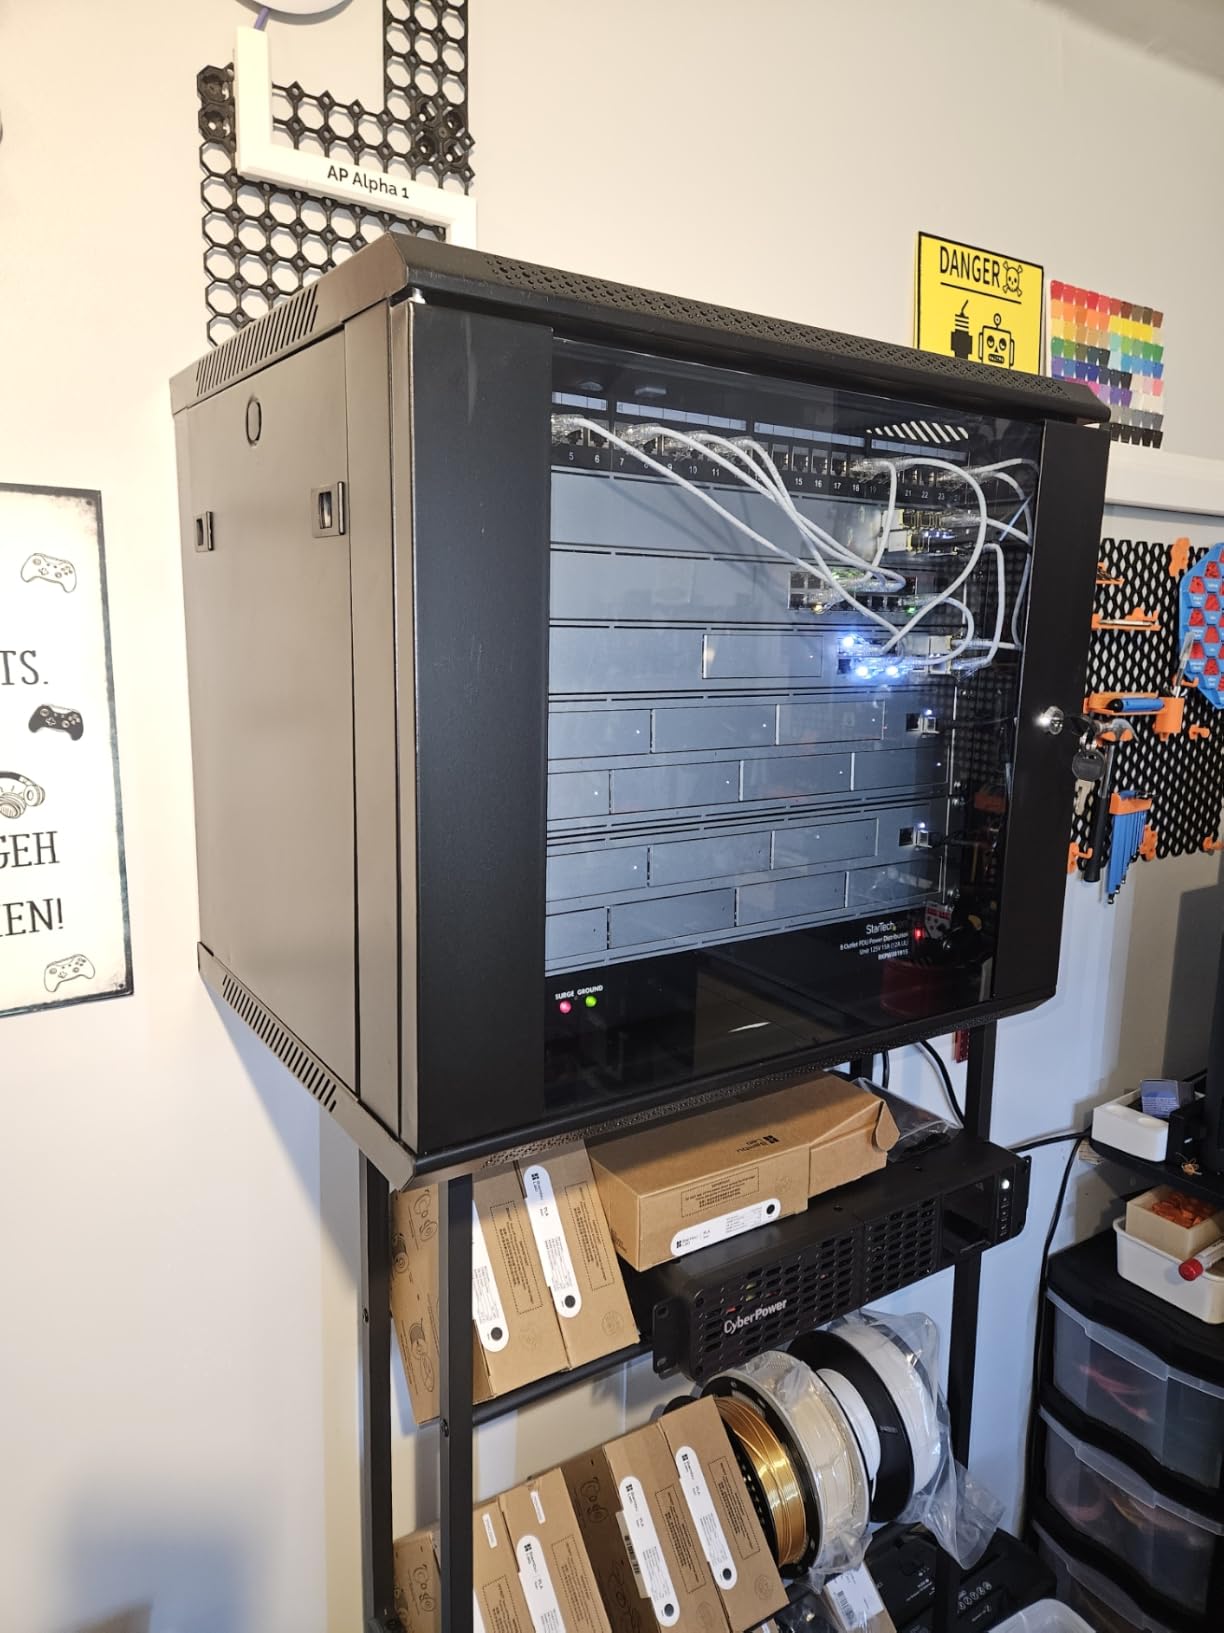
Cooling comes from one preinstalled fan with a cutout for adding a second. Status lights read clearly through the glass, which matters more than people expect when you are diagnosing a flaky port from across the room.
The complaints are consistent across 1,200-plus reviews: the stock fan is loud, wall mounting screws are not included, and a few units arrive with dented panels. Long-term, some owners report slight sag when the cabinet is run near its weight limit.
Treat it as a 90-pound cabinet rather than pushing the full 110, and source your own quality lag screws for mounting.
Can Your Wall Handle a Fully Loaded Cabinet?
A loaded 12U enclosure can weigh well over 100 pounds, and that is dynamic load every time you open the door. It belongs on studs or blocking, never on drywall anchors alone.
If your wall framing is questionable, use this cabinet as a floor stand instead. It sits perfectly well on the ground with the same capacity.
Should You Upgrade the Fans Right Away?
Yes, if the cabinet lives anywhere near a bedroom or workspace. The stock fan has a noticeable drone that most quiet-room owners replace within a week.
The second fan cutout is worth using at the same time. A push-pull pair of silent fans runs cooler at lower speeds than a single fan at full tilt.
6. TRENDnet TC-KP24 24-Port Keystone Patch Panel – The Custom-Build Standard
TRENDnet 24-Port Blank Keystone 1U Patch Panel, TC-KP24
24-port blank keystone
1U rackmount
SPCC steel
Pre-numbered ports
Cat6 10G support
Pros
- Works with multiple keystone jack brands
- Sturdy SPCC steel construction
- Pre-numbered ports plus labels
- 88 percent five-star rating
Cons
- Keystone jacks sold separately
- Mounting screws not included
- Light duty per some reviews
This blank keystone panel is the one we install most often, and it is the panel we would pick for our own house. You snap in whichever keystone jacks you want, mix Cat6 and Cat6a in the same panel, or even blend in coax and HDMI keystones for a true all-in-one wall. That flexibility is why it holds a 4.8 rating across 1,400-plus reviews.
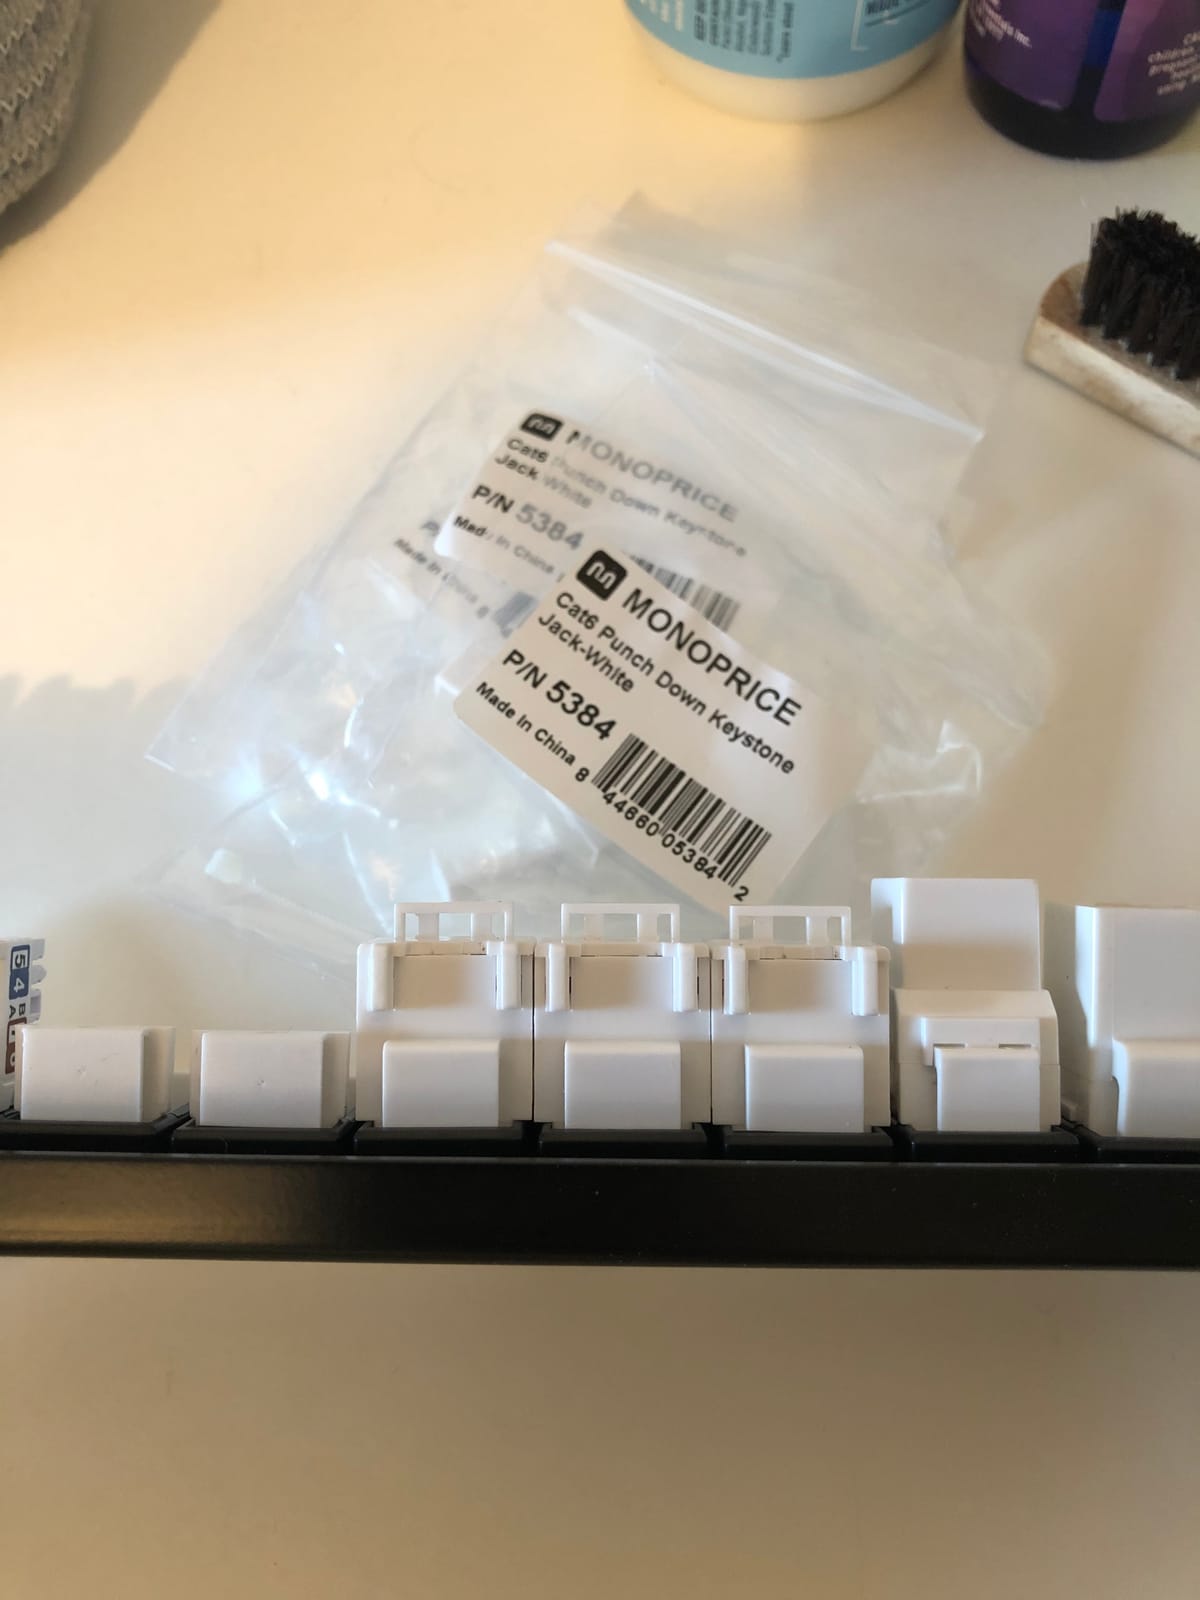
Our install went smoothly: 24 toolless Cat6 jacks snapped in with firm clicks, and the front numbering matched our switch ports exactly. The supplementary label sheet covered the odd cases where room names beat port numbers.
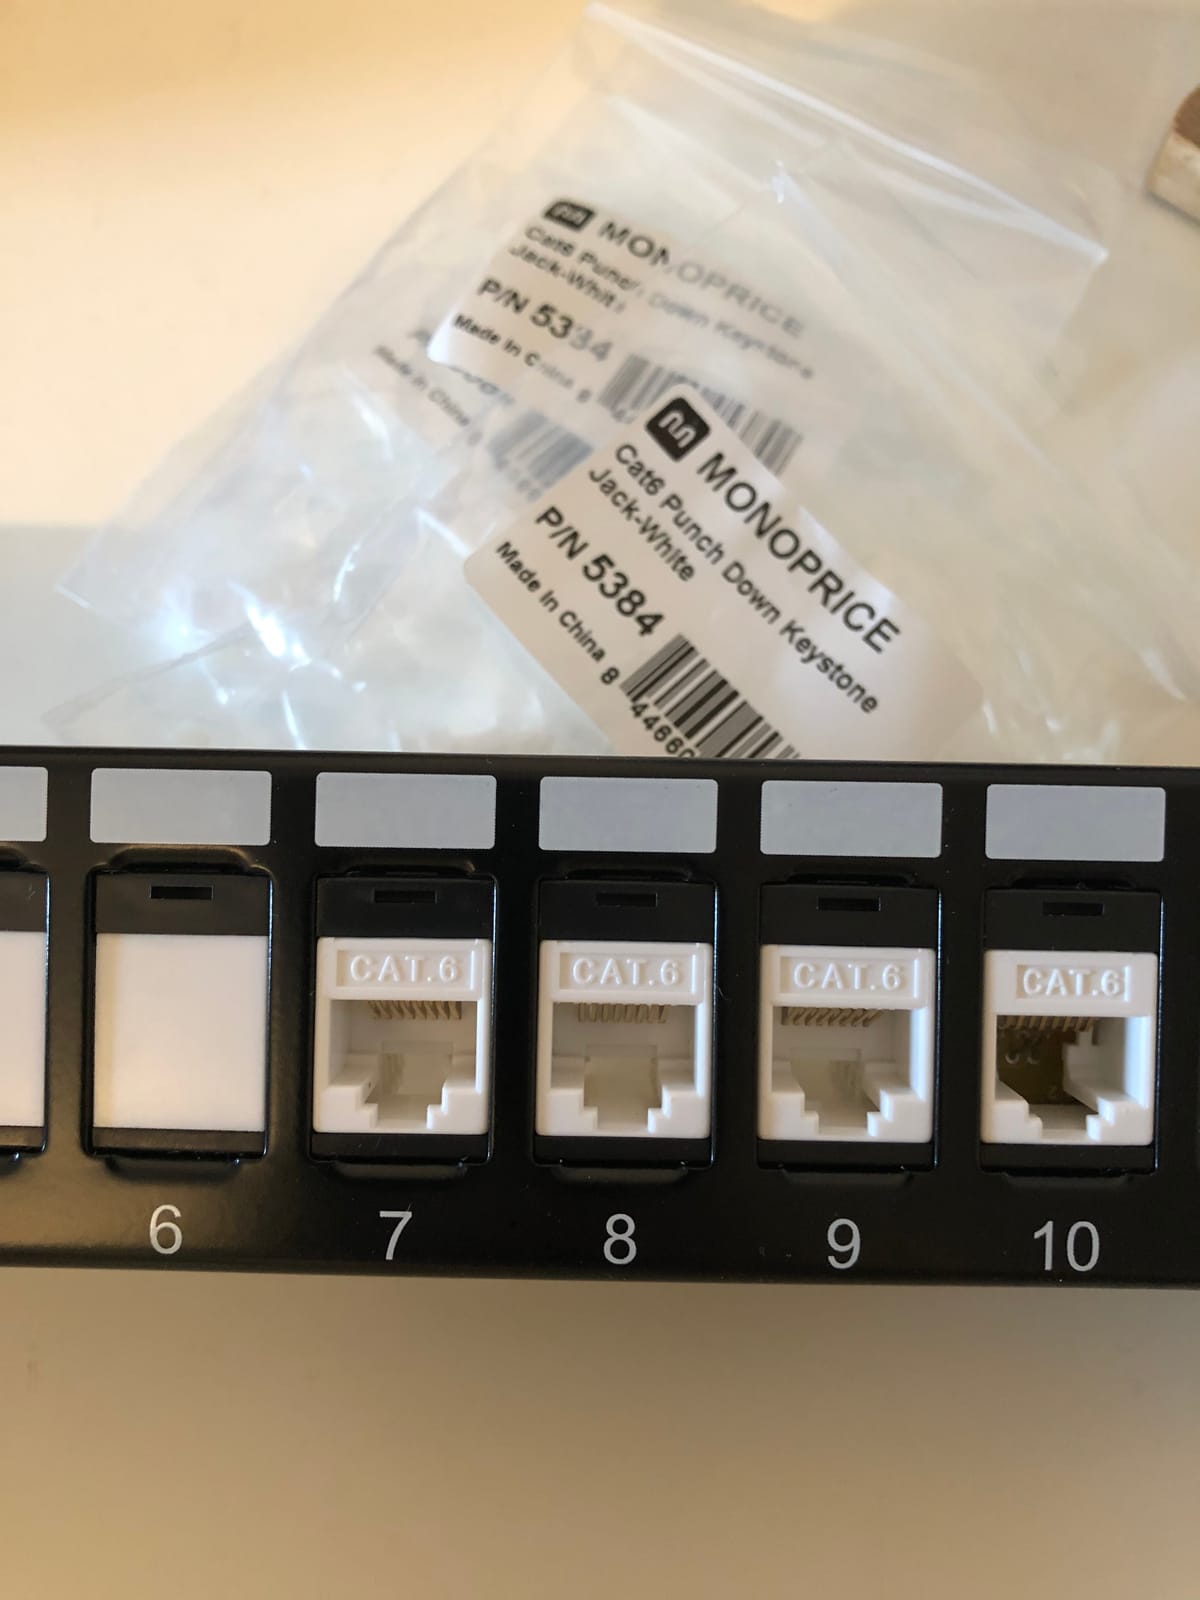
The SPCC steel housing feels solid in the hand and does not flex when you are pressing jacks into place. Compatibility is broad — our Leviton jacks seated just as cleanly as the TRENDnet ones recommended in the listing.
It supports Gigabit and 10G copper applications, so it will not be the bottleneck as your network speeds up. NDAA compliance matters mainly for government work, but it signals a level of supply-chain care.
Remember the panel arrives empty on purpose. Budget for jacks and a punch-down or toolless jack of your choosing, plus your own rack screws.
Blank Keystone or Pre-Loaded – Which Fits Your Plan?
Blank keystone wins when you want to choose your own jack quality, mix cable categories, or add non-ethernet ports. It is the flexible, future-proof route.
Pre-loaded panels make sense when every drop is the same category and you want one purchase to cover everything. If you hate fiddly work, skip to the Jadaol below.
What Else Do You Need to Buy With It?
Count your jacks first — 24 Cat6 keystones, a label maker or the included label sheet, and rack screws. Add a cable management bar behind the panel to keep the runs from sagging.
If you are buying toolless jacks, no punch-down tool is needed. Standard keystone jacks will want one, plus a wire stripper.
7. Jadaol 24-Port Pass-Through Patch Panel – The No-Punch-Down Pick
Jadaol [UL Listed] 24 Port Patch Panel Rackmount or Wall Mount 19-Inch 1U
24-port pass-through
Preloaded couplers
No punch-down needed
10Gbps rated
UL Listed
Pros
- No tools or punch-down required
- Preloaded with 24 couplers plus 1 spare
- Includes rear cable management bar
- Plug-and-play setup
Cons
- Requires pre-terminated RJ45 cables
- Not compatible with Ubiquiti Toolless 6U minirack
- Some users reported dead ports
This panel exists for people who never want to hold a punch-down tool. It comes preloaded with 24 RJ45 couplers plus a spare, so you plug your existing ethernet cables into the front and the back — done. We reterminated a media room in under twenty minutes without stripping a single wire.
Each port is a metal keystone coupler rated for 10Gbps, and the housing includes a rear cable management bar that keeps the cable bundle tidy. At 16 ounces, it mounts in any standard 19 inch rack or even on a wall bracket.
![Jadaol [UL Listed] 24 Port Patch Panel Rackmount or Wall Mount 19-Inch 1U | Cat 6 Network Panel Preloaded with 24 Keystone Couplers plus 1 Spare, 10Gbps Ethernet Panel with Cable Management & Back Bar customer photo 1](https://topgameserver.net/wp-content/uploads/2026/08/B0DQTG6BBK_customer_1.jpg)
The plug-and-play design has a real maintenance advantage too. When a port acts up, you swap the coupler instead of re-terminating a fixed panel, and the spare in the box covers exactly that scenario.
The catch is fundamental: this is not a punch-down panel. Every cable you feed through it must already have an RJ45 plug, so bulk solid-core runs that need field termination will not work here.
A small number of buyers reported defective ports, with one in ten failing on an unlucky unit. Test each port with a cheap cable tester before you close up the rack.
![Jadaol [UL Listed] 24 Port Patch Panel Rackmount or Wall Mount 19-Inch 1U | Cat 6 Network Panel Preloaded with 24 Keystone Couplers plus 1 Spare, 10Gbps Ethernet Panel with Cable Management & Back Bar customer photo 2](https://topgameserver.net/wp-content/uploads/2026/08/B0DQTG6BBK_customer_2.jpg)
Do Your Cables Have RJ45 Plugs Already?
If your house runs are pre-terminated or you are using store-bought patch cables, this panel is the fastest tidy-up available. It genuinely takes minutes.
If you are pulling bulk cable and terminating on site, choose the TRENDnet keystone or the Cable Matters punch-down instead. Couplers cannot accept bare wire.
Will It Play Nice With Your Rack?
It fits standard 19 inch racks and cabinets from any brand we tested. Owners specifically flag that it does not fit the Ubiquiti Toolless 6U minirack, so check your rails.
Depth needs are minimal since there are no punch-down blocks behind it. Shallow 2-post frames handle it without any strain.
8. Cable Matters 12-Port Mini Vertical Patch Panel – The Space-Saver
Cable Matters [UL Listed] Mini 10Gbps 12-Port Vertical Patch Panel
12-port vertical
10 inch compact
89D brackets included
Cat6a 10Gbps
PoE++ support
Pros
- Compact 10-inch design for tight spaces
- Includes 89D brackets and screws
- Color-coded IDC blocks
- Supports PoE and PoE++
Cons
- Jacks are not individually removable
- Tight cable routing behind panel
- Small label spaces
Sometimes there is no room for even a 1U panel. This 10-inch vertical panel was made for those spots — under stairs, inside a skinny structured wiring box, behind a wall panel in an apartment. We installed one in a hall closet where a full 19 inch panel physically could not fit.
Termination is a classic punch-down with color-coded IDC blocks that support both T568A and T568B standards. The gold-plated contacts and 83 percent five-star rating across 850-plus reviews speak to a panel that punches above its compact size.
![Cable Matters [UL Listed] Mini 10Gbps 12-Port Vertical Patch Panel | With 89D Bracket, Compact 10-Inch Patch Panel, 10 Gigabit Ethernet customer photo 1](https://topgameserver.net/wp-content/uploads/2026/08/B00UVQI8B6_customer_1.jpg)
It is rated for 10Gbps on Cat6a and plays nicely with Cat6, Cat5e, and Cat5. PoE support up to PoE++ means you can power access points and cameras straight through it.
The snap-on 89D brackets and included screws make mounting simple, and integrated cable tie slots keep the rear bundle from becoming a new mess. Front and rear port labeling helps you keep track from either side.
Its limits come from the small footprint: jacks are not individually removable, labels are tiny, and rear routing is snug. Plan your cable order before you start punching.
![Cable Matters [UL Listed] Mini 10Gbps 12-Port Vertical Patch Panel | With 89D Bracket, Compact 10-Inch Patch Panel, 10 Gigabit Ethernet customer photo 2](https://topgameserver.net/wp-content/uploads/2026/08/B00UVQI8B6_customer_2.jpg)
Where Does a Vertical Panel Actually Mount?
Anywhere a 10-inch footprint fits — the 89D brackets mount to a wall, plywood, or the side of a small enclosure. It is also at home inside structured media enclosures from home builders.
It does not need a rack at all, which is exactly the point. If you have no rails and no room, this is your panel.
Is 12 Ports Enough for Your Home?
For most homes, yes. Count your rooms with ethernet plus a couple of access points and cameras, and you usually land between 8 and 12 drops.
If you are already planning a homelab or whole-home camera system, go straight to a 24-port panel and never think about it again.
Buying Guide: How to Choose a Home Network Rack and Patch Panel
Choosing well the first time saves you from buying twice. Here is everything we wish someone had told us before our first rack build.
Start With Rack Units, Not the Rack Itself
One rack unit (1U) equals 1.75 inches of vertical rail space. Count your gear before you shop: a patch panel is 1U, most switches are 1U, a rackmount UPS takes 2U, and each shelf eats 1U.
A typical tidy home setup — panel, switch, UPS, one shelf — needs 5U of gear plus 1U of breathing room, which is why 6U cabinets are so popular. Add 2U of growth space for every year you plan to keep the rack.
Wall Mount, Floor Stand, or Open Frame?
Wall-mount cabinets hide everything behind a lockable door and free up floor space, but they need solid studs and honest weight math. Open frames maximize airflow and access but show every cable.
Floor-standing racks win in garages and basements where capacity matters more than looks. As a rule from experienced builders: put your heaviest gear at the bottom, because a top-heavy rack is a safety hazard waiting for a bumped corner.
Pick Your Panel Style: Keystone, Punch-Down, or Pass-Through
Blank keystone panels let you snap in any jack you like and mix categories or even coax in one unit. They are the flexible choice for custom builds.
Fixed punch-down panels terminate bare cable directly and keep the rear tidy, which is why they dominate professional installs. Pass-through panels need no tools at all, but every cable must arrive pre-terminated with an RJ45 plug.
Cable Management That Stays Tidy
Velcro beats zip ties, always — you will re-route cables, and cutting ties off a live switch is how outages happen. Leave a service loop of extra cable at each end so you can pull gear out without disconnecting everything.
Run your patch cables in a ladder pattern behind the rack, one velcro wrap every few inches. Keep patch cables short and color-coded by function: one color for uplinks, one for cameras, one for rooms.
Label Everything, Twice
Label both ends of every cable and match port numbers between your panel and your switch. A label maker costs little and saves a shocking amount of time when a port goes dark.
Skip the sticky notes and masking tape — they fall off within a summer. Printed labels or the sheets included with quality panels last for the life of the install.
Weight, Wall Strength, and Grounding
Check your rack’s weight capacity against your heaviest single device, not just the total. Deep UPS units are almost always the item that breaks the budget.
If you bond your rack to ground, do it at one point with a proper bonding strap, and never daisy-chain grounds through your equipment. Even a basic ground on a metal rack in a garage protects gear from static and nearby lightning induced surges.
Frequently Asked Questions
How do I set up a home network patch panel?
Mount the panel in your rack, label every port to match a room or device, then terminate each ethernet run onto its port. For a punch-down panel, strip the cable, match the wire colors to the T568B code on the block, punch down, and trim. For a keystone panel, terminate the jack first, then snap it into the port. Finish by running short patch cables from the panel to your switch and testing every port.
Where to put a patch panel in a rack?
Place the patch panel in the top 1U position of your rack with the switch directly below it. This keeps the short patch cables between them clean and leaves the lower, stronger slots for heavier gear like a UPS. If you use two panels, stack them together at the top with the switch immediately beneath.
Should I use a patch panel for home network?
Yes, if you have more than four or five wired runs. A patch panel terminates all your in-wall cables at one labeled point, so changes happen at the panel instead of by pulling equipment out. It also reduces wear on your switch ports, since you plug and unplug cheap patch cables rather than repunching solid-core runs.
What is the best way to organize patch panel cables?
Use a cable management bar directly behind the panel, bundle runs with velcro wraps every few inches, and leave a service loop of slack at both ends. Label both ends of every cable and match port numbers to your switch. Route cables in a ladder pattern with nothing crossing the front, and use short, color-coded patch cables for the final connection.
How to organize a home network rack?
Start loading from the bottom with the heaviest gear, place the patch panel at the top with the switch right under it, and keep the UPS low. Bundle rear cables with velcro, label everything at both ends, and leave at least 1U of free space for growth. Keep a service loop on every run so you can slide gear out without disconnecting it.
Final Thoughts on a Tidy Home Network
The best network racks and patch panels for a tidy home setup come down to your space, not your ambitions. The Tecmojo 6U cabinet hides everything behind lockable glass for most homes, the StarTech 6U frame is the grab-and-go classic, and the ECHOGEAR 10U carries the deep, heavy gear the others cannot.
On the panel side, the TRENDnet TC-KP24 keystone panel is the flexible pick we install most, the Jadaol pass-through skips the punch-down tool entirely, and the Cable Matters mini panel squeezes into spaces nothing else fits.
Whichever rack you choose, load heavy gear low, label both ends of every cable, and leave yourself room to grow in 2026. Your future self — the one troubleshooting a dead port at midnight — will thank you.