
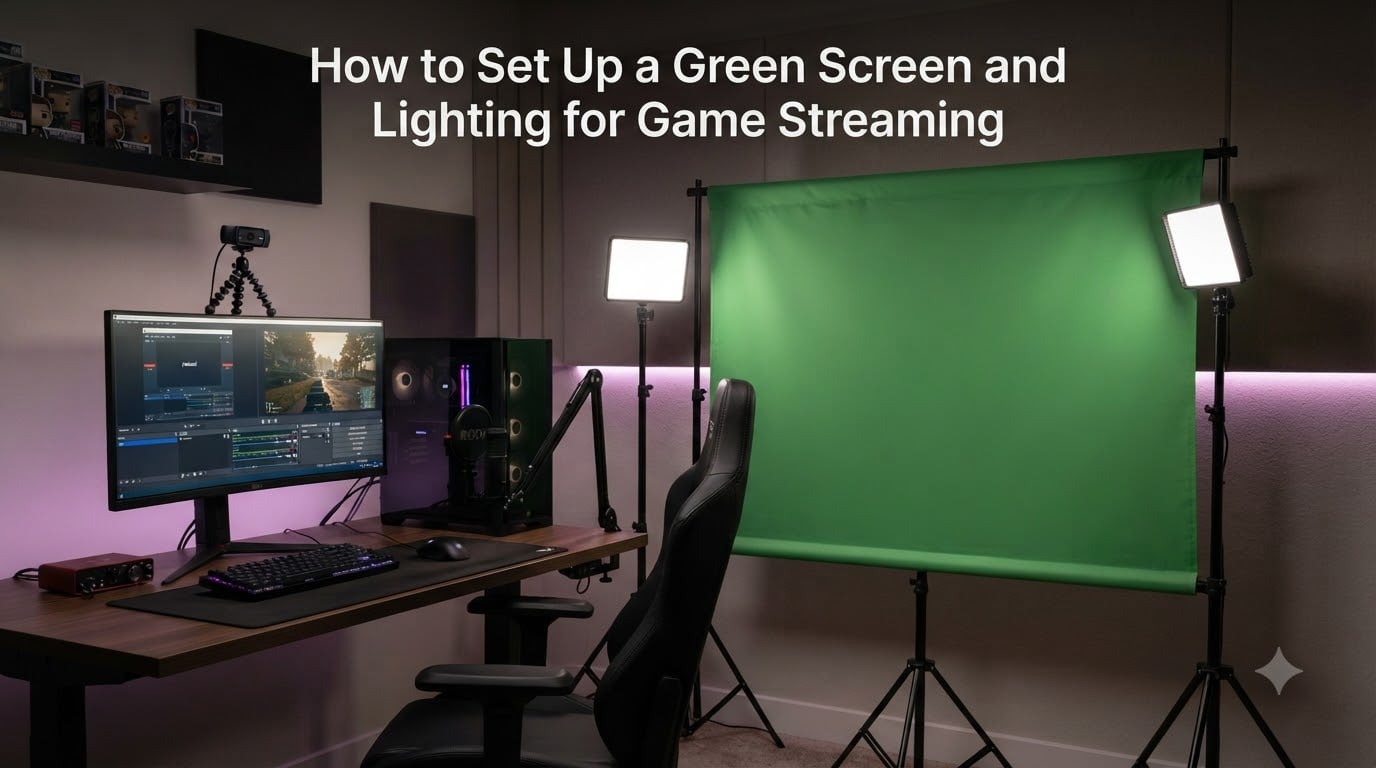
When I built my first game streaming setup in a tiny bedroom, I never expected a plain green sheet of fabric to completely change how my stream looked. A green screen swaps your messy real-world background for game art, branded overlays, or even gameplay footage — and the result looks like a professional broadcast. This guide walks through how to set up a green screen and lighting for game streaming the way I actually do it on stream, with no fluff and no gear you’ll never use.
I’ve tested everything from a 50-dollar pop-up backdrop to a painted wall, and I’ll show you what works, what doesn’t, and the specific OBS settings that make the magic happen.
Table of Contents
What Is a Green Screen and How Does It Work for Streaming?
A green screen is a solid-colored backdrop — almost always green — that your streaming software uses to detect and remove that single color in real time. Once the green is removed, your software fills the empty space with whatever background you choose, like a game overlay, your logo, or a virtual set.
This process is called chroma keying, and it’s the same technology used in Hollywood weather reports and feature films. Your software samples each pixel of your webcam feed, and if the pixel matches the green color closely enough, it makes it transparent. Then it layers your chosen background underneath.
Chroma Key Explained Simply
Think of chroma key like a digital stencil. Your streaming software (OBS Studio, Streamlabs, or similar) finds every pixel that looks “green enough” and cuts it out, leaving a hole where your background image shows through. The cleaner and more even your green backdrop, the cleaner this cut looks.
Why Green Instead of Other Colors
Green is used because digital camera sensors capture more green detail than red or blue, which means cleaner edges and less digital noise during keying. Green also sits opposite human skin tones on the color wheel, which makes it easier for software to separate you from the background without accidentally erasing parts of your face.
Why Game Streamers Use Green Screens
Most gamers don’t have a dedicated studio. The room behind your monitor usually has cables, laundry, posters, or that one shelf you’ve been meaning to organize for months. A green screen hides all of that in one click and replaces it with a clean, branded, on-brand background.
Beyond hiding clutter, green screens let you add dynamic overlays, alerts, and webcam frames that look like they were designed by a professional studio. They also let you switch backgrounds between games — fantasy art for an RPG, neon grids for a cyberpunk shooter, your guild logo for raid night.
If you’re streaming to Twitch or YouTube, a green screen setup also helps your channel stand out. Viewers scroll past dozens of webcam feeds with messy rooms; a polished backdrop with a custom border is a small upgrade that makes people stop and click.
Essential Equipment for a Game Streaming Green Screen Setup
You don’t need a Hollywood budget to get a clean key. Here’s what actually matters for a game streaming green screen setup.
Choosing the Right Green Screen
You have three main options: a collapsible pop-up screen, a fabric backdrop on a stand, or a painted wall. Pop-up screens are portable and store easily, which is great if you don’t have a dedicated streaming room. Fabric backdrops hang flat and produce the most even color. A painted wall is the cheapest permanent option if you have a free corner.
Whatever you choose, make sure the green is a true chroma key green (#00FF00 or close to it). Some fabrics lean too yellow or too teal, and those off-shades make keying noticeably harder.
Lighting You’ll Need
You need at minimum two lights: one for your green screen and one for yourself. The screen light should sit behind the screen or point straight at it to wash it evenly. Your key light should point at your face from in front of you. A third fill light is optional but helps if your room has hard shadows.
LED panels are the most popular choice because they run cool, last for years, and let you dial in brightness. Softboxes work too if you prefer a softer look.
Camera and Software Basics
Any modern webcam or DSLR that outputs a clean signal will work. OBS Studio is free and handles chroma keying beautifully. Streamlabs Desktop, vMix, and even Discord overlays also support it. Pick the one you already use for streaming — there’s no need to learn new software just for chroma key.
How to Set Up a Green Screen and Lighting for Game Streaming: Step-by-Step
This is the actual workflow I follow every time I rebuild my streaming setup, broken into six steps that go from physical gear to software settings.
Step 1: Mount or Hang Your Green Screen
Pull your green screen taut. Wrinkles are the number one reason chroma keys look terrible because they create shadows that confuse the keyer. If you’re using a fabric backdrop, use clamps or a tight frame. If you’re using a pop-up screen, lock the arms so it stands perfectly flat.
Position the screen 2 to 3 feet behind your chair. This space prevents shadows from your body falling onto the green and gives your software cleaner pixels to work with.
Step 2: Light the Screen First
Before you light yourself, light the screen. Place one or two lights pointing at the green from the sides or above at a 45-degree angle. The goal is even illumination across the entire surface with no hotspots and no shadows.
Walk in front of the screen and look at it through your camera’s preview. If you see bright spots or dark patches, adjust the lights until the green looks like one flat color.
Step 3: Position Yourself With Enough Distance
Stand or sit about 2 to 4 feet in front of the green. Closer than that and your body casts shadows on the backdrop. Farther than that and your room lighting may not reach your face properly.
If you have space, the community-validated sweet spot is roughly 10 to 15 feet between your back and the screen. Most bedroom setups can’t hit that, so aim for the closest distance that still keeps shadows off the backdrop.
Step 4: Add Key and Fill Lights on Yourself
Your key light should sit roughly 45 degrees off-axis from your face, slightly above eye level. This creates depth without flattening your features. A fill light on the opposite side at lower brightness removes the harsh shadow your key light creates.
If you wear glasses, angle your key light slightly higher than usual. Light bouncing off lenses is a major source of green spill and ruins otherwise clean keys.
Step 5: Configure OBS Chroma Key Settings
Open OBS, right-click your webcam source, choose Filters, then add a Chroma Key filter. Start with these baseline values: Similarity around 400, Smoothness around 80, and Key Color Spill Reduction around 100.
Adjust from there. If your edges look jagged, lower Similarity slightly. If you see a faint green halo around your head, raise Smoothness or increase Spill Reduction.
Step 6: Test, Iterate, and Go Live
Record a 30-second test clip with your background loaded. Watch it back and look for problems: green outlines on your hair, shadows on the backdrop, flickering edges when you move. Fix those one at a time before you go live.
I always run a private test stream on Twitch or YouTube before announcing a session. It’s the only way to see how your key holds up to real motion, real lighting changes, and your real streaming PC load.
Green Screen Lighting Techniques Every Streamer Should Know
Lighting is where 90 percent of game streamers go wrong. The screen itself can be perfect, but the wrong lights on your face will ruin everything.
Even Illumination on the Screen
Your green screen should look like a single, flat color under your camera. Hot spots from direct lighting create brightness differences the keyer sees as “less green” and refuses to remove. Diffuse your screen lights with softboxes or bounce them off the ceiling for the cleanest result.
Separating Subject From Background
Your key light and your screen light should never come from the same angle. If they do, your body and your backdrop blend together visually and the keyer has a hard time telling where you end and the screen begins. The standard setup: screen lights from the back, your lights from the front.
Controlling Color Spill
Color spill is the green tint your green screen reflects onto your face, hair, and clothes. To reduce it, increase the distance between you and the screen. Some streamers add a small magenta or purple light pointing at themselves — this counteracts the green cast and makes your skin tone look natural again.
This trick comes up constantly in r/Twitch and r/videography threads, and it’s the single cheapest way to make a chroma key look more professional.
Color Temperature Matching
All your lights should use the same color temperature. Mixing 5600K daylight LEDs with 3200K tungsten bulbs creates a mismatched look that’s hard to fix in software. Pick a temperature — most streamers go with daylight — and stick to it across every light in the room.
Camera Settings That Make Chroma Keying Easier
Your camera settings matter as much as your lighting. The cleaner the image you start with, the easier your keyer works.
Lower your exposure slightly so the green doesn’t blow out into white. Overexposed green reads as gray and refuses to key out cleanly. Aim for a histogram that peaks in the middle of the green channel without clipping.
Set a custom white balance that matches your lighting. Auto white balance shifts colors between frames, which makes your key flicker. Lock it once and leave it alone.
Turn off autofocus if your camera supports it. Auto focus hunts when you move, and that hunting motion shows up as edge flicker after the key is applied. Manual focus on your face, and you’re done.
Use a frame rate of 30 or 60 fps for streaming. Avoid exotic frame rates — most chroma key filters are tuned for standard values.
Common Green Screen Mistakes and How to Fix Them
Every streamer hits these problems at some point. Here’s how to troubleshoot them fast.
Shadows and Wrinkles
If you see soft dark patches on the green, your screen is too close or your fabric is loose. Move back, retighten the fabric, and add another light pointing at the shadowed area.
Green Spill on Face or Glasses
Green tint on your skin or reflective lenses means light is bouncing off the screen back onto you. Add more distance, raise your key light slightly above eye level, and consider that small magenta counter-light trick from the lighting section.
Uneven Keying
If parts of the green screen disappear cleanly but other parts stay visible, your lighting is uneven. Walk the screen with a light meter or your camera preview and fix dark or bright spots one at a time. Then re-adjust Similarity in OBS.
Clutter Showing Through
If your real room is leaking through the key, your Similarity setting is too low. Raise it in small steps until the background vanishes, but stop before your edges start to fray.
Budget-Friendly and DIY Green Screen Alternatives
You don’t need a professional kit to start. A 5-dollar green poster board from a craft store works for head-and-shoulders shots. A painted wall in chroma key green paint works for permanent setups. Even a green blanket clipped to a curtain rod can work in a pinch, as long as you pull it taut.
For lighting, LED panels under $30 are widely available and produce usable results for smaller streams. Two panels — one for the screen, one for your face — cover the minimum viable setup.
The biggest budget mistake is buying an expensive screen and cheap lights. Lights make a much bigger difference than the backdrop itself.
Game-Specific Tips for Twitch, YouTube, and Other Platforms
Twitch streamers should aim for a tighter webcam crop. A close-up face with green screen means less screen area to light and fewer keying problems. YouTube creators making longer videos can pull the camera back and use a wider backdrop with more overlay room.
If you stream on both Twitch and YouTube, test your key on both platforms. Each service re-encodes your video, and some compression settings expose green edge artifacts that didn’t appear in your raw OBS preview.
For mobile game streams or handheld console streams, consider a smaller pop-up green screen and a single battery-powered LED. The setup shrinks, but the principles stay the same: even light, enough distance, clean fabric.
Frequently Asked Questions About Green Screen Streaming
How to setup a green screen for streaming?
Mount a taut green backdrop 2 to 3 feet behind your chair, light it evenly with one or two lights, position a key light on your face, and configure a chroma key filter in OBS with Similarity around 400 and Smoothness around 80. Test, adjust, and go live.
How should I set up the lighting for a green screen?
Light the green screen first with one or two lights aimed at a 45-degree angle for even coverage. Then add a key light on yourself at a 45-degree angle from the front, with an optional fill light on the opposite side. Keep all lights at the same color temperature.
How do I set up the best lighting for streaming?
Use at least two lights: one key light pointed at your face from the front at a 45-degree angle, and a fill light at lower brightness on the opposite side to soften shadows. Diffuse the lights with softboxes or fabric for a smoother look on camera.
How does a green screen work for streaming?
Streaming software uses chroma key technology to detect the green color in your webcam feed and remove it in real time, then replaces it with your chosen virtual background. The cleaner and more even your green backdrop, the cleaner the final result.
How far should I stand from a green screen?
Sit or stand 2 to 4 feet in front of the green screen for typical bedroom setups. If you have more space, aim for 10 to 15 feet between your back and the screen for the cleanest key with no shadows.
Can I use a green screen without expensive lighting?
Yes. Budget LED panels under $30 each can produce a clean key for smaller streams. The most important factor is even lighting, not expensive gear. Two lights — one for the screen, one for your face — cover the minimum viable setup.
Final Thoughts on Your Green Screen Streaming Setup
Learning how to set up a green screen and lighting for game streaming comes down to three habits: light the screen before you light yourself, give yourself enough distance to prevent shadows, and always test before going live. Once those three habits are second nature, the rest is just dialing in OBS until your key looks clean.
Start with the minimum gear that works, then upgrade one piece at a time. Better lights, a tighter backdrop, a smarter webcam — each step gives you more polish without forcing a full rebuild. Before long, your stream will look like the professional broadcasts you once thought required a real studio.