
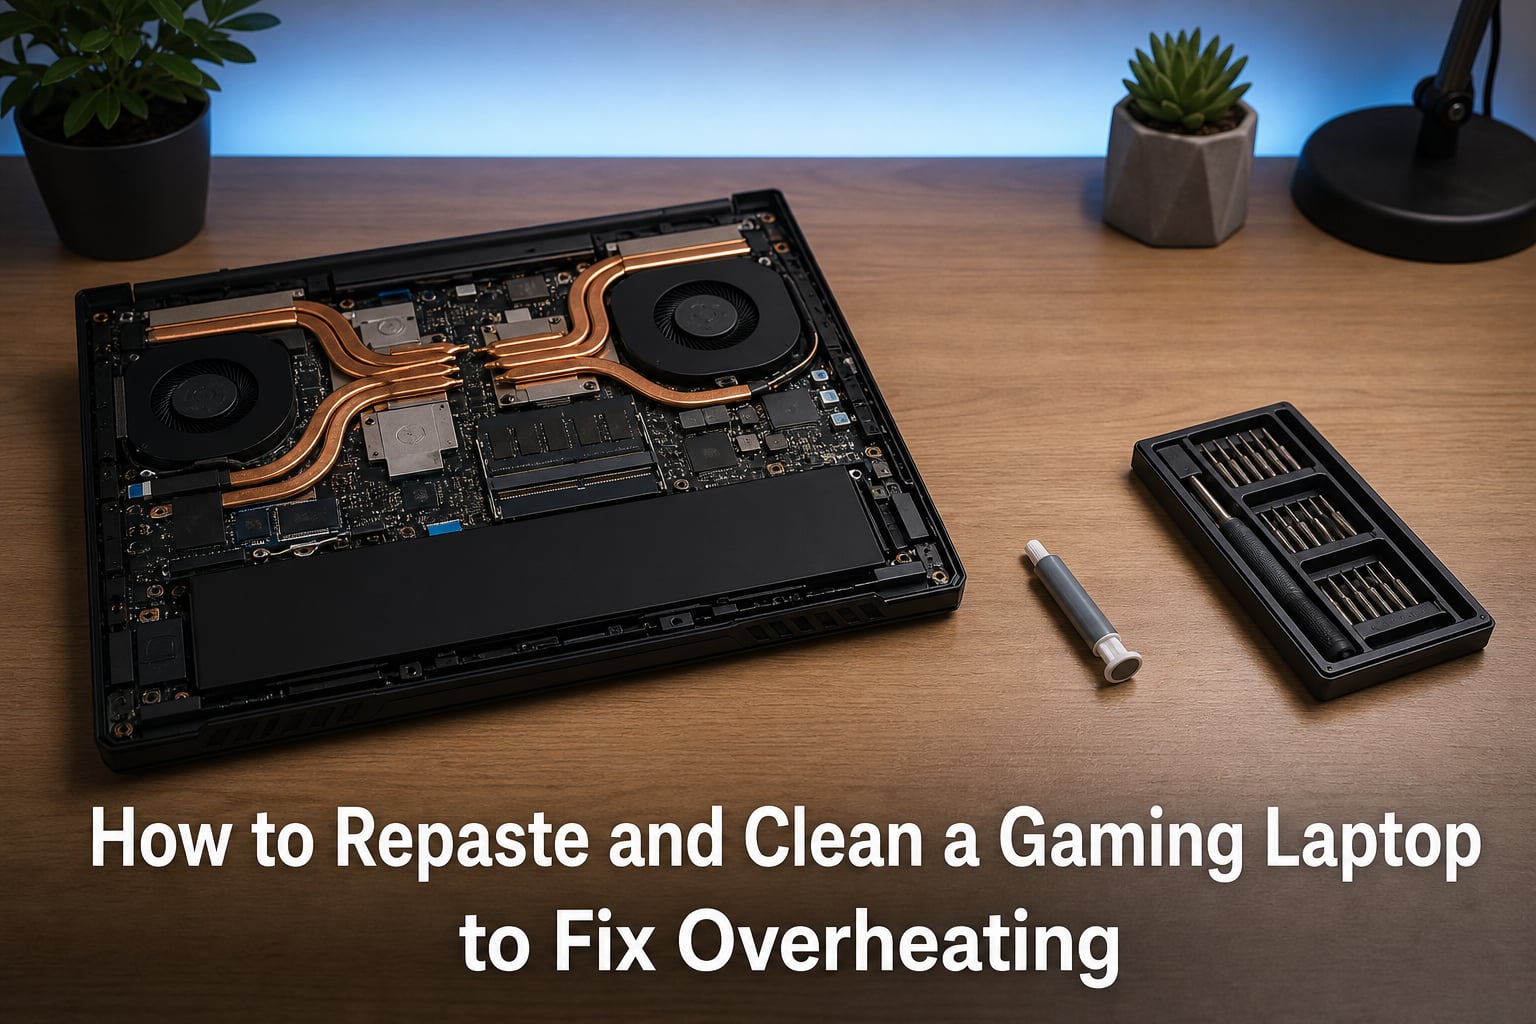
Your gaming laptop sounded like a jet engine last night. Frames dropped during a boss fight. The keyboard felt hot enough to warm your hands in winter. These are classic warning signs that your laptop’s cooling system is struggling, and the most effective fix is something many gamers never think about: cleaning the dust out and replacing the thermal paste.
In this guide, I’ll walk you through exactly how to repaste and clean a gaming laptop to fix overheating, step by step. We’ll cover why gaming laptops run hot in the first place, how to disassemble yours safely, clean out the dust, apply fresh thermal paste the right way, and reassemble everything without making the common mistakes that leave temperatures worse than before.
I’ve spent years working on gaming laptops, from budget rigs to high-end machines, and I’ve seen every overheating scenario imaginable. This guide pulls together what actually works, including temperature benchmarks, real-world results from the community, and the specific mistakes that ruin otherwise good repaste jobs.
Table of Contents
Why Gaming Laptops Overheat?
Gaming laptops overheat for two main reasons: dust buildup blocking airflow and thermal paste that has dried out and lost its ability to transfer heat. Understanding both causes helps you fix the problem at its root instead of just treating symptoms.
Thermal paste is a heat-conductive compound sandwiched between your CPU and GPU dies (the silicon chips) and the metal heatsink that sits above them. Its job is to fill the microscopic imperfections on both surfaces so heat transfers efficiently from the chip to the heatsink, where fans can blow it away. Over time, that paste dries out, cracks, and sometimes turns into a hard cement-like substance. When that happens, air pockets form between the chip and heatsink, and air is a terrible conductor of heat. Your temperatures climb, fans spin faster, and performance drops.
Gaming laptops are especially vulnerable to this problem because they pack desktop-level performance into a chassis a fraction of the size. A modern gaming laptop GPU might draw 150 watts or more, all concentrated on a die the size of a postage stamp. Compare that to a desktop card with a massive cooler and three fans, and you can see why gaming laptops operate on the edge of thermal limits. Sustained gaming sessions push these components at maximum heat output for hours at a time, which accelerates thermal paste degradation.
Dust is the second culprit, and it works in tandem with paste failure. Fine dust particles get pulled in through intake vents and accumulate on heatsink fins, fan blades, and internal surfaces. A thick layer of dust on your heatsink fins acts like a blanket, trapping heat inside instead of letting exhaust fans push it out. Many Reddit users on r/GamingLaptops report finding dust bunnies the size of a pea inside laptops just 18 months old.
The combination is brutal: dried paste means poor heat transfer from the chip to the heatsink, and dust means poor heat transfer from the heatsink to the outside air. Fixing both together is what brings temperatures back under control.
Signs Your Gaming Laptop Needs Repasting
Your gaming laptop will tell you when it needs a repaste and clean. You just need to recognize the signals before they lead to permanent hardware damage. Here are the signs I look for when diagnosing overheating laptops.
Temperatures above 90C during gaming. This is the most reliable indicator. If your CPU or GPU hits 90 degrees Celsius or higher during a gaming session, something is wrong with the cooling system. A healthy gaming laptop under load should sit between 75 and 85C. When temps consistently push past 90C, the laptop is thermal throttling, meaning it’s reducing performance to protect itself from damage.
Loud fan noise even at idle or light tasks. If your fans spin up loudly when you’re just browsing the web or watching a video, the cooling system is working overtime. This often means dust is blocking airflow or paste has degraded enough that the laptop runs hotter at baseline than it should.
Frame rate drops during gaming. When a CPU or GPU hits its thermal limit (usually around 95C), it automatically clocks itself down to generate less heat. You’ll see this as sudden frame drops, stuttering, or a game that runs smoothly for 20 minutes then becomes choppy. This is thermal throttling in action.
Hot chassis and keyboard areas. If the area above your keyboard or the bottom of the laptop feels uncomfortably hot to the touch, the internal cooling system isn’t dissipating heat properly. The WASD keys and the area near the exhaust vents are the first places you’ll notice this.
Your laptop is 2-3 years old and has never been serviced. Even without obvious symptoms, thermal paste degrades over time. Most community members on r/GamingLaptops recommend repasting every 2-3 years for gaming laptops, regardless of whether temperatures seem fine. Prevention is cheaper than replacement.
Random shutdowns under load. This is the most severe symptom. If your laptop powers off mid-game, it’s hitting a critical temperature threshold (usually around 105C) and shutting down to prevent the CPU or GPU from literally burning up. Do not ignore this sign. Stop gaming immediately and service the cooling system.
Safe Temperature Ranges for Gaming Laptops
Knowing the right temperature ranges helps you diagnose problems and measure whether your repaste was successful. Here are the benchmarks I use when evaluating gaming laptop thermals.
At idle (web browsing, watching videos, no heavy load), your CPU should sit between 45 and 55C, and your GPU between 40 and 50C. If idle temperatures are consistently above 60C, dust buildup or paste degradation is likely already underway.
Under gaming load, a well-functioning gaming laptop runs its CPU between 75 and 85C and its GPU between 70 and 82C. These are normal, expected temperatures for compact high-performance hardware. Anything in this range is perfectly fine during extended gaming sessions.
The danger zone starts at 90C. Between 90 and 95C, most gaming laptops begin thermal throttling, reducing clock speeds to manage heat. Performance drops noticeably, and the components are under stress. If your laptop hits 90C regularly, it needs a repaste and cleaning.
Above 95C, you’re in critical territory. Most CPUs and GPUs will throttle aggressively or shut down entirely around 95-105C to prevent permanent damage. Running at these temperatures for extended periods shortens the lifespan of your components and can cause instability, data corruption, or outright hardware failure.
To monitor temperatures, download HWiNFO64 or HWMonitor. Both are free and give you real-time temperature readings for every sensor in your laptop. Run one of these tools in the background while gaming to establish your baseline before and after repasting.
Tools and Materials Checklist
Before you open your laptop, gather everything you need. There is nothing worse than having your laptop half-disassembled on your desk and realizing you’re missing a critical tool. Here is the complete checklist I use for every repaste job.
Thermal paste. You need a quality non-conductive paste designed for laptops. Arctic MX-6 (or MX-4) is the most popular choice among the community because it’s easy to apply, non-conductive, and performs well. Thermal Grizzly Kryonaut offers slightly better performance for those pushing maximum overclocks. Avoid liquid metal unless you are experienced, as it is electrically conductive and can destroy your motherboard if it spills. A 4-gram tube is enough for 5-10 applications.
Isopropyl alcohol (90% or higher). This is your cleaning agent for removing old thermal paste. Higher concentrations evaporate faster and leave less residue. You can find 99% isopropyl alcohol at most pharmacies or electronics stores. Do not use rubbing alcohol with added water or fragrances.
Lint-free cloth or coffee filters. You need something that won’t shed fibers onto your CPU die. Coffee filters are surprisingly effective and cheap. Microfiber cloths work too. Avoid paper towels and tissues, which leave lint behind.
Precision screwdriver set. Gaming laptops use small Phillips (PH0 and PH1) and sometimes Torx (T5 and T6) screws. A quality precision screwdriver set with magnetic tips saves enormous headaches. The magnetic tip holds screws in place as you position them.
Plastic spudger or pry tool. You need this to safely pry open the bottom panel without scratching or denting it. Guitar picks also work well as improvised pry tools. Never use metal tools to pry laptop panels, as you can damage internal components or short something out.
Compressed air can. For blowing dust out of fans, heatsink fins, and vents. Hold the can upright to prevent liquid propellant from spraying onto components.
Anti-static wrist strap. Optional but recommended. Electrostatic discharge can kill laptop components instantly. A wrist strap connected to a grounded metal surface keeps you safe.
Screw organizer. A magnetic tray, ice cube tray, or even a labeled piece of cardboard with holes punched in it. Laptop screws come in different lengths, and putting a long screw in a short hole can pierce the motherboard. Organize them from the start.
Phone or camera. Take photos at every step of disassembly. When you’re putting everything back together, those photos are your roadmap.
Safety Precautions Before You Start
Working inside a laptop carries real risks, but following a few safety rules eliminates nearly all of them. These precautions are non-negotiable.
Disconnect the battery first. This is the single most important safety step. After removing the bottom panel, find the battery connector on the motherboard and unplug it before touching anything else. This prevents accidental shorts that can fry your motherboard. If your laptop has an external battery, remove it before opening the case at all.
Ground yourself. Static electricity can destroy laptop components without any visible sign of damage. Wear an anti-static wrist strap connected to a grounded metal surface, or touch a metal object before handling internal parts. Avoid working on carpet or wearing wool clothing.
Work in a clean, well-lit area. A clear desk with good lighting helps you see screw sizes, cable routing, and small components. Avoid working in cluttered spaces where screws can get lost.
Check your warranty status. Opening your laptop may void the warranty depending on the manufacturer and your region. Some brands like Lenovo and ASUS allow user-initiated RAM and storage upgrades without voiding the warranty, but deeper disassembly for repasting may still be restricted. Check your warranty terms if your laptop is still covered.
Never force anything. If a screw won’t come out, a connector won’t release, or a panel won’t pry open, stop. Forcing components is how ribbon cables get torn and plastic tabs get snapped. Take a breath, look for hidden screws, and try a different angle.
Step-by-Step: How to Disassemble Your Gaming Laptop
This is the core of the process. Follow these steps carefully, and take photos at each stage so reassembly goes smoothly. Every gaming laptop is slightly different, but the general sequence applies to nearly all models from ASUS ROG, MSI, Lenovo Legion, Acer Predator, Razer, and others.
Step 1: Power down completely. Shut down your laptop (do not sleep or hibernate), unplug the power adapter, and remove any connected USB devices, cables, and SD cards. Wait 5 minutes for all components to cool down fully before proceeding.
Step 2: Remove all bottom panel screws. Flip the laptop upside down on a soft surface. Remove every visible screw on the bottom panel. Pay close attention because screws come in different lengths. I cannot stress this enough: organize your screws by location. Use a screw organizer or draw a diagram of the bottom panel and place each screw in its corresponding spot. Some laptops hide screws under rubber feet or stickers, so check those too.
Step 3: Pry open the bottom cover. Insert your plastic spudger or pry tool into the seam between the bottom panel and the laptop chassis. Work your way around the perimeter slowly, gently popping each clip. You’ll hear small snaps as clips release, which is normal. Go slowly around the hinge area and near the IO ports, where the panel connects more firmly.
Step 4: Disconnect the battery immediately. Once the panel is off, locate the battery connector on the motherboard. It’s a wide, flat ribbon or plug connector. Gently pull it straight up or use a spudger to lift it. Do not skip this step. Press and hold the power button for 10 seconds to drain any residual charge from the capacitors.
Step 5: Locate the heatsink assembly. The heatsink is the metal structure with copper heat pipes running from the CPU and GPU to the exhaust fans. You’ll see a cluster of screws holding it down around the CPU and GPU dies. These screws often have small numbers stamped next to them (1, 2, 3, 4…) indicating the order for removal and installation.
Step 6: Remove heatsink screws in the correct order. Unscrew the heatsink screws in numerical order, starting from the highest number and working down (reverse of installation). If screws aren’t numbered, remove them in a criss-cross or star pattern to avoid warping the heatsink. Loosen each screw a quarter turn first, then remove them fully. This prevents the heatsink from being stressed unevenly.
Step 7: Lift the heatsink straight up. Gently lift the heatsink off the CPU and GPU dies. If it feels stuck, do not pry with metal tools. Gently twist it side to side to break the old paste seal, then lift straight up. Set the heatsink aside on a clean surface with the copper base facing up.
You’re now looking at the CPU and GPU dies, covered in old thermal paste. Time to clean everything.
How to Clean Old Thermal Paste Properly
Cleaning the old paste is just as important as applying the new stuff. Any residue left behind creates a barrier between the fresh paste and the metal surfaces, undermining the entire repaste. Here is the method I use to get dies spotless every time.
Soak a small section of your lint-free cloth or coffee filter with isopropyl alcohol (90% or higher). Gently wipe the old paste off the CPU die, GPU die, and the copper base of the heatsink. Wipe in one direction, not in circles, to lift the paste away rather than spreading it around.
The first wipe will smear the paste around. That’s normal. Use a fresh section of cloth with more alcohol and wipe again. Repeat this process 3-5 times until both the dies and heatsink base are completely clean and shiny. You’ll know you’re done when the cloth comes away with zero gray or white residue.
Be patient with old, hardened paste. Many community members report that paste from laptops 3+ years old can be rock-hard and cemented to the die. Let the alcohol soak into the hardened paste for 30-60 seconds before wiping. This softens it and makes removal much easier. Never use metal scrapers, razor blades, or fingernails to scrape paste off a bare die. The silicon is fragile, and even light scratching can ruin the chip.
Clean the heatsink base too. The copper plate that contacts the CPU and GPU will have paste residue as well. Clean it just as thoroughly as the dies. Check for any thermal pads on the heatsink that cover VRAM chips or VRM components. If these pads are still intact and in good shape, leave them in place. If they’re crumbling or torn, replace them with fresh thermal pads of the same thickness.
Once everything is clean, avoid touching the die surfaces or the heatsink base with your bare fingers. Skin oils leave residue that degrades thermal transfer. The surfaces should look like polished metal with zero streaks or spots.
How to Clean Dust from the Cooling System
With the heatsink removed, you have direct access to the fans and heatsink fins. This is the perfect time to clear out all the dust that’s been choking your airflow. A dusty heatsink can negate even a perfect repaste.
Blow out the heatsink fins. Hold your compressed air can upright and blow air through the heatsink fins from the inside out. You’ll see a surprising amount of dust fly out. Hold the fins steady with your other hand to prevent bending them. Work along the entire length of the fin stack on both the CPU and GPU sides.
Clean the fan blades. Hold the fan stationary with your finger to prevent it from spinning, then blow compressed air onto the blades. Letting fans spin freely from compressed air can damage the bearings or generate back-current that harms the motherboard. Wipe visible dust off the fan housing with a dry cloth if needed.
Clear the exhaust vents. Blow compressed air through the exhaust vents on the side and rear of the laptop. Dust tends to accumulate here in thick mats that block hot air from escaping. You can also use a soft brush to gently loosen stubborn dust before blowing it out.
Check the intake vents. Flip the laptop over (carefully, with the bottom panel off) and blow air through the intake vents on the bottom. These draw in cool air, and if they’re blocked, the entire cooling system starves for airflow.
Inspect the heat pipes. While you’re in there, visually inspect the copper heat pipes for any dents, cracks, or discoloration. A damaged heat pipe won’t transfer heat effectively and may need replacement. Also check that the thermal pads covering VRAM and VRM components are making good contact with the heatsink.
How to Apply New Thermal Paste Correctly
This is where most people go wrong. Too much paste, too little paste, or uneven application can leave your temperatures worse than before. The application method matters, and for gaming laptops, the approach differs slightly from desktop CPUs.
How much paste to use. Less than you think. For laptop CPUs and GPUs, you want a small amount roughly the size of a grain of rice or a small pea. The paste only needs to fill the microscopic gaps between the die and heatsink. When you tighten the heatsink down, the pressure spreads the paste into a thin, even layer. Too much paste creates a thick layer that actually insulates the chip instead of conducting heat.
Where to apply it. Place the paste directly in the center of the CPU die and the GPU die. For elongated dies (common on laptop GPUs), a thin line of paste along the center works better than a single dot. The goal is coverage of the entire die surface when the heatsink presses down.
Do not spread it manually. Many guides suggest spreading the paste with a card before installing the heatsink. For laptop repastes, skip this step. Let the heatsink pressure do the spreading. Manual spreading traps tiny air bubbles that reduce thermal transfer. Just place the right amount in the center and let physics handle the rest.
For non-conductive pastes like Arctic MX-6 or MX-4, a slightly larger amount is more forgiving because excess paste won’t cause electrical shorts. For conductive compounds like liquid metal, precision is critical and any spillage onto the motherboard can be catastrophic. If you’re a beginner, stick with non-conductive paste.
Installing the heatsink. Lower the heatsink straight down onto the dies without sliding or twisting it. Sliding smears the paste off-center. Once the heatsink is resting on the dies, insert the screws and tighten them following the numbered sequence (1, 2, 3, 4…) or in a star/cross pattern if unnumbered.
Tighten gradually and evenly. Screw each one in until just finger-tight, going through the sequence. Then go through the sequence again and give each screw a final quarter turn. Do not overtighten, as this can warp the heatsink, crack the die, or strip the screw threads. The goal is even pressure across the entire die surface so the paste spreads uniformly.
What the paste should look like. After tightening, if you peek at the edge of the die, you should see a thin, even layer of paste with the heatsink metal nearly visible through it. If paste is oozing out in large quantities, you used too much. Clean it up with alcohol and start over with less.
Step-by-Step: Reassembly Instructions
Putting everything back together is the reverse of disassembly, but a few details deserve attention. This is where having those reference photos pays off.
Step 1: Double-check the heatsink. Before moving on, verify that all heatsink screws are tight in the correct order and that no thermal paste has spilled onto surrounding components. Confirm that all thermal pads are properly seated on VRAM and VRM chips.
Step 2: Reconnect any fan cables that you may have disconnected during disassembly. Some laptops have fan connectors that need to be unplugged to remove the heatsink. Make sure these are reconnected securely.
Step 3: Reconnect the battery. Plug the battery connector back into the motherboard. Make sure it’s fully seated and the clip is engaged.
Step 4: Replace the bottom cover. Align the bottom panel with the chassis and press down around the perimeter to re-engage the clips. You’ll hear snaps as each clip locks into place.
Step 5: Reinstall all bottom screws. Using your screw organizer or reference photos, reinstall every screw in its original position. Double-check that no screws are leftover. If you have an extra screw, something didn’t get reinstalled. Different length screws in the wrong holes can damage the motherboard or puncture the battery.
Step 6: Power on and verify. Plug in the power adapter and turn the laptop on. If it doesn’t boot, disconnect power, reopen the case, and check that the battery connector and any fan cables are properly seated. Once it boots successfully, you’re ready to test temperatures.
Testing and Temperature Benchmarks After Repasting
A repaste without before-and-after temperature measurements is incomplete. You need to know whether your work actually improved cooling, and the only way to know is to test. Here’s my testing process.
Measure your “before” temperatures first. If you haven’t already, run a temperature monitoring tool (HWiNFO64 or HWMonitor) while gaming for 15-20 minutes before disassembling your laptop. Record the maximum CPU and GPU temperatures. This is your baseline for comparison.
Test after reassembly. Once your laptop is back together and booted up, run the same monitoring tool and launch the same game or stress test. Play for 20-30 minutes to let temperatures stabilize. Record the maximum CPU and GPU temperatures.
Expected improvement. A successful repaste and cleaning typically reduces temperatures by 10 to 20 degrees Celsius under load. Community members on r/GamingLaptops regularly report drops from the mid-90s down to the high 70s or low 80s. If your temperatures only dropped by 2-5 degrees, something went wrong. Common culprits are too much paste, uneven heatsink pressure, or a heatsink that wasn’t fully clean.
Run a proper stress test. For a more controlled test, use Cinebench R23 for CPU stress testing or run a demanding game like Cyberpunk 2077 or Red Dead Redemption 2 with settings maxed out. These push the cooling system to its limits and reveal whether your repaste holds up under sustained load.
Check both CPU and GPU. If you repasted both chips, verify temperatures on both. Sometimes the CPU shows great improvement while the GPU remains hot, which could mean the GPU die needs more paste or the heatsink isn’t making even contact across both chips.
Listen to the fans. After a successful repaste, fans should run quieter and at lower RPMs under the same workload. If fans are still screaming at maximum speed, temperatures are still too high and you should re-examine your work.
Common Mistakes to Avoid
I’ve seen these mistakes ruin countless repaste jobs. Some leave temperatures unchanged, others actually make things worse, and a few can permanently damage your laptop. Learn from others’ errors.
Using way too much thermal paste. This is the number one mistake. More paste does not mean better cooling. In fact, a thick layer of paste acts as an insulator, trapping heat against the die instead of transferring it to the heatsink. Multiple Reddit users have reported that some repair shops apply entire tubes of paste, leaving temperatures worse than before. Use a grain-of-rice amount, period.
Tightening the heatsink unevenly. If you tighten one corner fully before touching the others, the heatsink tilts and traps air on the opposite side. Always tighten in the numbered sequence or star pattern, going around multiple times with gradual pressure. This ensures the heatsink sits perfectly flat against the die.
Forgetting to disconnect the battery. Working inside a laptop with the battery connected is asking for a short circuit. One slip of a screwdriver and you can fry the motherboard. Disconnect the battery first, every time, no exceptions.
Using electrically conductive paste near exposed components. Liquid metal pastes like Thermal Grizzly Conductonaut offer excellent thermal performance but are electrically conductive. A single drop that runs off the die onto the motherboard can short circuit components instantly. Unless you have experience and are willing to take that risk, use non-conductive paste. Many laptop manufacturers also use silicon-based protective coating around dies on liquid metal models, which needs careful handling.
Losing track of screw positions. Gaming laptops use screws of different lengths in the bottom panel and heatsink. A screw that’s too long can pierce through the motherboard or puncture the battery. A screw that’s too short won’t hold the heatsink firmly against the die, creating air gaps. Photograph your screws and organize them from the moment you remove the first one.
Not cleaning thoroughly enough. Leaving old paste residue on the die or heatsink means the new paste sits on top of a barrier instead of making direct contact with metal. Take the extra two minutes to clean until the cloth shows zero residue. Your temperatures will reflect the effort.
Sliding the heatsink during installation. When lowering the heatsink onto freshly applied paste, sliding it even slightly pushes the paste off-center. Lower it straight down, contact the dies, then screw it in. No lateral movement.
Prevention: How to Keep Your Gaming Laptop Cool
A repaste fixes the immediate problem, but good maintenance habits prevent overheating from returning too quickly. Here are the practices I recommend to every gaming laptop owner.
Elevate your laptop. Gaming laptops pull cool air from the bottom and exhaust it out the sides or rear. If the laptop sits flat on a desk, the intake vents are partially blocked. Use a laptop stand, a cooling pad, or even just prop up the rear with a book to improve airflow underneath.
Blow out the vents monthly. A quick blast of compressed air through the intake and exhaust vents every month prevents dust from accumulating into the thick mats that kill airflow. This 30-second task extends the time between full repaste jobs significantly.
Use a cooling pad for extended sessions. Active cooling pads with built-in fans can reduce temperatures by 3-7 degrees Celsius during long gaming sessions. They’re especially helpful for laptops with bottom-mounted intake vents. Look for one with adjustable fan speed and a metal mesh surface for maximum airflow.
Repaste every 2-3 years. Thermal paste degrades over time, even under ideal conditions. For gaming laptops that run hot daily, plan on a repaste every 2 years. For lighter use, every 3 years is sufficient. Mark it on your calendar.
Manage your fan curves. Most gaming laptop brands offer control software (ASUS Armoury Crate, MSI Dragon Center, Lenovo Vantage) that lets you adjust fan speeds. Setting a more aggressive fan curve keeps temperatures lower by spinning fans up sooner. Yes, it’s louder, but lower temperatures protect your hardware.
Never game on soft surfaces. Beds, couches, pillows, and blankets block intake vents completely. The laptop suffocates and temperatures spike within minutes. Always game on a hard, flat surface.
DIY vs Professional Repaste Service
Not everyone should attempt a laptop repaste themselves. The decision depends on your comfort level, the complexity of your laptop, and the risk you’re willing to accept. Here’s how I break down the choice.
DIY makes sense when you’re comfortable with small screwdrivers, your laptop has a straightforward design (most mainstream gaming laptops from ASUS, MSI, and Lenovo qualify), and your warranty has already expired. The cost is minimal (thermal paste and alcohol, roughly $15-25 total), and you learn a valuable skill. The satisfaction of dropping your temps 15 degrees with your own hands is hard to beat.
Seek professional help when your laptop is still under warranty that covers repasting, your laptop has an unusually complex disassembly (Razer Blade and some thin-and-light gaming laptops require near-complete teardown to reach the heatsink), or you want to use liquid metal and aren’t confident in the application. A professional service also makes sense if you’ve attempted a repaste and temperatures didn’t improve, as the issue may be more complex than paste degradation.
Beware of low-quality services. Multiple community members on r/GamingLaptops have reported paying for professional repaste services that made temperatures worse. The most common complaint is technicians applying excessive paste, sometimes nearly an entire tube. If you do use a service, ask about their paste and application method beforehand, and test temperatures yourself after the service.
Cost considerations. A DIY repaste costs $15-25 for materials. Professional repaste services typically charge $50-150 depending on the laptop and the shop. Factor in shipping costs if you’re mailing the laptop to a service center. For most gamers with a standard gaming laptop, DIY is the clear choice financially.
FAQs
How do I fix my gaming laptop from overheating?
To fix a gaming laptop that overheats, clean dust from the fans and heatsink fins with compressed air, replace the old dried thermal paste between the CPU/GPU dies and the heatsink using quality non-conductive paste like Arctic MX-6, ensure the heatsink is tightened evenly in the correct screw order, and improve airflow by elevating the laptop or using a cooling pad. A proper repaste and cleaning typically reduces temperatures by 10-20 degrees Celsius.
How do you clean a laptop to stop overheating?
To clean a laptop and stop overheating, power it down, remove the bottom panel, disconnect the battery, then use compressed air to blow dust out of the heatsink fins, fan blades, intake vents, and exhaust vents. Hold fans stationary while blowing air to prevent bearing damage. For deeper cleaning, remove the heatsink, clean old thermal paste from the CPU and GPU dies with 90% or higher isopropyl alcohol on a lint-free cloth, and apply fresh thermal paste before reassembly.
Can an overheated laptop be fixed?
Yes, an overheated laptop can almost always be fixed. The two most effective solutions are cleaning accumulated dust from the cooling system and replacing degraded thermal paste. In most cases, these two maintenance tasks reduce temperatures by 10-20 degrees Celsius. If the laptop still overheats after cleaning and repasting, the problem may be a failing fan, damaged heat pipe, or blocked exhaust vent that requires component replacement.
Is 80 C too hot for a CPU laptop?
No, 80 degrees Celsius is not too hot for a gaming laptop CPU under load. During gaming or other heavy workloads, CPU temperatures between 75 and 85 degrees Celsius are normal and safe for gaming laptops. Temperatures above 90 degrees indicate a cooling problem, and above 95 degrees is the danger zone where throttling and shutdown can occur. At idle, your laptop CPU should sit between 45 and 55 degrees Celsius.
How often should I repaste my gaming laptop?
You should repaste your gaming laptop every 2 to 3 years. Gaming laptops run hotter than standard laptops due to high-power CPUs and GPUs in compact chassis, which accelerates thermal paste degradation. If you notice temperatures rising above 90 degrees Celsius during gaming, loud fan noise at idle, or frame rate drops from thermal throttling, repaste sooner regardless of how long it has been.
Can I use too much thermal paste?
Yes, using too much thermal paste is the most common mistake people make when repasting a laptop. Excess paste creates a thick layer that acts as an insulator rather than a conductor, trapping heat against the CPU or GPU die. This can result in temperatures higher than before the repaste. The correct amount is roughly the size of a grain of rice placed in the center of the die. The heatsink pressure spreads it into a thin, even layer.
Conclusion
Learning how to repaste and clean a gaming laptop to fix overheating is one of the most valuable skills any gamer can develop. The process comes down to five core steps: disassemble safely with the battery disconnected, clean old paste thoroughly with isopropyl alcohol, clear all dust from fans and heatsink fins, apply a grain-of-rice amount of fresh non-conductive thermal paste, and reassemble with even heatsink pressure in the correct screw order.
The results speak for themselves. A proper repaste and cleaning typically drops temperatures 10-20 degrees Celsius, eliminates thermal throttling, quiets fan noise, and extends the life of your hardware. Most gaming laptops need this maintenance every 2-3 years, and the entire job costs under $25 in materials.
Take your time, follow each step carefully, organize your screws, and test your temperatures before and after. Your gaming laptop, your frame rates, and your ears will thank you.