
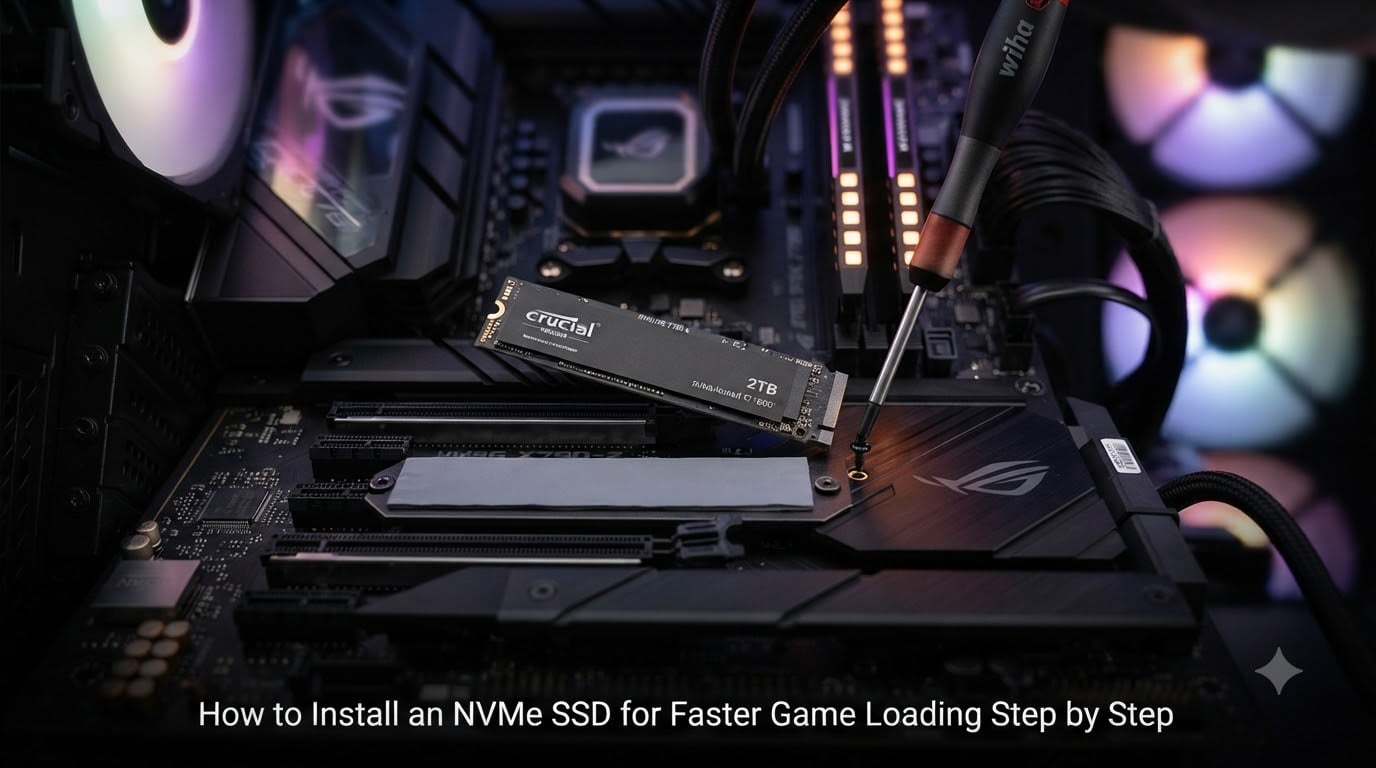
If your games take too long to load, an NVMe SSD is one of the simplest upgrades you can make to your gaming PC. These drives use the PCIe bus to deliver speeds five to seven times faster than a SATA SSD, and far beyond what any spinning hard drive can manage. The result is shorter loading screens, smoother texture streaming in open-world games, and a system that boots in seconds rather than minutes.
I have installed NVMe SSDs in over a dozen gaming builds, and the process is genuinely simple once you understand what to look for. You do not need power cables or data cables. You need about 15 minutes, a small screwdriver, and a bit of patience with that one tiny mounting screw everyone loses at least once.
This guide walks through every step of how to install an NVMe SSD for faster game loading, step by step. We cover compatibility checks, physical installation, BIOS configuration, Windows formatting, and the optimization tricks that make the biggest difference in real game load times.
Table of Contents
Why Install an NVMe SSD for Gaming in 2026?
Yes, NVMe SSDs load games faster. The improvement is most noticeable in titles with large open worlds, dense textures, and long initial load sequences. Games like Cyberpunk 2077, Starfield, and Microsoft Flight Simulator benefit from the higher sequential read speeds that NVMe drives deliver over the PCIe interface.
NVMe stands for Non-Volatile Memory Express. It is a protocol designed specifically for flash storage connected through the PCIe bus on your motherboard. A typical SATA SSD peaks around 550 MB/s sequential reads. A PCIe Gen 4 NVMe SSD can hit 7,000 MB/s or more. That is not a marginal improvement.
For gaming specifically, the benefit goes beyond a single number. Faster random read performance means the game engine can pull scattered texture and asset files without stutter. PCIe Gen 4 and Gen 5 NVMe drives also support Microsoft DirectStorage, which lets the GPU decompress game assets directly and reduces CPU overhead during asset streaming.
Here is a quick comparison to put the speeds in context:
HDD (spinning drive): 100 to 200 MB/s sequential reads, 1 MB/s random 4K reads
SATA SSD: up to 550 MB/s sequential reads, 90 to 100 MB/s random 4K reads
PCIe Gen 4 NVMe SSD: up to 7,400 MB/s sequential reads, 800 to 1,000 MB/s random 4K reads
PCIe Gen 5 NVMe SSD: up to 14,000 MB/s sequential reads in the newest drives
You will not always see a 10x improvement in game load times from a 10x improvement in sequential speed. Game engines are limited by CPU processing and asset decompression. But you will see meaningful gains, especially when moving from an HDD or a slower SATA SSD to a modern NVMe drive.
What You Need Before Installing an NVMe SSD
The tools list is short. The Reddit buildapc community consistently confirms that the actual installation takes only a few minutes, and most of that time is spent locating the mounting screw. Here is everything you need:
Your NVMe SSD in the correct M.2 2280 form factor
A Phillips #1 or #0 magnetic screwdriver
The M.2 standoff and screw that came with your motherboard
A clean, flat workspace with good lighting
Your motherboard manual for slot identification
That magnetic screwdriver recommendation is not a luxury. The M.2 mounting screw is roughly the size of a grain of rice, and a magnetic tip saves you from dropping it inside your case where it can short components. One buildapc user put it simply: a long magnetic screwdriver will help a lot.
If your NVMe SSD includes a heatsink, set it aside for now. We cover heatsink installation in a dedicated section later. Some motherboards also ship with pre-installed M.2 heatsinks, in which case you should not stack a second heatsink on top.
One thing you do not need is anti-static wrist straps in most home environments. Just touch a grounded metal surface before handling components, avoid working on carpet, and keep the SSD in its anti-static bag until you are ready to install it.
How to Check M.2 Slot Compatibility on Your Motherboard
Not every M.2 slot supports NVMe SSDs. This is the single most common compatibility mistake, and it is worth 10 minutes of checking before you buy or install anything. M.2 is a physical form factor. NVMe is a protocol that runs over PCIe lanes. Some older or budget motherboards only support SATA M.2 SSDs in their M.2 slots.
Open your motherboard manual and look for the storage section. You are looking for entries that mention PCIe NVMe, M.2 PCIe, or specific PCIe generation support. If your manual only references SATA M.2 SSDs, that slot will not work with an NVMe drive.
Next, check the M.2 key type. NVMe SSDs use the M key, which has a notch on the right side of the connector when looking at the drive from the contact edge. SATA M.2 SSDs use the B key with a notch on the left. Some drives are B+M keyed with two notches and will work in either slot type, but at SATA speeds only.
PCIe generation matters for performance but not for basic functionality. A PCIe Gen 4 NVMe SSD will work in a PCIe Gen 3 M.2 slot, but it will be limited to Gen 3 speeds (around 3,500 MB/s instead of 7,000 MB/s). The drive is backwards compatible. You just will not get full speed.
If your motherboard has multiple M.2 slots, check which one supports the highest PCIe generation. On many boards, only the top slot runs at Gen 4 or Gen 5 speeds, while the second slot shares lanes with the graphics card or runs at a lower generation. Check the manual for any notes about lane sharing before you decide which slot to use.
For laptop users, the process is similar but you must also confirm the laptop supports NVMe and that there is physical space. Some ultra-thin laptops solder the SSD to the board or use proprietary formats. Check your laptop service manual or the manufacturer support page before purchasing.
Step-by-Step NVMe SSD Installation Guide
This is the core of how to install an NVMe SSD for faster game loading, step by step. Follow each step in order and take your time on the physical handling. The whole process should take 10 to 20 minutes.
Step 1: Power Down and Unplug Your PC
Shut down your computer completely through the operating system. Do not use sleep or hibernate. Once the system is off, switch off the power supply using the toggle on the back of the unit, then unplug the power cable from the wall.
Press the power button on your case once after unplugging. This drains residual charge from the capacitors. You may see the fans twitch briefly, which confirms the power is fully discharged.
Step 2: Open the Case and Locate the M.2 Slot
Remove the side panel of your case. The M.2 slots are usually located between the CPU socket and the graphics card, or near the bottom edge of the motherboard. They are flat horizontal slots, not the larger vertical PCIe slots used for graphics cards.
If a graphics card is blocking the M.2 slot, you will need to remove it. Unscrew the retention bracket at the back of the case, press the PCIe release latch on the motherboard slot, and gently pull the card straight out. Place it on a clean surface away from static.
Check whether your motherboard has a pre-installed M.2 heatsink covering the slot. If so, unscrew and remove it carefully. Some boards ship with a thermal pad already attached to the underside of the heatsink. Keep that pad intact.
Step 3: Position the Standoff
The standoff is a small brass post that sits in a hole near the end of the M.2 slot. It determines where your SSD will rest. M.2 2280 drives (the most common gaming NVMe size) need the standoff in the position marked 2280 on the motherboard.
If your board supports multiple lengths (2242, 2260, 2280, 22110), unscrew the standoff using needle-nose pliers or a small wrench and reposition it to the 2280 hole. Tighten it finger-snug. Do not overtighten.
Step 4: Insert the NVMe SSD
Remove the SSD from its anti-static bag. Hold it by the edges only, avoiding the gold contacts and the chips on top. Align the notch on the SSD connector with the ridge inside the M.2 slot.
Insert the SSD into the slot at a slight 30-degree angle. The connector goes in first, and the drive should slide in smoothly with light pressure. If it does not seat easily, do not force it. Recheck the orientation of the notch.
One buildapc user described the motion perfectly: it takes two fingers and a thumb to insert into the slot. The drive will naturally rest with its rear end slightly raised above the standoff hole. That is correct.
Step 5: Secure the SSD with the Mounting Screw
Press the rear end of the SSD down gently until it sits flat against the standoff. Hold it in place with one finger while you lower the tiny mounting screw into the standoff hole with your other hand.
This is where the magnetic screwdriver earns its keep. Start the screw by hand to avoid cross-threading, then tighten with the screwdriver. Snug is enough. The screw only holds the drive flat. It does not need to be cranked down.
If you drop the screw inside the case, do not panic. Retrieve it with magnetic tweezers or tip the case gently. Never power on the system with a loose screw rattling around inside.
Step 6: Reinstall the Heatsink or Replace the Graphics Card
If you are using the motherboard’s pre-installed M.2 heatsink, place it back over the SSD and thermal pad. Screw it down evenly, alternating between screws so the pad compresses uniformly.
If you removed the graphics card to access the slot, reinstall it now. Line up the connector with the PCIe slot, press down firmly until the latch clicks, and secure the retention bracket.
Step 7: Close the Case and Reconnect Power
Replace the side panel and plug the power cable back in. Flip the power supply switch to the on position. You are now ready to configure the BIOS and initialize the drive in Windows.
That is the entire physical installation. No power cables. No data cables. No SATA ports to manage. The drive draws power and transfers data entirely through the M.2 slot.
Configuring BIOS and UEFI Settings for Your NVMe SSD
Power on your desktop PC. As it boots, repeatedly press the key that enters your BIOS or UEFI settings. This is usually Delete or F2 on most motherboards, though some gaming boards use F11 or F12. The prompt appears briefly on the POST screen.
Once inside the BIOS, look for a storage or advanced section. The exact layout varies by manufacturer. On ASUS boards, check the Advanced tab and then Storage Configuration. On MSI boards, look under Settings and Advanced. On Gigabyte, try the Peripherals section.
Verify that the NVMe SSD appears in the list of connected drives. It should show up by its model name or capacity. If the drive does not appear, exit the BIOS without saving, power down, and reseat the SSD in the slot. We cover this in the troubleshooting section.
If you plan to boot from the new SSD, navigate to the boot order section and set the NVMe drive as the first boot device. If you are using it as secondary storage alongside an existing boot drive, leave the boot order as is.
Check that the M.2 slot is configured for NVMe mode rather than SATA mode. On most modern boards this is automatic, but some older boards let you toggle the slot mode in the BIOS. NVMe mode is required for an NVMe SSD to function at full speed.
Save your changes and exit the BIOS. The system will reboot. At this point the SSD is recognized by the hardware. Windows handles the next part of the setup.
Initializing and Formatting the NVMe SSD in Windows
When Windows boots, your new SSD will not automatically appear in File Explorer. It needs to be initialized, partitioned, and formatted. This takes about two minutes through Windows Disk Management.
Right-click the Start button and select Disk Management. If a popup appears asking you to initialize the new disk, accept it. Choose GPT (GUID Partition Table) as the partition style. GPT is required for drives larger than 2 TB and is the modern standard for UEFI systems. The older MBR style has limitations you do not want.
If no popup appears, locate your new drive in the bottom pane of Disk Management. It will be listed as Unknown and Not Initialized. Right-click the disk label on the left and select Initialize Disk, then choose GPT.
Right-click the unallocated space on the new drive and select New Simple Volume. Click through the wizard. Assign it a drive letter of your choice. For a game library drive, many users pick G for Games.
On the format step, choose NTFS as the file system. NTFS is the best choice for Windows gaming drives. Set the allocation unit size to Default. Give the volume a label like Games or GameStorage, and make sure Perform a quick format is checked.
Click Finish. Within seconds, the drive appears in File Explorer and is ready to use. You can now start installing games directly to it, or migrate your existing game library.
Cloning Your Old Drive to the New NVMe SSD
If you want to move your operating system and games from an older drive to the new NVMe SSD without reinstalling everything, cloning is the fastest path. This preserves your installed games, settings, and files. The SanDisk guide uses Acronis True Image, and most major SSD brands include a free cloning tool license with the drive.
Download the cloning software from your SSD manufacturer. Samsung Magician, WD Dashboard, Kingston SSD Manager, and Crucial Storage Executive all offer disk cloning features. Connect both the source drive and the new NVMe SSD to your system.
Launch the cloning software and select the option to clone your entire disk. Choose the old drive as the source and the NVMe SSD as the destination. Double-check your selections. Cloning overwrites the destination drive completely.
Start the clone process. Depending on the amount of data and the speed of the source drive, this can take 30 minutes to several hours. Let it complete without interruption.
Once the clone finishes, restart your computer and enter the BIOS. Change the boot order so the NVMe SSD is the first boot device. Save and exit. Windows should now boot from the new drive, and your games will load from the faster storage.
Keep the old drive connected for a few days as a backup. Once you confirm everything works, you can wipe it and use it as secondary storage.
Installing a Heatsink to Prevent Thermal Throttling
NVMe SSDs generate significant heat during sustained reads and writes. PCIe Gen 4 and Gen 5 drives are especially prone to thermal throttling, where the controller automatically reduces speed to prevent damage. A heatsink keeps the drive within safe temperatures and maintains peak performance during long game loads or file transfers.
If your motherboard includes a pre-installed M.2 heatsink with a thermal pad, you do not need an additional one. The motherboard heatsink is designed for that specific slot and provides adequate cooling.
For drives without a motherboard heatsink, many NVMe SSDs ship with a heatsink already attached. If yours does not, you can buy a third-party M.2 heatsink for a few dollars. Look for one that includes a pre-cut thermal pad.
To install a heatsink, first check whether your SSD has a manufacturer-provided thermal pad on the controller side. If it does, do not add a second pad. Stack only one pad between the drive and the heatsink.
Peel the protective film from both sides of the thermal pad. Place the pad on the controller side of the SSD (the side with the chips). Position the heatsink on top and secure it with the included screws or clips. Tighten evenly to ensure consistent contact pressure.
A properly installed heatsink can reduce SSD temperatures by 10 to 20 degrees Celsius under load. This keeps the drive from throttling during extended gaming sessions and extends the lifespan of the components.
Performance Optimization Tips After Installation
Once your NVMe SSD is installed and formatted, a few settings ensure you are getting maximum performance for gaming.
First, confirm that TRIM is enabled. TRIM allows the operating system to inform the SSD which data blocks are no longer in use, which keeps write speeds fast over time. Open Command Prompt as administrator and run: fsutil behavior query DisableDeleteNotify. If the result shows 0, TRIM is enabled. If it shows 1, run fsutil behavior set DisableDeleteNotify 0 to enable it.
Second, make sure write caching is enabled. Open Device Manager, expand Disk drives, right-click your NVMe SSD, select Properties, and check the Policies tab. Enable Write caching on the device and Turn off Windows write-cache buffer flushing if your system has reliable power backup or UPS protection.
Third, never defragment an NVMe SSD. Defragmentation is designed for spinning hard drives and causes unnecessary wear on flash storage. Windows automatically disables scheduled defragmentation for SSDs, but double-check in Defragment and Optimize Drives to make sure the optimization type for your NVMe drive shows as TRIM, not Defrag.
Fourth, update your SSD firmware. Manufacturers release firmware updates that improve stability, performance, and compatibility. Use the manufacturer’s management software (Samsung Magician, WD Dashboard, etc.) to check for and install updates.
Finally, for gaming-specific optimization, install your most-played games on the NVMe SSD. Prioritize open-world titles with large texture files and long load sequences. Games installed on a SATA HDD or SSD will not benefit from the NVMe speed. Move them using Steam’s built-in library transfer feature or your launcher’s game move function.
Troubleshooting Common NVMe SSD Installation Issues
If your NVMe SSD is not detected in BIOS, power down and reseat the drive. Remove it from the slot, check that the standoff is in the correct position, and reinsert it carefully. A drive that is even slightly misaligned will not make proper contact.
Check that the M.2 slot is enabled in the BIOS. Some motherboards disable unused M.2 slots by default or share lanes with SATA ports. If you have SATA drives connected to specific ports that share lanes with the M.2 slot, the BIOS may disable one or the other. Consult your manual for lane sharing details.
If the drive is detected in BIOS but not in Windows, open Disk Management and check whether it appears as unallocated space. If it does, initialize and format it as described earlier. If it does not appear at all in Disk Management, try a different M.2 slot if available.
For slower-than-expected speeds, confirm the PCIe generation your slot supports. A Gen 4 drive in a Gen 3 slot will max out around 3,500 MB/s. Run a benchmark using CrystalDiskMark and compare the results to the rated speeds of your drive. If speeds are significantly lower, check for thermal throttling and consider a heatsink.
If your system fails to boot after cloning, enter the BIOS and verify the boot order points to the new NVMe SSD. If the cloned drive uses MBR partition style and your system uses UEFI, you may need to reclone with GPT selected.
FAQs
Does NVMe load games faster?
Yes. NVMe SSDs deliver sequential read speeds up to 7,000 MB/s on PCIe Gen 4 and even higher on Gen 5, compared to around 550 MB/s for SATA SSDs. Games with large texture files and open-world environments load significantly faster, and texture streaming stutters are reduced.
How do I properly install an NVMe SSD?
Power off and unplug your PC, open the case, locate the M.2 slot, position the standoff at 2280, insert the SSD at a 30-degree angle, press it flat, and secure with the mounting screw. Then enter BIOS to verify detection and initialize the drive in Windows Disk Management using GPT partition style and NTFS format.
How do I make my NVMe SSD faster?
Ensure TRIM is enabled, keep write caching turned on, install a heatsink to prevent thermal throttling, update the SSD firmware through manufacturer software, and confirm the drive is in the highest-generation M.2 slot your motherboard supports. Never defragment an NVMe SSD.
How do I optimize NVMe for gaming?
Install your most-played games directly on the NVMe SSD, especially open-world titles with large assets. Enable TRIM, use GPT partitioning with NTFS, keep the drive below 80 percent full for sustained write speeds, and ensure DirectX 12 games can take advantage of DirectStorage on supported drives.
Conclusion
Learning how to install an NVMe SSD for faster game loading step by step takes about 20 minutes of hands-on work and pays off every time you launch a game. The physical installation is straightforward: no cables, no complex wiring, just a careful insertion and one tiny screw.
The real performance gains come from using the right M.2 slot, configuring the BIOS correctly, and applying the optimization tips covered above. With TRIM enabled, a heatsink installed, and your games on the fast drive, you will see shorter loading screens and smoother asset streaming in even the most demanding titles.
If you run into any issues during installation, work through the troubleshooting section step by step. Most problems come down to a misaligned drive, a shared lane conflict, or a slot that needs enabling in the BIOS. Fix those and you are back on track in minutes.